

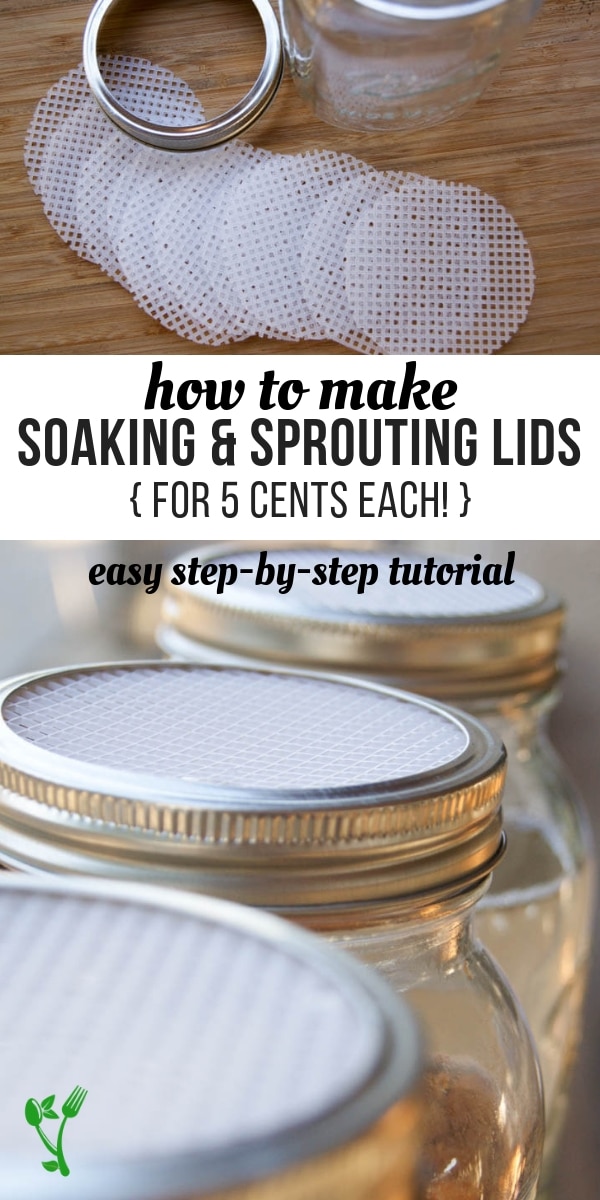
DIY Soaking & Sprouting Lids for Mason Jars are an economical way to absorb more nutrients. At just 5 cents each, you can use them for various soaking needs.

Why is it important to soak and sprout grains?
The process of soaking and sprouting kick starts the digestion of proteins for better digestion and easy absorption of nutrients. You can read more about it in this Weston A. Price article. This Nourishing Gourmet post is complete with all those scientific terms like phytic acid and enzyme inhibitors but suffice it to say that that's one of the reasons why traditionally prepared sourdough is inherently a better option for bread than whole wheat.
The extended fermentation process breaks down the gluten into amino acids that provides a more pleasant digestion, even for those with gluten sensitivity.
Related: Nourishing Foods Defined
What is the difference between soaking & sprouting?
Soaking and sprouting uses the same technique, but produces a different result.
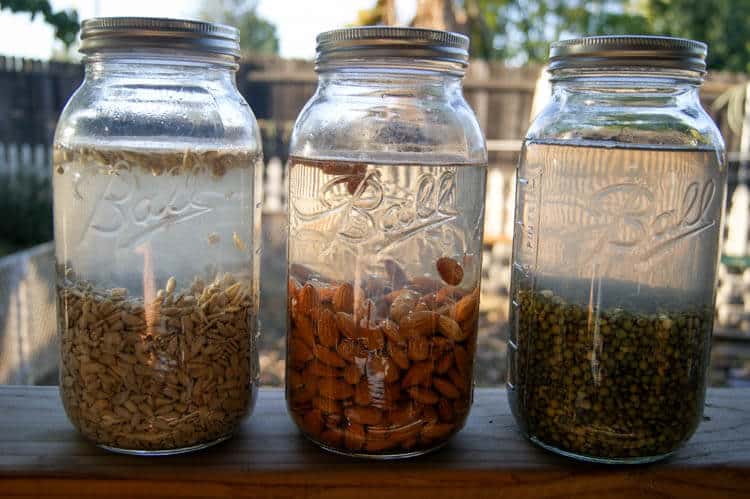
In soaking (seeds, nuts and some grains) food is submerged in water and acidic medium or salt for a period of 12-24 hours. This is enough time for the phytic acid to be released. You would then strain the seeds, nuts or grains and rinse well and cook as you desire.
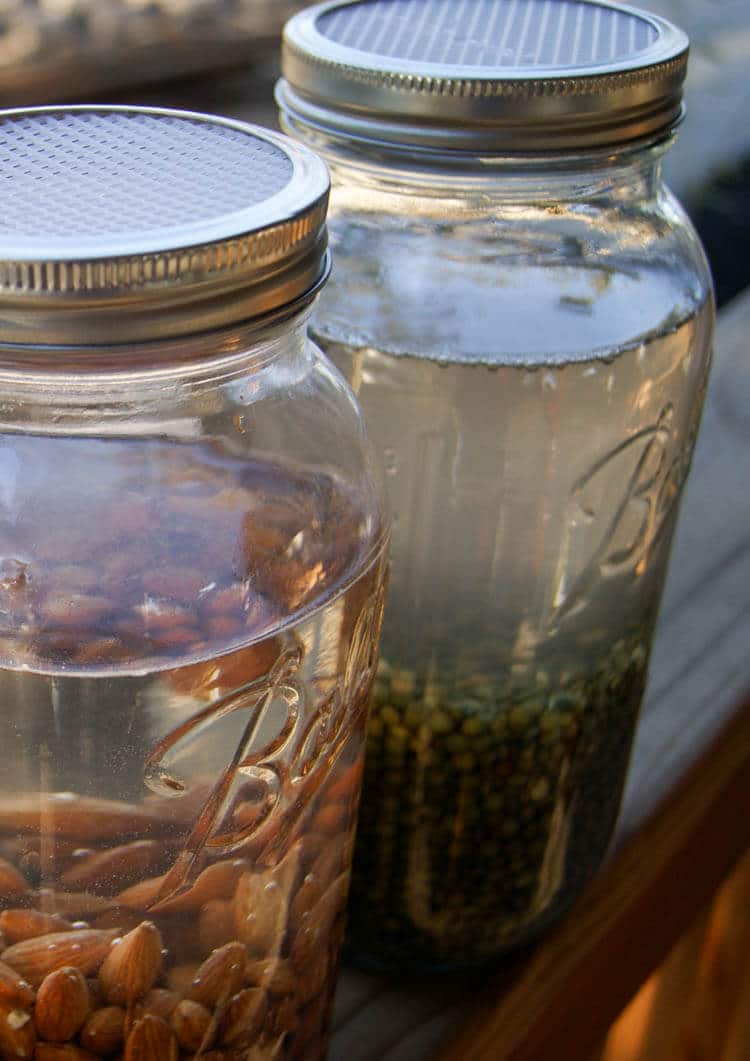
Sprouting requires an additional step and usually takes a few days. As the name suggests, you want to see 'sprouts' in your grains or legumes. Every 12 hours or so, you will need to replace the water to your grains to avoid mold. This informative post talks more about sprouting grains.
Economical Solution to Soaking Lids
I have used this Sprouting Jar Strainer Lid from Amazon in the past but they run at around $5 a piece. Because, I typically soak or sprout several items at a time, I need more than one or two. Another option is to use several layers of cheesecloth but I wanted a more feasible and hassle-free solution.
I've seen people use a metal fine mesh wire but wasn't sure how it would hold up with water use. Metal mesh wire rusts easily and I didn't want rust particles in my food. Then I came across a plastic needlework canvas from a craft or hobby store and knew I had to try this.
How to Make Soaking & Sprouting Lids for 5 Cents Each
I used this 10.5inX13.5 in #7 canvas but in white. The number 7 refers to 7 square wholes per square inch. They come in smaller sizes for very small seeds like alfalfa, perhaps a 10 or 14 would be better for those?
How fun would it be to have the lids in different colors? If you're really OCD, you can use a brown lid for buckwheat sprouts, white for rice, green for mung beans, etc...
And the best part is it cost me a whole lot less than $5 to make 10 pieces. TEN! Ten screens can fit on one canvas (actually I'm sure you can stretch and make 12 out of them). Including a quart jar, the price is still under $2 for a complete soaking jar with screen.
When making these lids, I would suggest making them for wide-mouth lids only because they are more versatile as far as sizes go. You can use wide-mouth on pint, quart, and half-gallon jars.
Speaking of mason jars, let's get to it. This is a fun little afternoon project and it doesn't even include glitter!
Related: How to Cook Soaked Rice in the Instant Pot
DIY Soaking & Sprouting Lids for Mason Jars
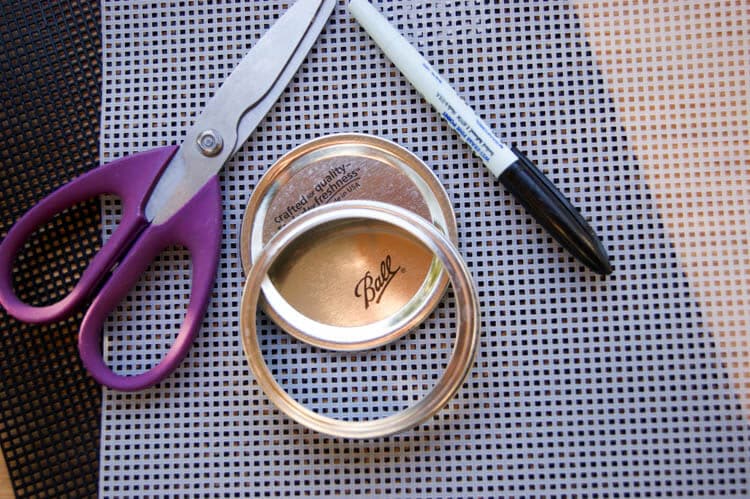
Supplies Needed:
10.5"X13.5" needlework plastic canvas
Marker- sharpie or wet erase both work great
Wide-mouth lid & jar
Scissors
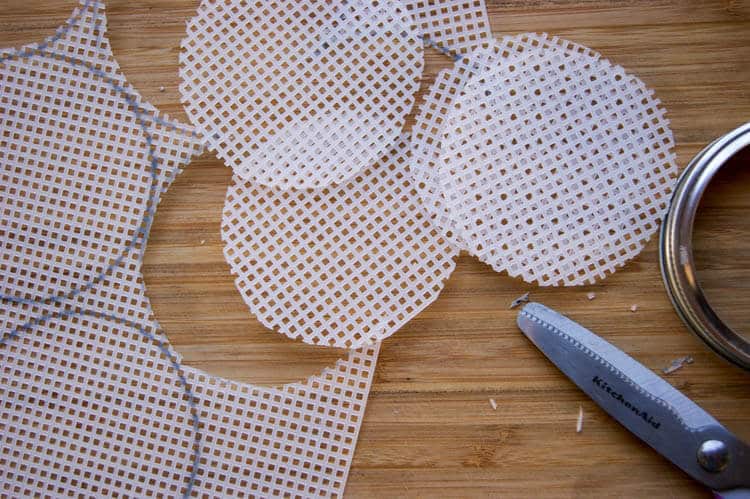
Step 1: Trace the wide-mouth lid (do not use band) with a marker. I was able to fit 10 circles comfortably, but I know I could've made 12 if needed.

Step 2: After tracing the lid, carefully cut on the inside of the tracings. If you don't feel comfortable with working with the inside, you can work with the outer edges but most likely, you will have to trim them more to make them fit to the bands.
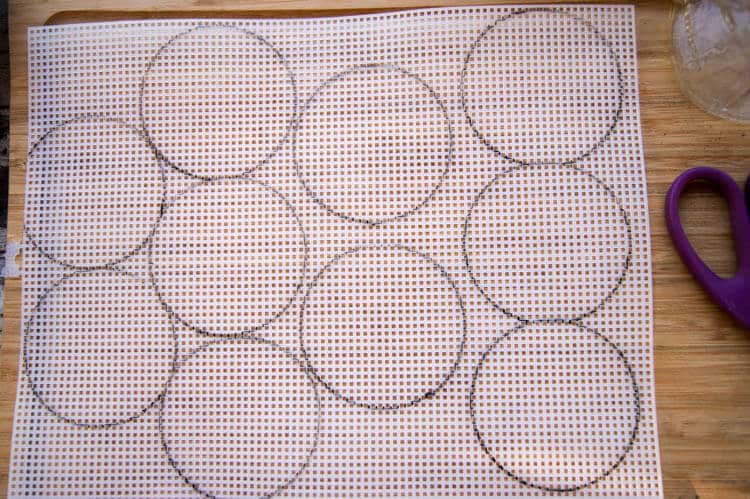
Step 3: Continue cutting the rest of the lids, making 10-12 fine mesh plastic lids.
Step 4: Now, you are ready to use them for all your soaking and sprouting needs. These hold up well in the dishwasher too. I tried and tested it, though I typically do not put anything plastic in my dishwasher.
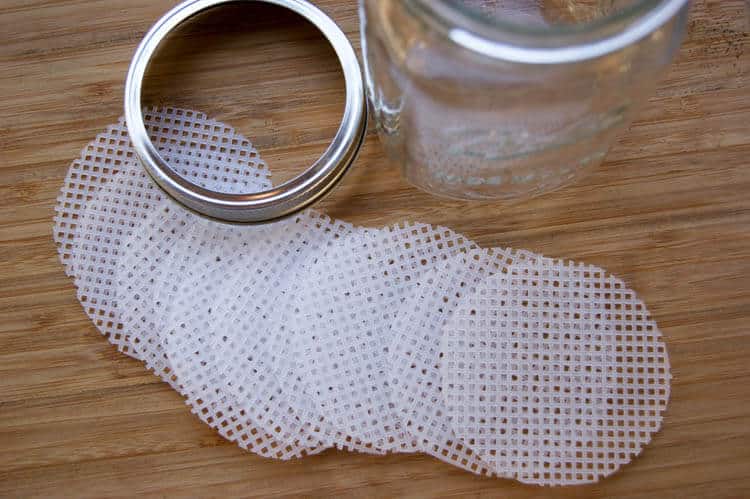
There you have it! With just a few bucks and 20 minutes, you have 10-12 soaking and sprouting lids. What will you soak today?
Note: I can't say with certainty that these lids are BPA free since they are not designed for handling of food. And please know I make best effort to avoid as much plastic as I can but in that same breath I can say with much conviction that purchasing one *plastic* needlework canvas and using other materials already on hand saves me time and money, not to mention it also avoids having those pesky green mesh lids which adds to more plastic in the long run. I feel these are safe to use to sprout and soak ONLY and should never be used to heat, cook, and eat off of. I would also caution against washing these in dishwasher (though I did do a test run and they held up fine).
>>>Pin This<<<
If you liked the post above, please consider leaving a comment below. Also, be sure to follow me on Facebook, Instagram, and Pinterest.

Kathryn Grace says
Clever idea! The plastic definitely looks sturdy enough to hold up under many reuses. Do you know whether it contains BPA or pthalates? We avoid those at our house. Currently, I use wire-mesh screens that supposedly are made of food-grade stainless steel, but they rusted over the years.
Now I'm trying to figure out whether rust, which is organic, or plastic molecules would be the least harmful, especially to the children.
Any information you may have about that would be most helpful.
Anya says
I'm with you on the BPA, Kathryn. And though I do not know if these are BPA-free, I am confident using them since I am not heating them. In fact, it's contact with the food is extremely limited to just straining it. I still think soaking and sprouting my grains and legumes using this piece of plastic is better than not sprouting them at all. Hope that helps. 🙂
James546613 says
Hello ...Good idea .you can used to dry herbs also ...thanks alot
Tiff says
If you still do this and are in need of an idea that is bpa free, find a food container that is thin enough to cut with an exacto knife or really good scissors, like a cheap sandwich container that is bpa free and just poke holes into it after you cut it into a circle. It will lead to more plastic waste, but with some luck maybe you'd be able to get one out of the lid as well.
Kerri says
I also don’t think this is a great idea. These are not food safe.
Marla says
Hi Anya,
Great information. I have been thinking about starting my own sprouts this winter so this information will come in handy for me. Thanks for sharing on Real Food Fridays. Pinned & tweeted.
Anya says
Growing sprouts is fun, Marla. Enjoy!
Raia says
Genius. Haha. I only have three sprouting lids and my kids are always stealing them and mason jars to keep random bugs in. :p This is a cheap solution - enough for us all! 🙂 Thanks so much for sharing at Savoring Saturdays, Anya. Definitely pinning this. 😉
Anya says
You're welcome, Raia. 🙂
Shirley Burgess says
I think the silicon mesh used in dehydrator would work best for this.
Erlene says
Interesting and informative. I've never tried to sprout my own seeds or grains. Will have to look into this more.
Deborah Davis says
What a clever and cost-effective DIY strainer idea! I love this. Must try it a home!
Anya says
Thank you Deborah 🙂
Bonnie V says
Great post! I haven't delved very far into soaking and sprouting yet. I do try to soak my beans, but half the time I end up throwing the dry beans in the slow cooker because I forgot to plan ahead. These lids make the process look easy though.
Thanks for sharing on the Homestead Blog Hop. Your post has been selected as one of this week's Features. Please feel free to visit http://www.notsomodern.com/homestead-blog-hop-65.html/ to grab the Featured badge to add to your post.
Anya says
Thanks Bonnie. Give it a try...soaking those beans makes for an easier digestion. 😉
Carol @studiobotanica.com says
What a super idea! It may not be your idea, but I am reading it here and the pic are super
with great instructions! Thanks!
I will be on the 'look out' for this at my local craft store!
Kerrie heart says
You can buy mesh fabric that looks just the same as the plastic canvas.
I use that and it works great.
It's either nylon or polyester, not sure
linda spiker says
What a great idea. And I love the step by step photos (I need those)
Anya says
Ha!! I'm glad there are useful for you.
Michele says
This is so creative and smart Anya. I was looking at the same sprouting lids you mentioned in stainless steel but didn't like that they rust. Then I looked at the plastic ones and just didn't feel right spending $5/lid. Thank you for posting this awesome, money-saving sprouting lid "hack".
Anya says
Thanks Michele. I totally get the whole rust issue. Enjoy your sprouting lids. 🙂
Daisy says
AWESOME idea !
Anya says
Thanks Daisy! We think so too. 😉
Brittany says
This is such a great Idea. I've been wanting to start sprouting and lucky me I have like 10 sheets of this plastic canvas in my craft room. Now I will have enough to sprout and some for lids for my son for his bug jar. No more poking holes in the metal lid for him. I've always been scared he would get cut. Thank you for the great Idea!
Susana says
What a great idea! Thank you.
Anya says
Thanks Susana. It's a great money-saver!
Chris says
Is the problem with cheesecloth the cost? I have just begun sprouting and I had natural fibre cheesecloth around. I cut a piece and used elastic to secure it on the mouth of the jar. Seems to hold up well to rinsing and filling.
Anya says
Hi Chris,
No, I just don't personally care for reusing cheesecloth (or any cloth for that matter) with water and food. Just a personal preference.
michelle says
Creative &brilliant idea for DIY Sprouting lids! Loved it! Thanks for sharing.
Brenda says
Brilliant! And excellent instructions! I’m glad I found you. As a fourth grade teacher, back in the day, we would do this using plastic screening. Worked fine but their is just something elegant about your solution. It was BTW, one of the favorite units. Of course kids love anything to do with edible end products! Thanks!!
Anya says
What a great idea to make this into a kids project! Thanks for sharing with us.
Adrienne says
For the sprouting lids, I used screen material I had left over from repairing my windows. I just cut them to size and washed them. They worked perfect too.
Anya says
That's great, thanks for sharing!
M. Nakajima says
I think as long as I don't leave the plastic in the sunlight it should be pretty safe to use.
Sunlight breaks down the plastics and that what tends to release biphenol A.
It's a clever idea and I will go get a sheet from my local daiso (dollar store) and try it out.
Greetings from Japan
Anya says
That's a great idea!
Bettina Gilligan says
Thank you for your informative info on sprouting chia seeds. Plan on finding the needlepoint canvas today.