


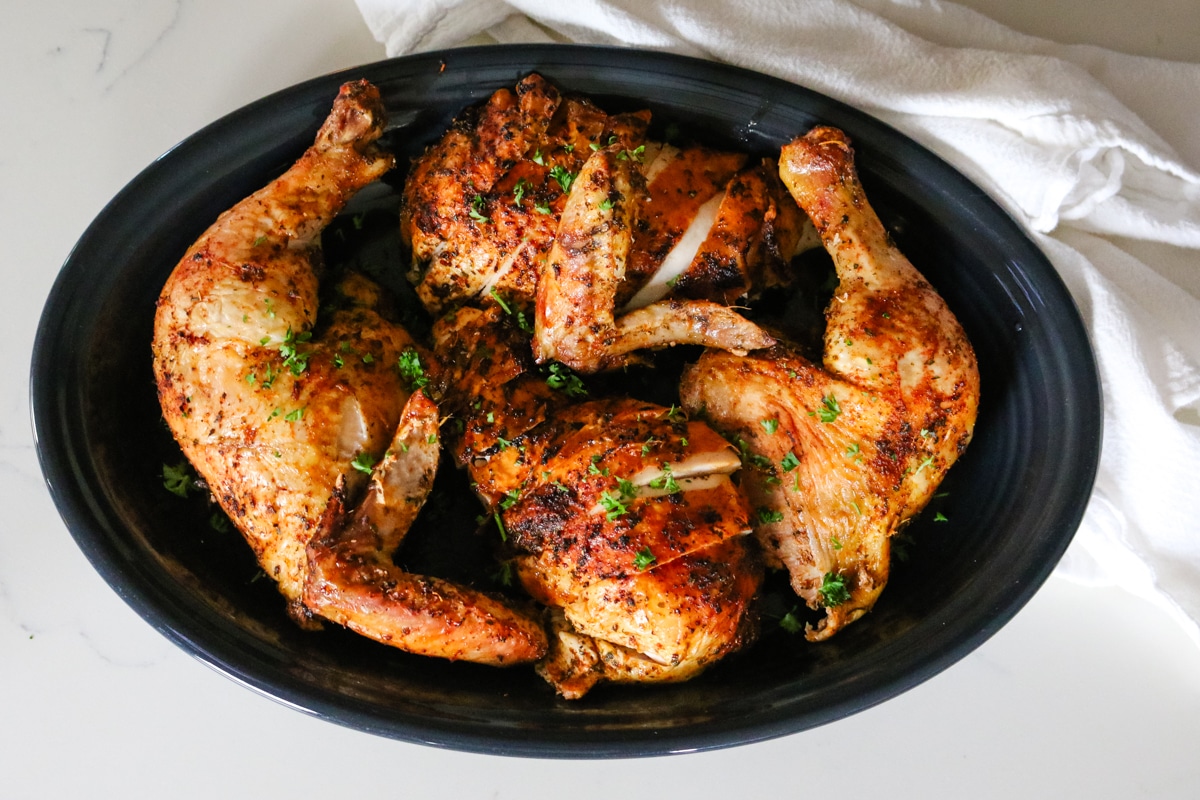
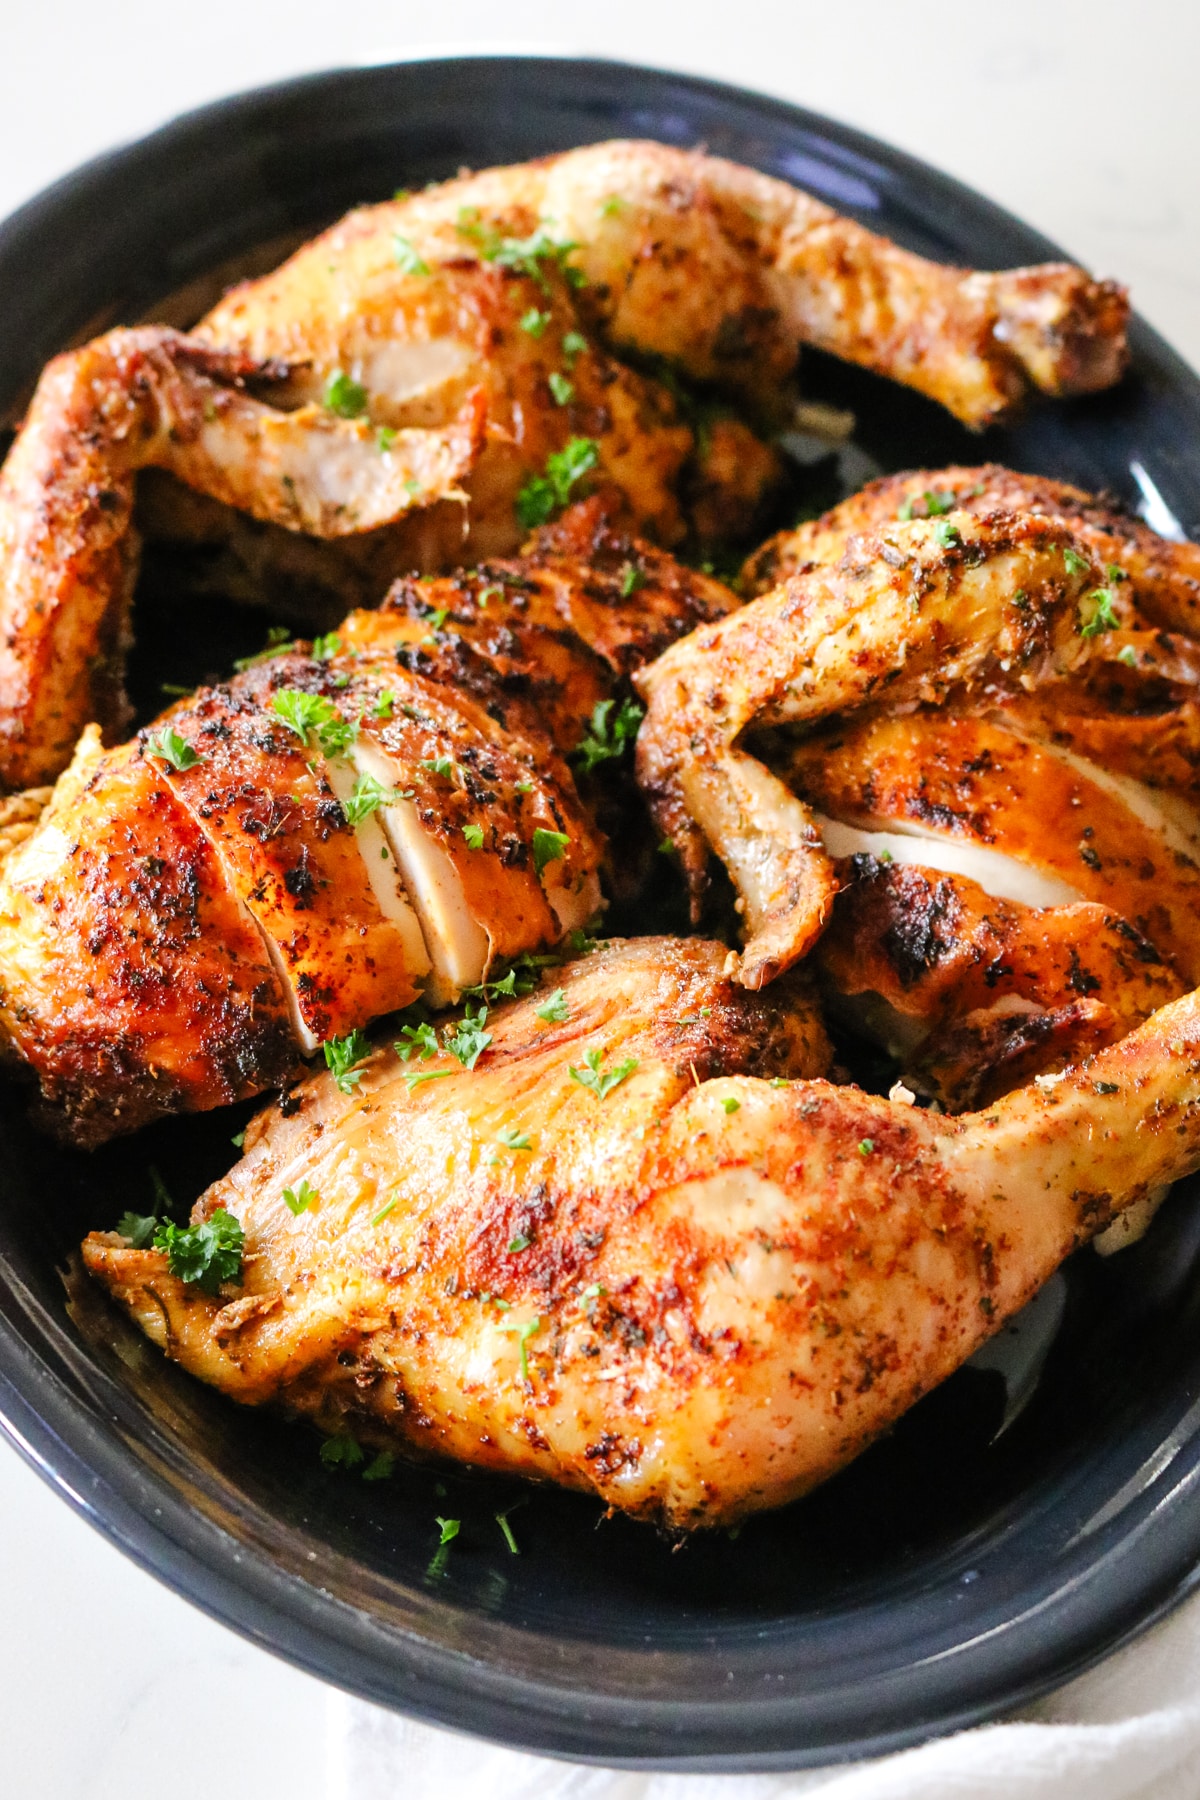
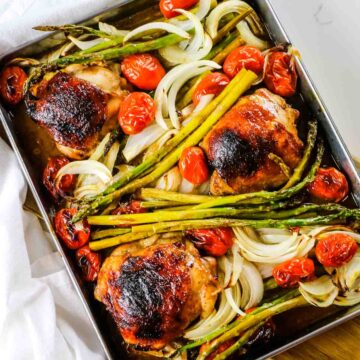
This easy roasted Dry Brine Chicken gives you crispy skin and juicy meat with very little effort. Salt the bird the night before, then roast it with a simple garlic and herb rub the next day. The salt seasons the meat all the way through while drying out the skin for that crackly texture, and most of the work happens while you sleep.
Jump to:
💡Recipe Overview
- Prep and Cook Time: 15 minutes to prep, at least 4 hours for brining but overnight is best, and 1.5 hours to roast
- Cooking Method: oven-baked
- Dietary Info: high-protein, paleo, ancestral diet
- Skill Level: Easy
What is an ancestral diet? Read my post on what nourishing foods are based on the traditional dietary principles of the Weston A. Price Foundation.
The Real Reason Roast Chicken Disappoints
Roast chicken has a reputation problem. Not because it's hard, but because most people have eaten dry, disappointing breast meat at least once and figured that's just how roast chicken is.
The truth is, it's not you -- it's the bird.
The breast and the legs are fundamentally different cuts that want different things from the oven, and when you cook them together as a whole bird, you're basically asking two very different people to agree on a thermostat setting.
The breast is done first and dries out fast. The legs need more time and heat to break down properly.
Dry brining solves a big part of this problem by seasoning the meat deeply in advance so even if the breast edges toward done, it's still juicy and flavorful rather than chalky and sad.
Spatchcocking helps too -- flattening the bird evens out the cook so the legs catch up without sacrificing the breast. It's not a perfect system, but it's a significantly better one, and once you try it you'll understand why this method gets made on repeat around here.

Ingredients for Dry Brine Roast Chicken
- Whole chicken: Pasture-raised or air-chilled is worth it here -- the skin crisps up better and the flavor is noticeably different. Check your local farmer's market or look for air-chilled at the grocery store.
- Sea salt: I think it's fair to say no one is using table salt at this point, right? Use a good sea salt or kosher salt -- it's doing the heavy lifting in this recipe and the flavor difference is real.
- Dried herbs and spices: Use your favorites but my go-to blend for roast chicken is garlic powder, paprika, parsley, thyme, and oregano.
- Olive oil: Use a real extra virgin, not a blended or "light" variety. This will help bind the rub and helps the skin brown evenly.
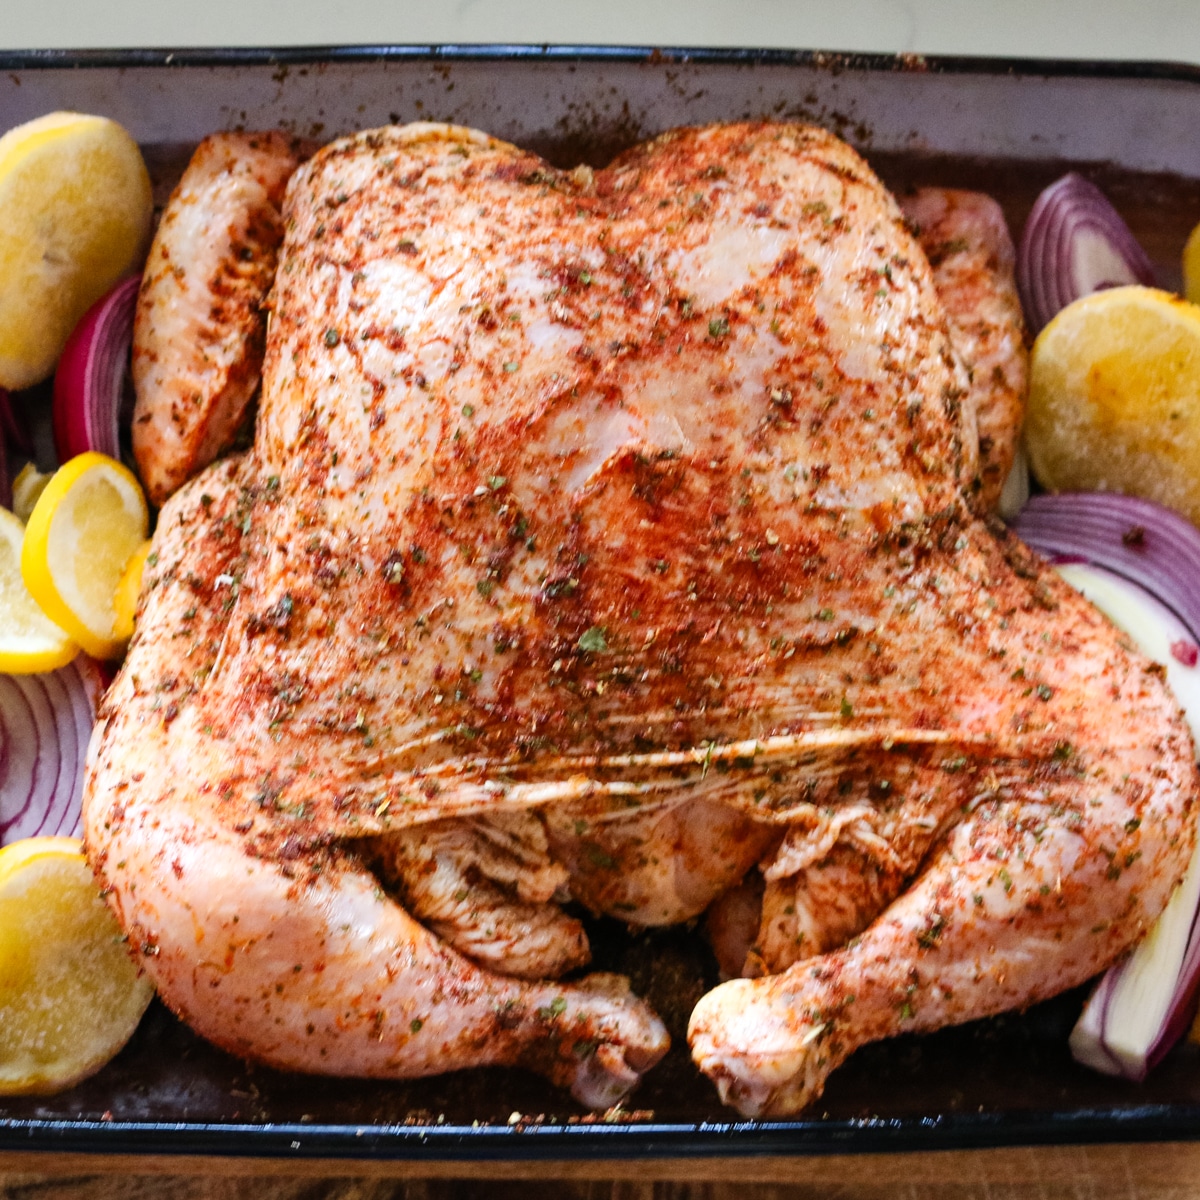
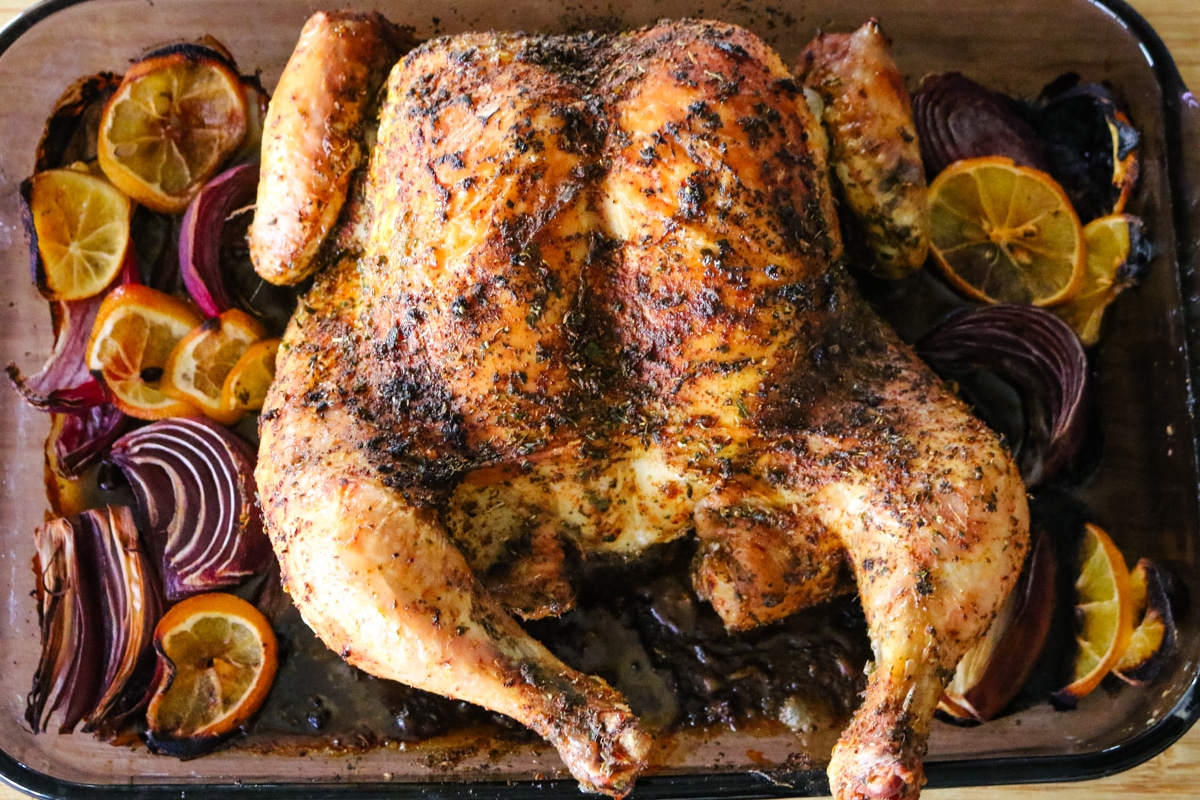
- Onions and lemons: These go on the bottom of the pan -- they create a delicious "gravy" at the end to pour over the chicken.
- Root veggies: If you want to make this dish a complete meal, add a pound of baby potatoes and 2-3 carrots to the roast.
How to Make Dry Brine Chicken Juicy
The complete printable recipe is below in the recipe card for your convenience.
Step 1.
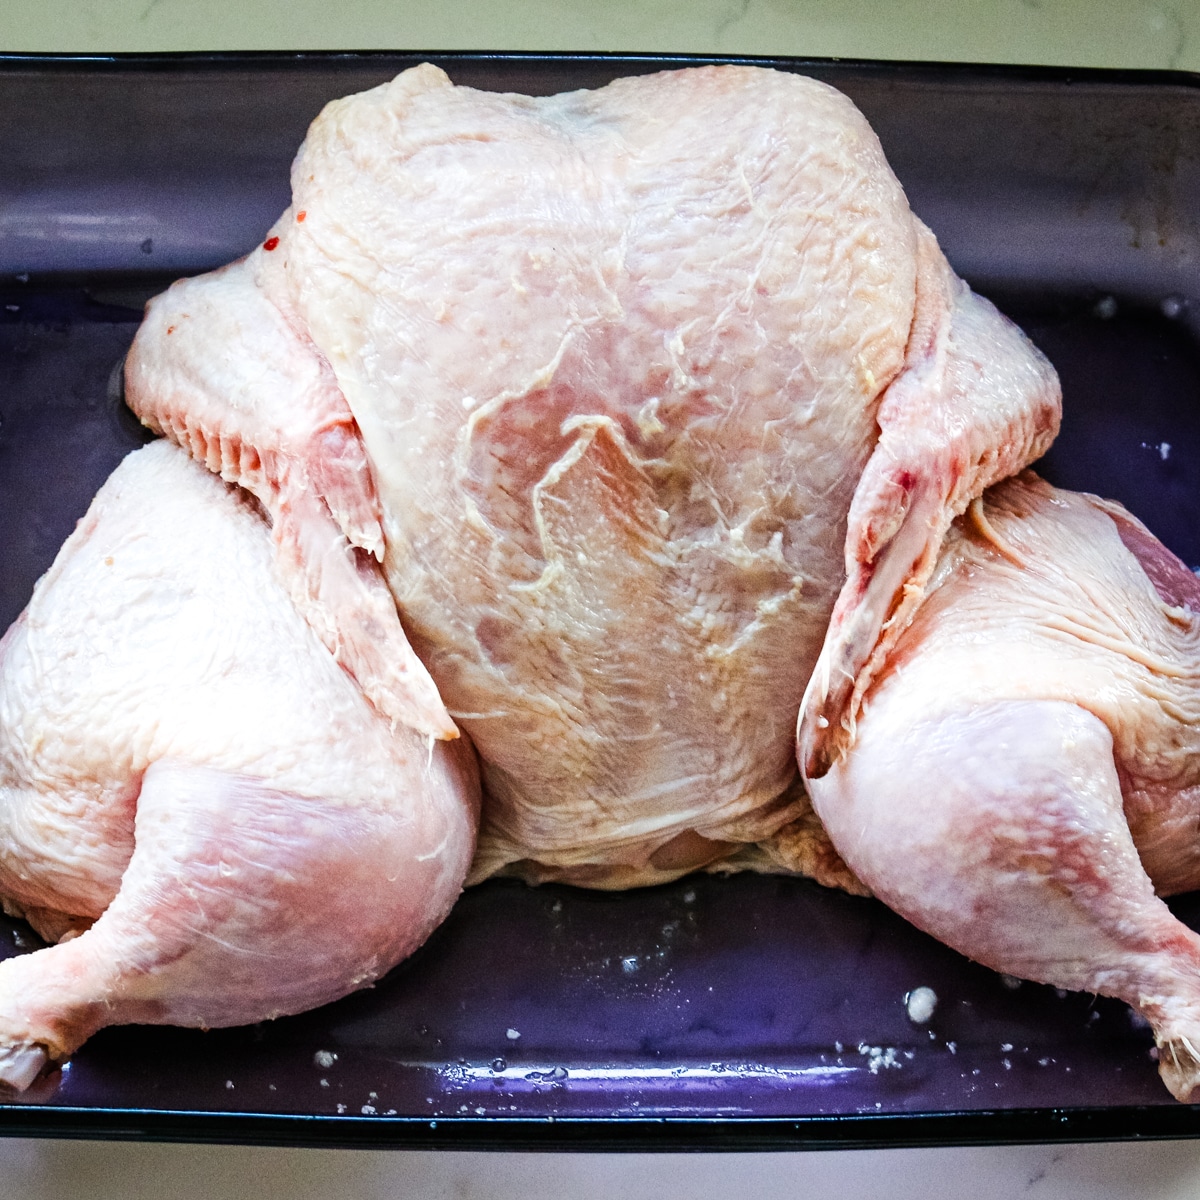
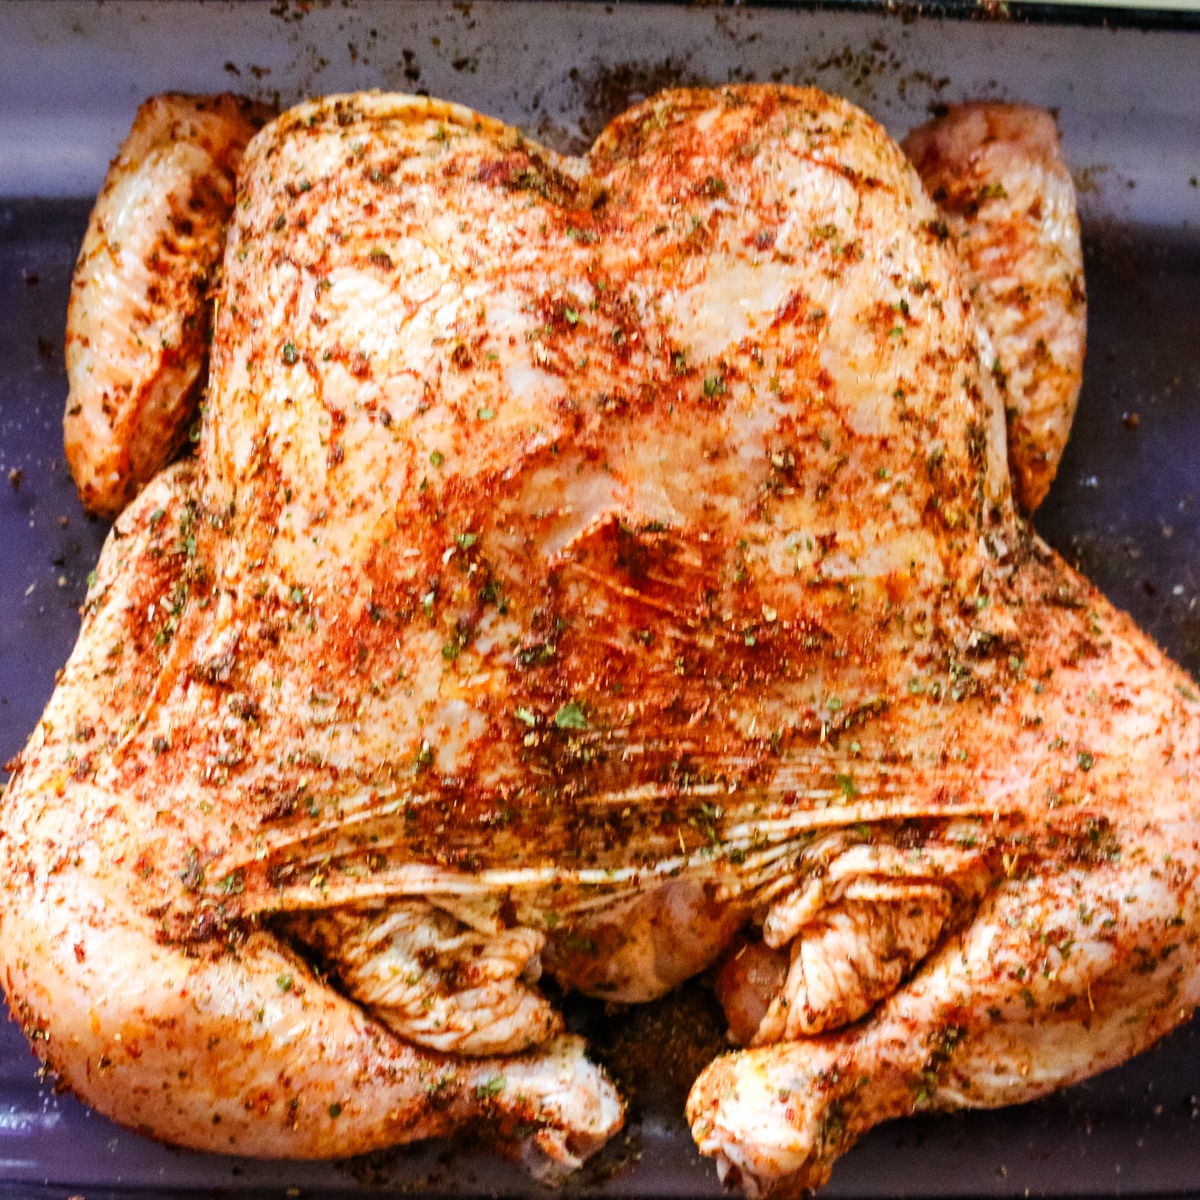
Spatchcock the chicken first if you haven't already (totally optional), then pat it completely dry with paper towels and season both sides generously with sea salt, get under that skin! That's where the real magic happens. Place it skin-side up on a rimmed baking sheet and refrigerate uncovered for a few hours. The salt penetrates the meat while the fridge air dries out the skin.
Step 2.
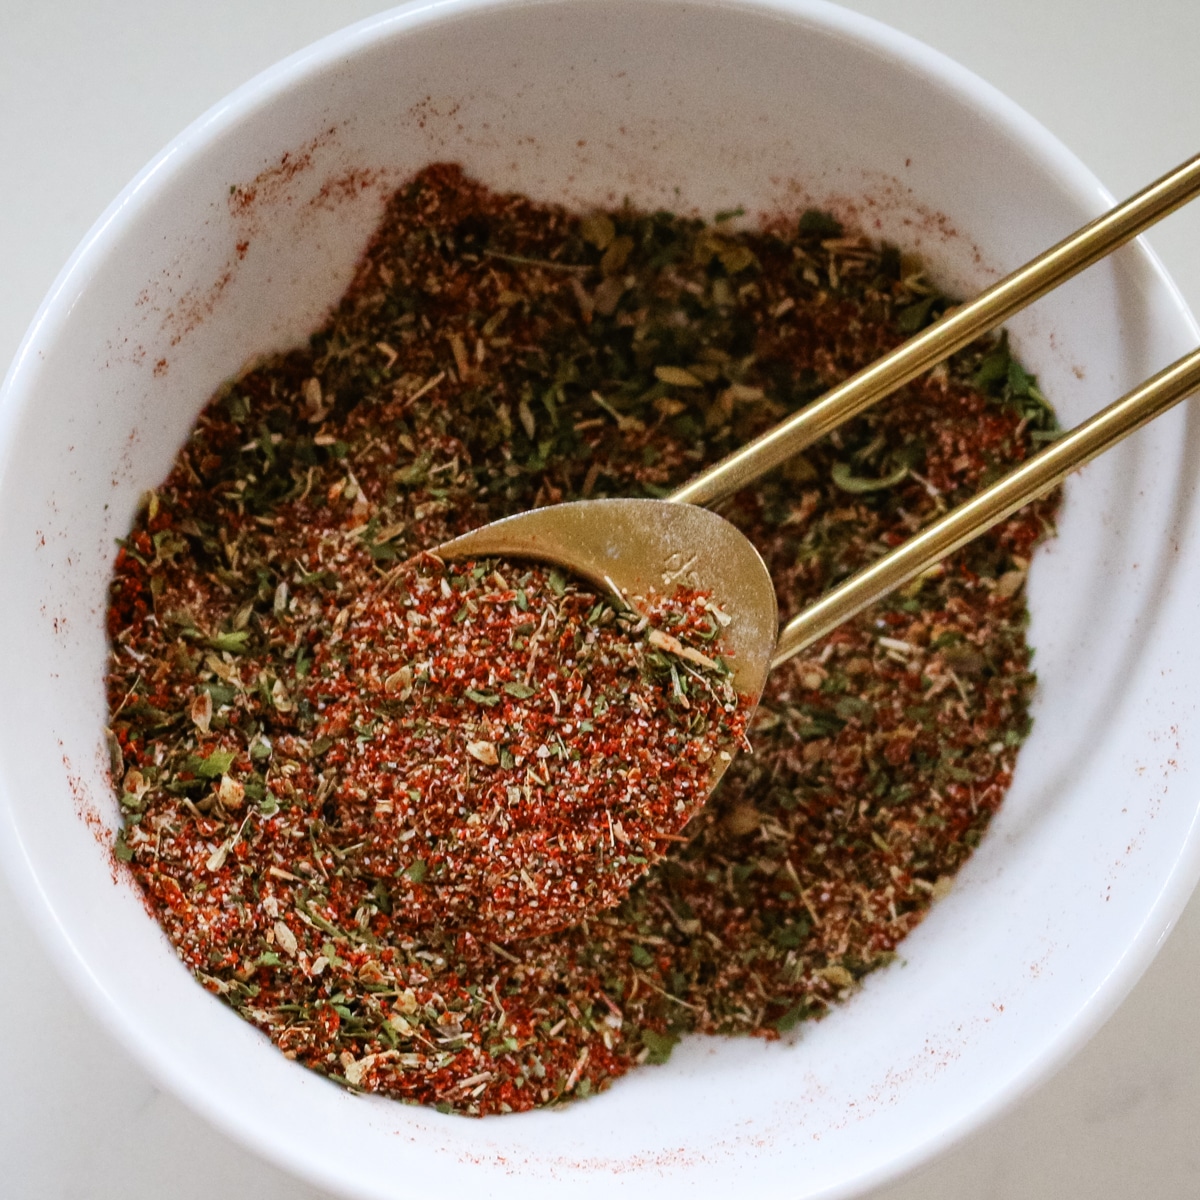
In a small bowl, mix the seasonings, including garlic powder, paprika, dried parsley, dried thyme, and oregano. You can use other seasonings or whatever you have on hand. This is just my go-to for chicken. It's flavorful and fresh.
Step 3.
Preheat the oven and pull the chicken out of the fridge to allow it to come to room temperature. Coat the chicken with a little olive oil and rub the spice mixture all over the skin and a little bit of underside.
Step 4.
Place the chicken, breast side up over cut onions and lemons. Roast until the chicken is cooked through. Remove from oven and allow to rest.
Helpful Tips
- Brining tip: If you place the chicken on a wire rack set in a baking dish, the chicken won't sit in the juices. It's not necessary but maybe helpful to achieve a better brine. Brine anywhere from 4 hours up to 48 hours. The longer the better. You may also want to dry the chicken after pulling it out of the fridge.
- Salt it well: Don't just season the surface -- get under the skin and directly onto the breast meat. That's how the salt actually penetrates and tenderizes, not just flavors the outside.
- Make it a full meal: If you want to make it a complete meal, add seasoned baby potatoes and chopped carrots around the chicken when you remove the cover and roast with the chicken for 45-50 minutes. Don't add them in at the beginning or they'll become mushy and overcooked.
- Spatchcocked chicken: Omit roasting covered and just roast uncovered for 45-50 minutes, it'll cook quicker.
💭Meal Prep Suggestion!
If you're going through the effort, roast two chickens at once. While they're still warm, pull all the meat off the bones -- it comes off so much easier than when it's cold. Store the meat in an airtight container in the fridge for up to 4 days and use it throughout the week in salads, soups, tacos, or sandwiches. Toss the carcasses straight into a pot or slow cooker for bone broth.
Serving Suggestions
Roast chicken is one of those meals that works for a busy weeknigh just as well as a holiday table. It doesn't need much -- a good bird cooked well is the meal.
- Keep it simple: Serve straight from the pan with the roasted onions and lemons from the bottom of the dish. They're soft, caramelized, and worth eating.
- Make it a complete meal: Add seasoned baby potatoes and chopped carrots directly to the pan -- the timing tip for this is already in the recipe card so they don't overcook.
- Add a side: Yukon gold mashed potatoes or a simple house salad round out the plate without competing with the chicken.
- Make it a full spread: For gatherings or Sunday dinners, pair it with oven roasted broccolini, butter cabbage, or buttery green beans.
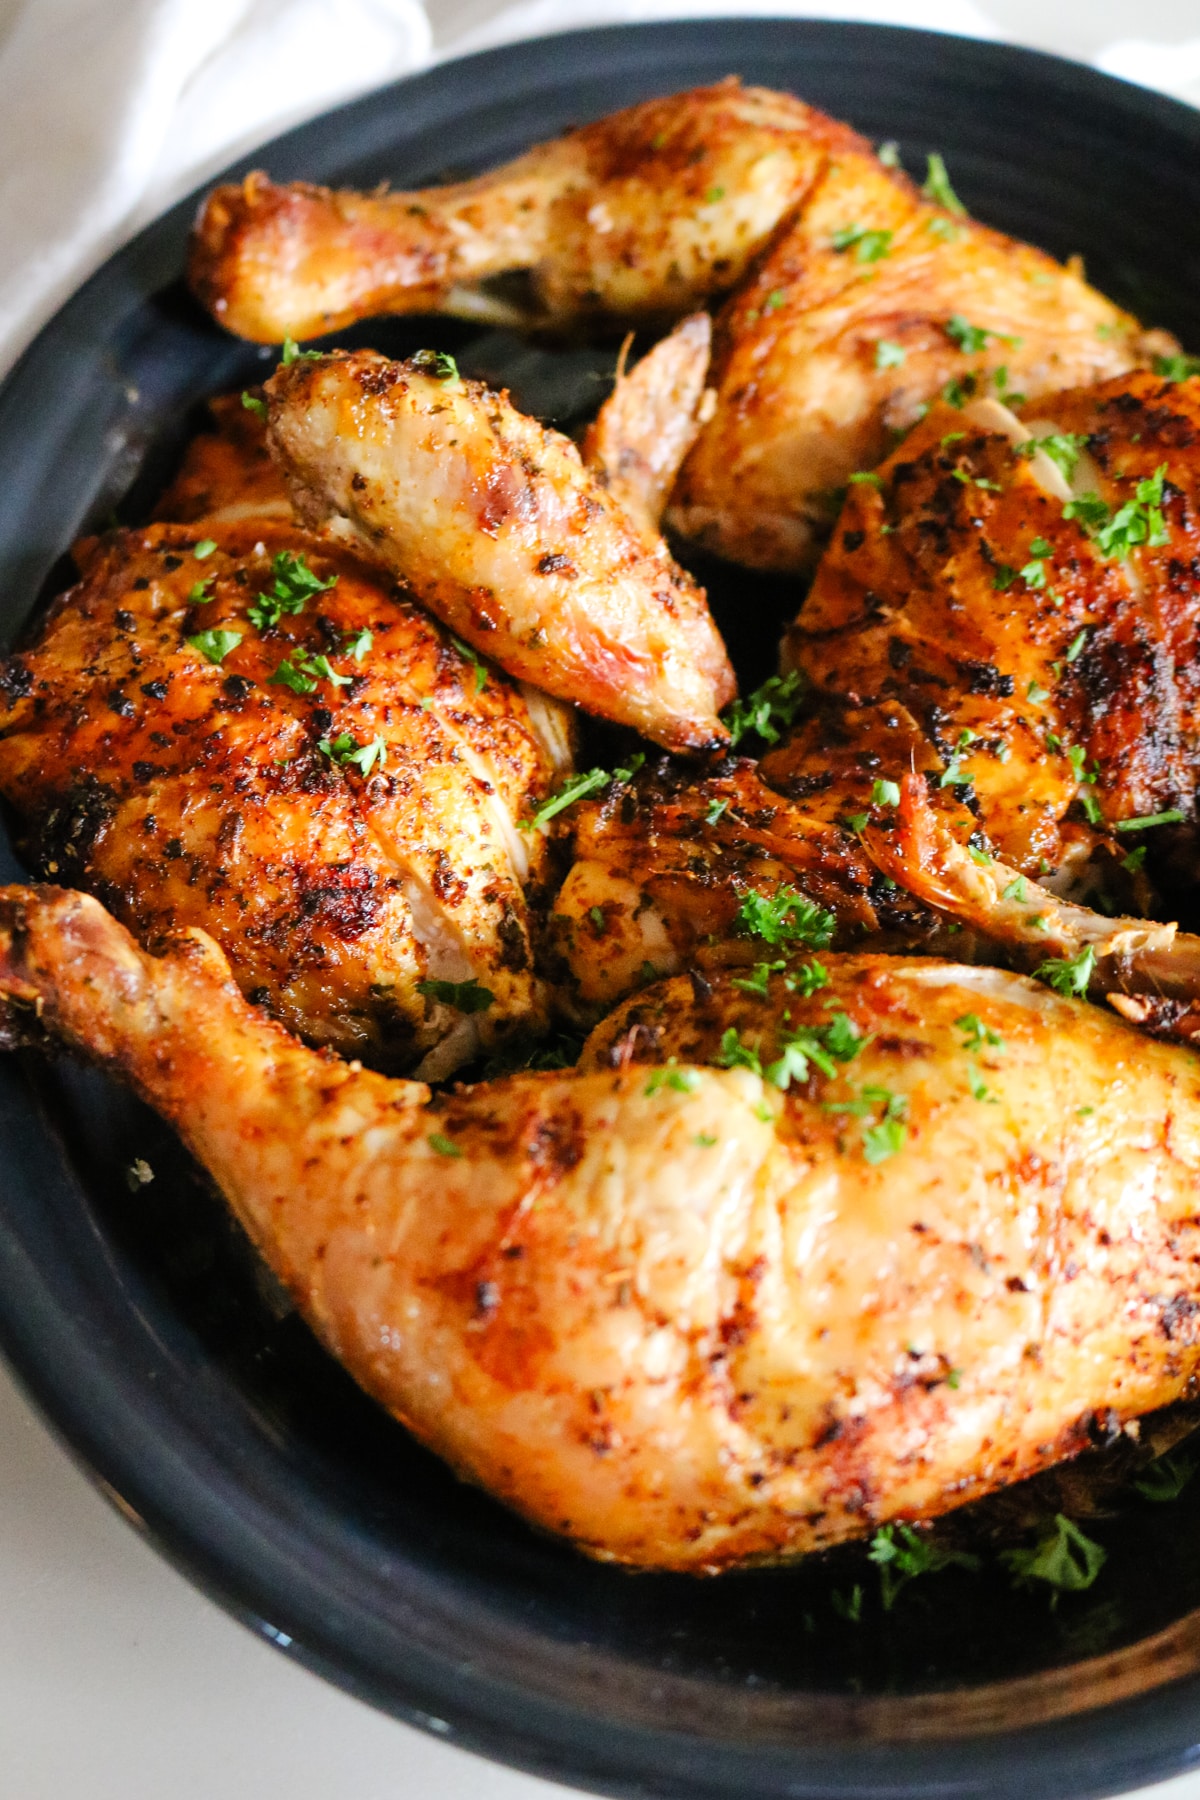
- Leftover chicken meat: Slice the breast and shred the leftover chicken meat to add to recipes that call for cooked chicken like Chicken Caesar Pasta Salad, 30-minute Chicken Pad Thai, and high-protein Chicken Cabbage Casserole.
- Use the drippings: Don't pour them out. Spoon them over the carved chicken or use as a base for a quick pan sauce or gravy. You can also check out this chicken gravy recipe for more tips.
Frequently Asked Questions
I recommend picking off all the meat while the chicken is still at room temperature, as it pulls away much easier than when chilled. Store the meat in an airtight container in the refrigerator for up to 4 days or freeze for up to 3 months. These glass snap containers are perfect for leftovers. To reheat, add to an air fryer and reheat the pieces in 350°F for about 10 minutes. Or crisp up in a little avocado oil in a skillet over medium heat until warmed through.
Yes, at two different stages. Before cooking, once the brine is complete you can wrap it tightly and freeze it raw for up to 3 months - the salt has already done its work. After cooking, pull the meat off the bones while still warm, cool completely, and freeze in meal-sized portions for up to 3 months. Just know the crispy skin won't survive the freezer -- it goes soft on reheat. Save the bones for broth, those freeze well too.
No. Don't rinse it. The salt has been absorbed into the meat -- rinsing it off defeats the purpose and adds unnecessary moisture back to the skin you've been working to dry out.
Looking for more chicken recipes? Here are some ideas:


Did you make this dry brine chicken? Please leave a ⭐⭐⭐⭐⭐ recipe rating in the recipe card below and leave a review in the comments. Thank you!💚
Printable Recipe

Easy Roasted Dry Brine Chicken
Ingredients
- 1 whole chicken approx. 4 lbs
- 1 ½ tablespoon sea salt for the dry brine
- 1 tablespoon olive oil
- 1 teaspoon garlic powder
- 1 teaspoon paprika
- 1 teaspoon dried parsley
- 1 teaspoon dried thyme
- ½ teaspoon oregano
Instructions
- Optional: Place the 1 whole chicken breast-side down on a large cutting board. Using kitchen shears, cut along both sides of the backbone to remove it. Save it for broth. Flip the bird over and press firmly on the breastbone until it cracks and lies flat.
- Pat the chicken extremely dry with paper towels. Season both sides of the chicken with 1 ½ tbsp sea salt, especially getting under the skin so the salt penetrates through the breast. Flip it skin-side up and place it on a rimmed baking sheet. Place in the refrigerator, uncovered, for at least 4 hours. This allows the salt to penetrate the meat while the fridge air dehydrates the skin.
- Preheat your oven to 400°F. Remove the chicken from the refrigerator and allow to come to room temperature. Do not rinse.
- In a small bowl, mix the 1 tsp garlic powder, 1 tsp paprika, 1 tsp dried parsley, 1 tsp dried thyme, and ½ tsp oregano to create a rub.
- Coat the chicken with 1 tablespoon olive oil and rub the herb mixture all over the skin and a little bit of underside.
- In a roasting pan, place sliced onions and lemons on the bottom. If the chicken is not spatchcocked, stuff it with lemon wedges or slices. Cover and roast for 30 minutes. Remove the cover and continue to roast for another 45-50 minutes. The chicken is done when the breast reaches 160°F and the thighs reach 175°F. Remove from the oven and let the chicken rest on the wire rack for 15 minutes before carving.
Notes
- Brining tip: If you place the chicken on a wire rack set in a baking dish, the chicken won't sit in the juices. It's not necessary but maybe helpful to achieve a better brine. Brine anywhere from 4 hours up to 48 hours. The longer the better.
- Tuck the wings: To prevent the very tips of the wings from burning, tuck them behind the shoulders of the chicken or under the breast before roasting.
- Make it a full meal: If you want to make it a complete meal, add seasoned baby potatoes and chopped carrots around the chicken when you remove the cover and roast with the chicken for 45-50 minutes. Don't add them in at the beginning or they'll become mushy and overcooked.
- Spatchcocked chicken: Omit roasting covered and just roast uncovered for 45-50 minutes, it'll cook quicker.


Trisha E. says
My family loved this!