


Learn How to Make Kimchi at home with this simple step-by-step guide. This Easy Fermented Kimchi recipe is loaded with spicy and tangy flavors and crunchy textures. Plus, this napa cabbage kimchi recipe truly has the most simplest and wholesome ingredients, including excellent gochujang substitutes!

Unleash the probiotic goodness and flavorful wonders of this approachable and easy kimchi recipe.
This easy-to-follow guide will walk you through all the steps of creating your very own, deeply-flavored kimchi right in your kitchen. From gathering kimchi ingredients to burping kimchi - this has it all!
And if you're new to fermented cabbage recipes, be sure to check out raw sauerkraut recipe, red cabbage recipe, and spicy kraut with ginger and garlic.
Let's jump in, have some fun, and discover the world of tasty fermentation as we make homemade kimchi together!
Jump to:
What is Kimchi?
Kimchi is a traditional Korean dish made from fermented vegetables, most commonly napa cabbage. It is considered a staple in Korean cuisine and is enjoyed as a side dish or as an ingredient in another recipe. It is often found in Asian markets.
While kimchi is commonly known as a Korean dish, variations of fermented napa cabbage exist among other Asian countries such as China, Japan, and Taiwan.
The main ingredient in kimchi is napa cabbage, which features pale green leaves and white stems and bulb.
Napa cabbage in kimchi is typically cultured in a brine made with salt, ginger, garlic, and chili pepper flakes. Other vegetables, such as radishes, carrots, and scallions or spring onions may also be added to enhance the flavor and texture.
Why Learn How to Make Kimchi
Live probiotic goodness - Discover the health benefits of live probiotics and enzymes formed during the lacto-fermention process. It's an easy way to get healthy bacteria to your gut.
Easy to make - Making kimchi can be intimidating because it has so many components, and fermenting vegetables can be tricky. That's why I share tips and tricks and a fermentation timeline so you will know success on your first try at making this easy kimchi recipe.
Wholesome - This Korean kimchi recipe takes a healthy spin by using unprocessed ingredients. No soybean oil. Just pure and healthy ingredients. If you declined gochujang kimchi because of the filler ingredients, this kimchi recipe is for you!
Customizable - Kimchi ingredients can appear daunting. That's why I'm including plenty of substitutes that are readily available and accessible so anyone can make this recipe, beginners and fermentation buffs alike.
💭Fun Fact: In Japanese, napa cabbage is called "hakusai" which literally translates to white vegetable.
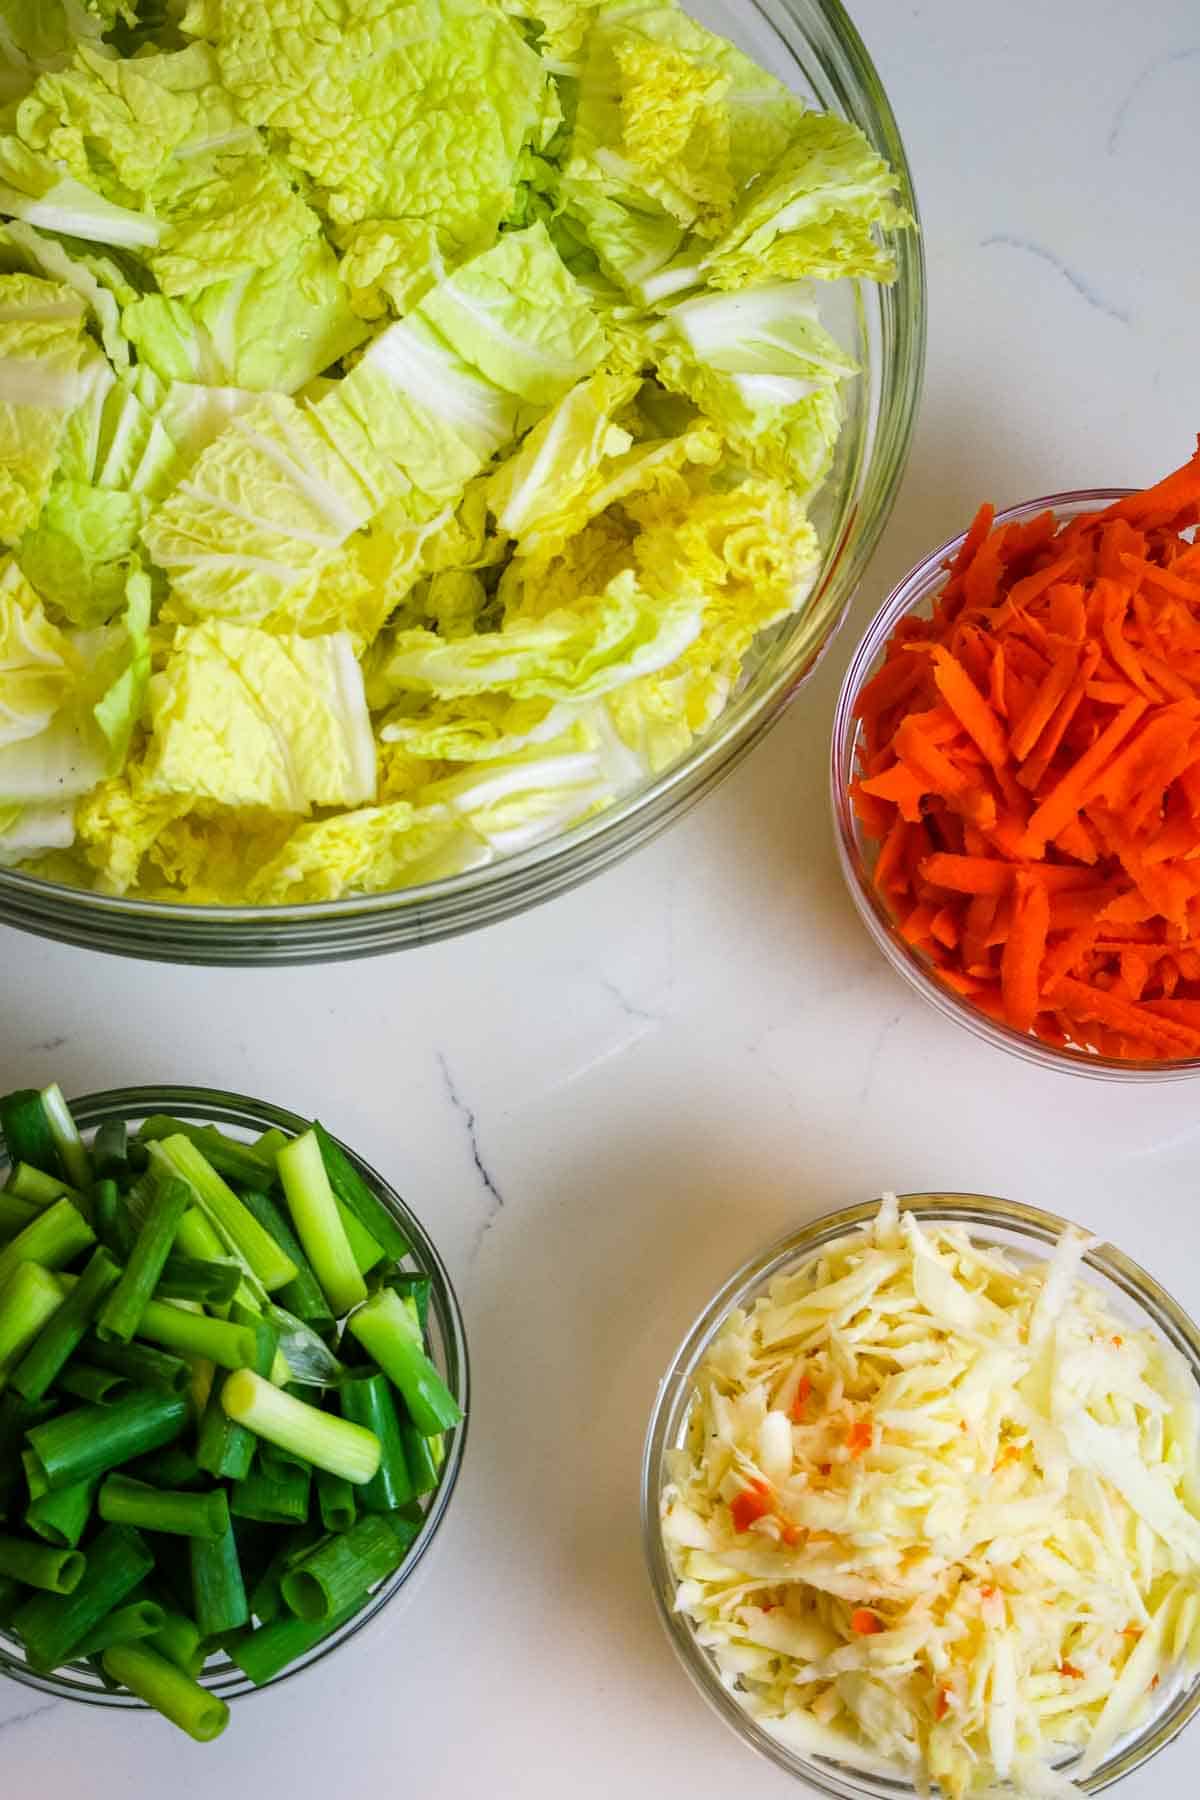
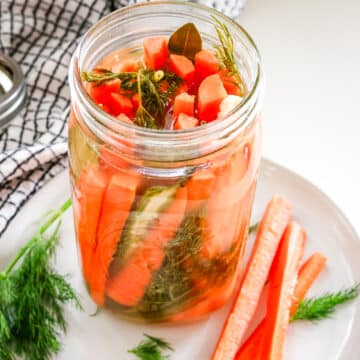
Ingredients for Homemade Kimchi
Learn how to make kimchi with a handful of simple ingredients. And be sure to check out the substitutions for how you can tweak this to use ingredients you have on hand.
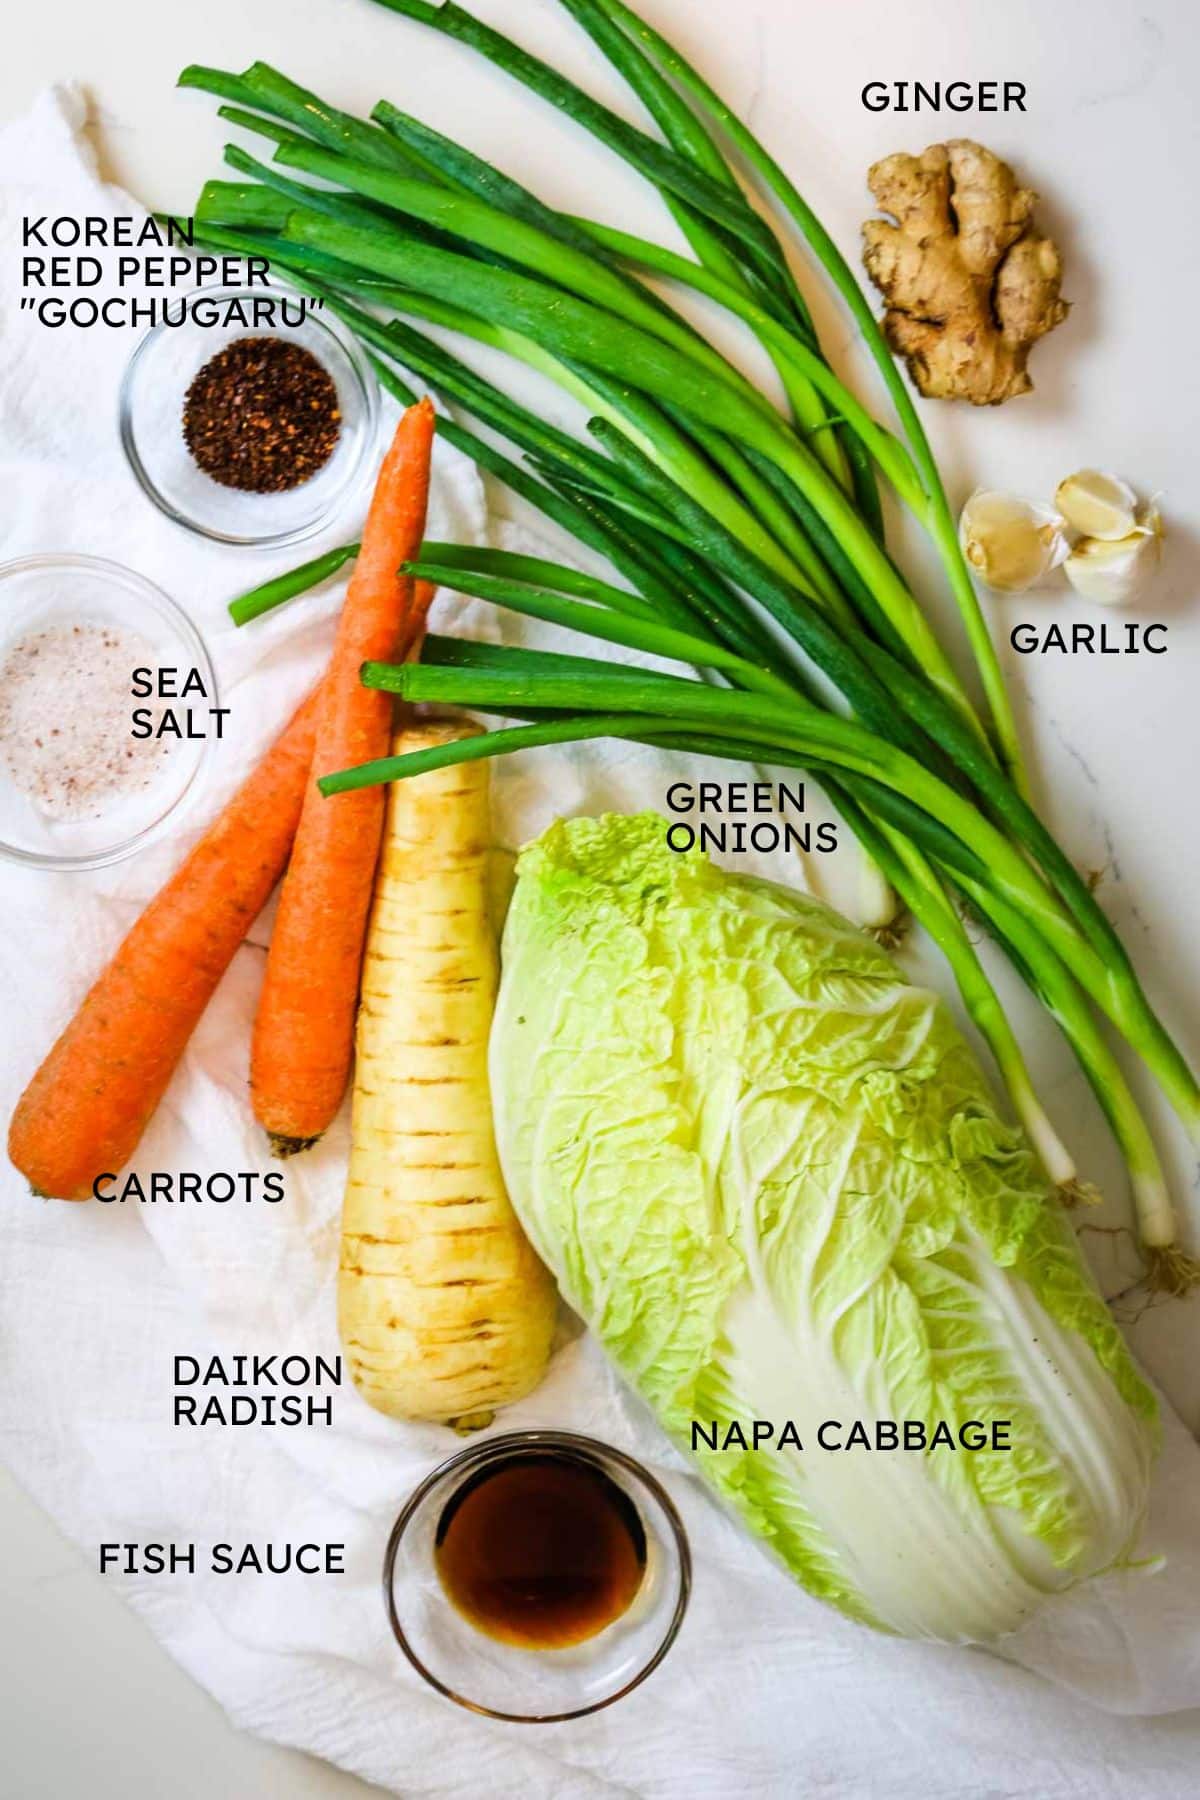
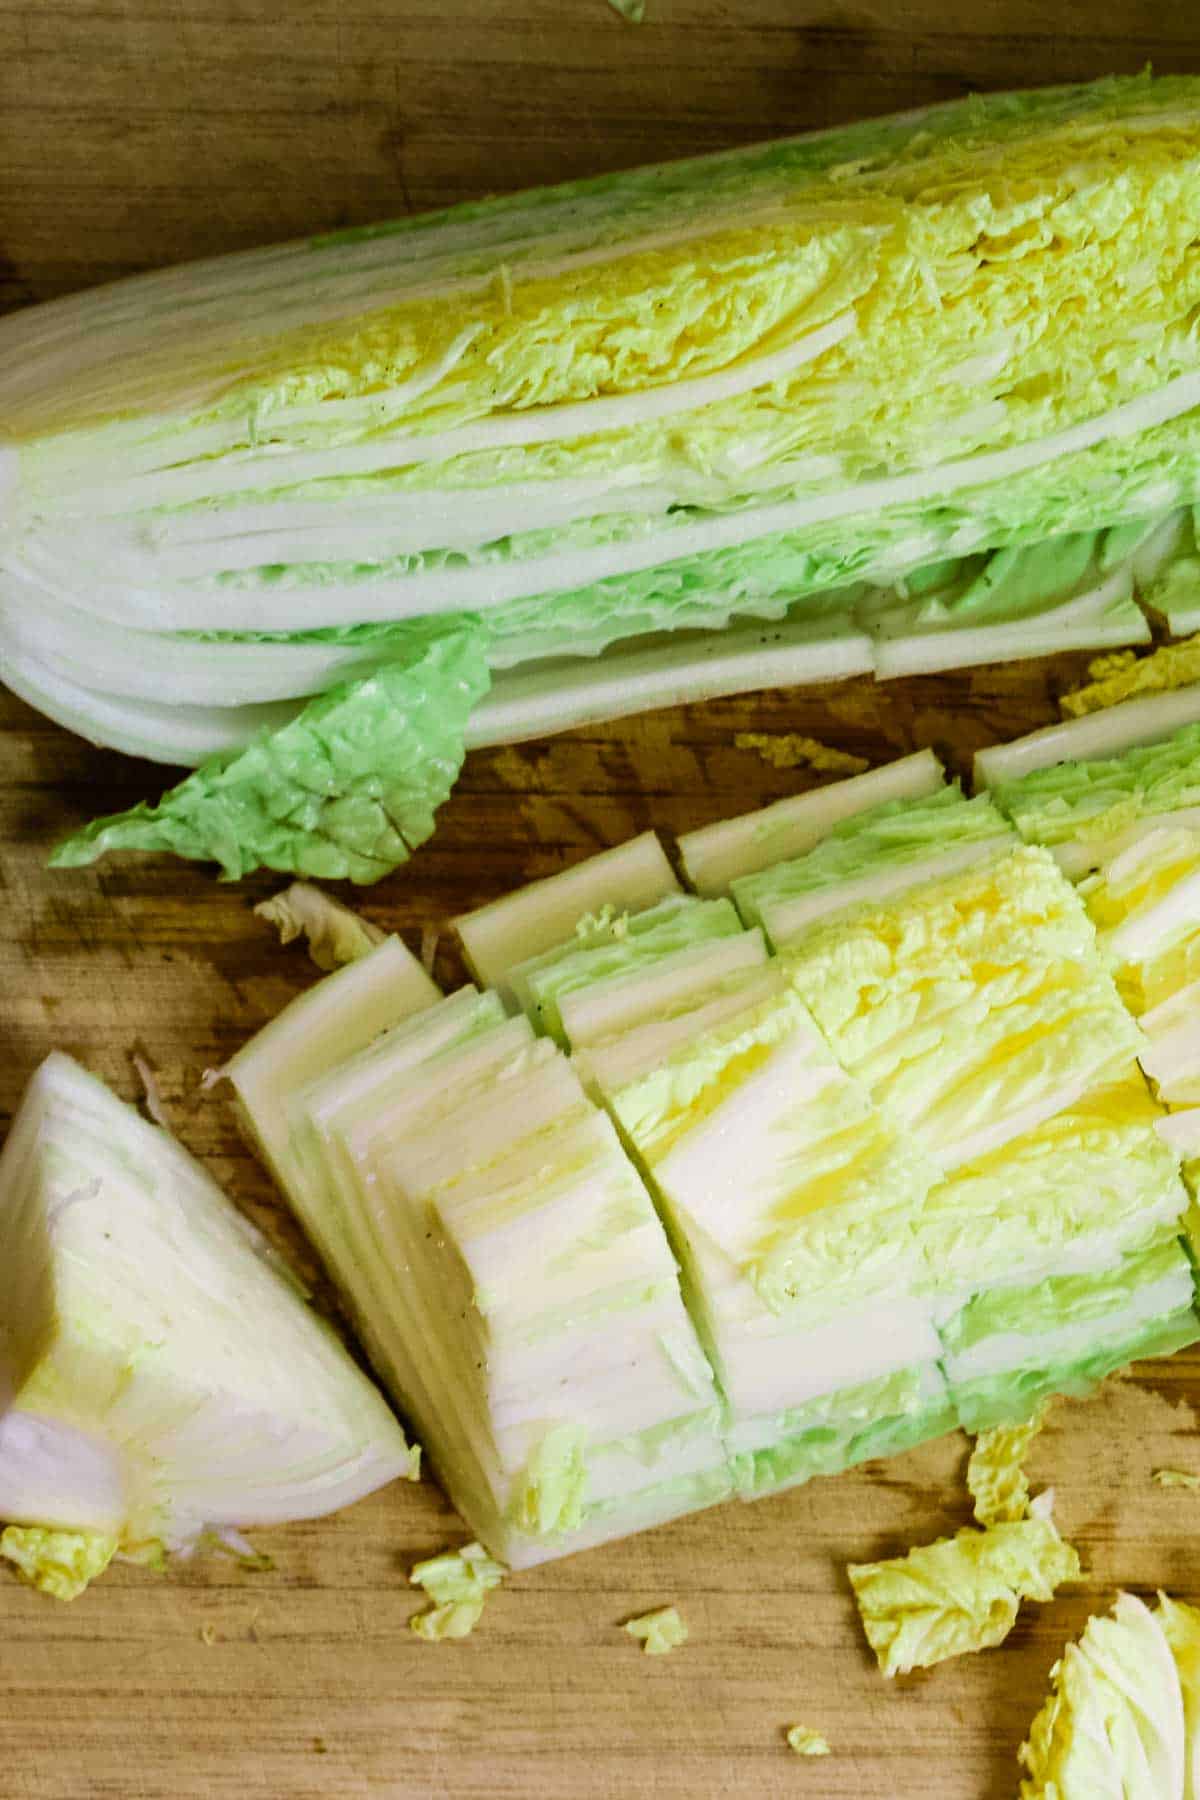
- Napa cabbage: Also known as hakusai, napa cabbage, is the main vegetable used in kimchi. Look for crispy, pale green leaves and a white stalk and bulb.
- Daikon radish: Adds extra crunch and a peppery taste.
- Carrots: Adds a touch of natural sweetness that balances the spiciness and saltiness of kimchi.
- Green onions: Also known as scallions, green onions contribute a fresh and mild onion flavor, adding an aromatic element to the napa cabbage kimchi.
- Aromatics: Fresh ginger and garlic adds warmth and slightly spicy flavor to kimchi. Fish sauce is also great at contributing umami flavor and helps to enhance the overall saltiness of kimchi. It also kick-starts the fermentation process, thanks to the natural bacteria that it contains.
- Gochugaru: Most commonly known as Korean red pepper, gochugaru is just that - red pepper flakes and they are the key ingredient in giving kimchi its signature spicy and vibrant flavor. Gochugaru varies in heat levels, so you can adjust the amount based on your preference for spiciness.
See the recipe card for exact quantities.
Substitutions and Variations
- Fish sauce - Use anchovy paste or anchovies instead of fish sauce to still give that complex flavor and umami taste. In a pinch, you can use the same amount of coconut aminos or soy sauce.
- Daikon radish - This root vegetable can be hard to find in grocery stores sometimes. Use turnips or radishes instead, or omit them entirely.
- Gochugaru - This is an excellent gochujang substitute, but you can use the paste if you desire a more robust flavor to make spicy kimchi. Or use dried red pepper flakes and paprika instead of gochugaru.
Make it Nutrient Dense
Staying true to the heart of what Prepare and Nourish is all about, there are ways to ensure you get the maximum nutrition in this traditional napa cabbage kimchi recipe.
Use high-quality produce. Select fresh and crisp napa cabbage and vegetables from your local farmer's market.
Ditch additives and use gochugaru. Many kimchi recipes call for gochujang paste, which typically contains tapioca syrup, brown rice, yeast extract, and some alcohol by-product to preserve freshness. Gochugaru is an excellent gochujang substitute because you can skip all those unnecessary ingredients.
Use unrefined sea salt. Skip the blue cans of iodized salt and use unrefined, mineral-rich sea salt. For more information on unrefined salt, see my post on Unrefined Salt Guide and the importance of using good quality salt in your cooking.
How to Make Kimchi
The complete printable recipe is below in the recipe card for your convenience.
Follow these step-by-step instructions to make your own kimchi at home. Start with clean hands and prep all your ingredients so the process moves quickly.
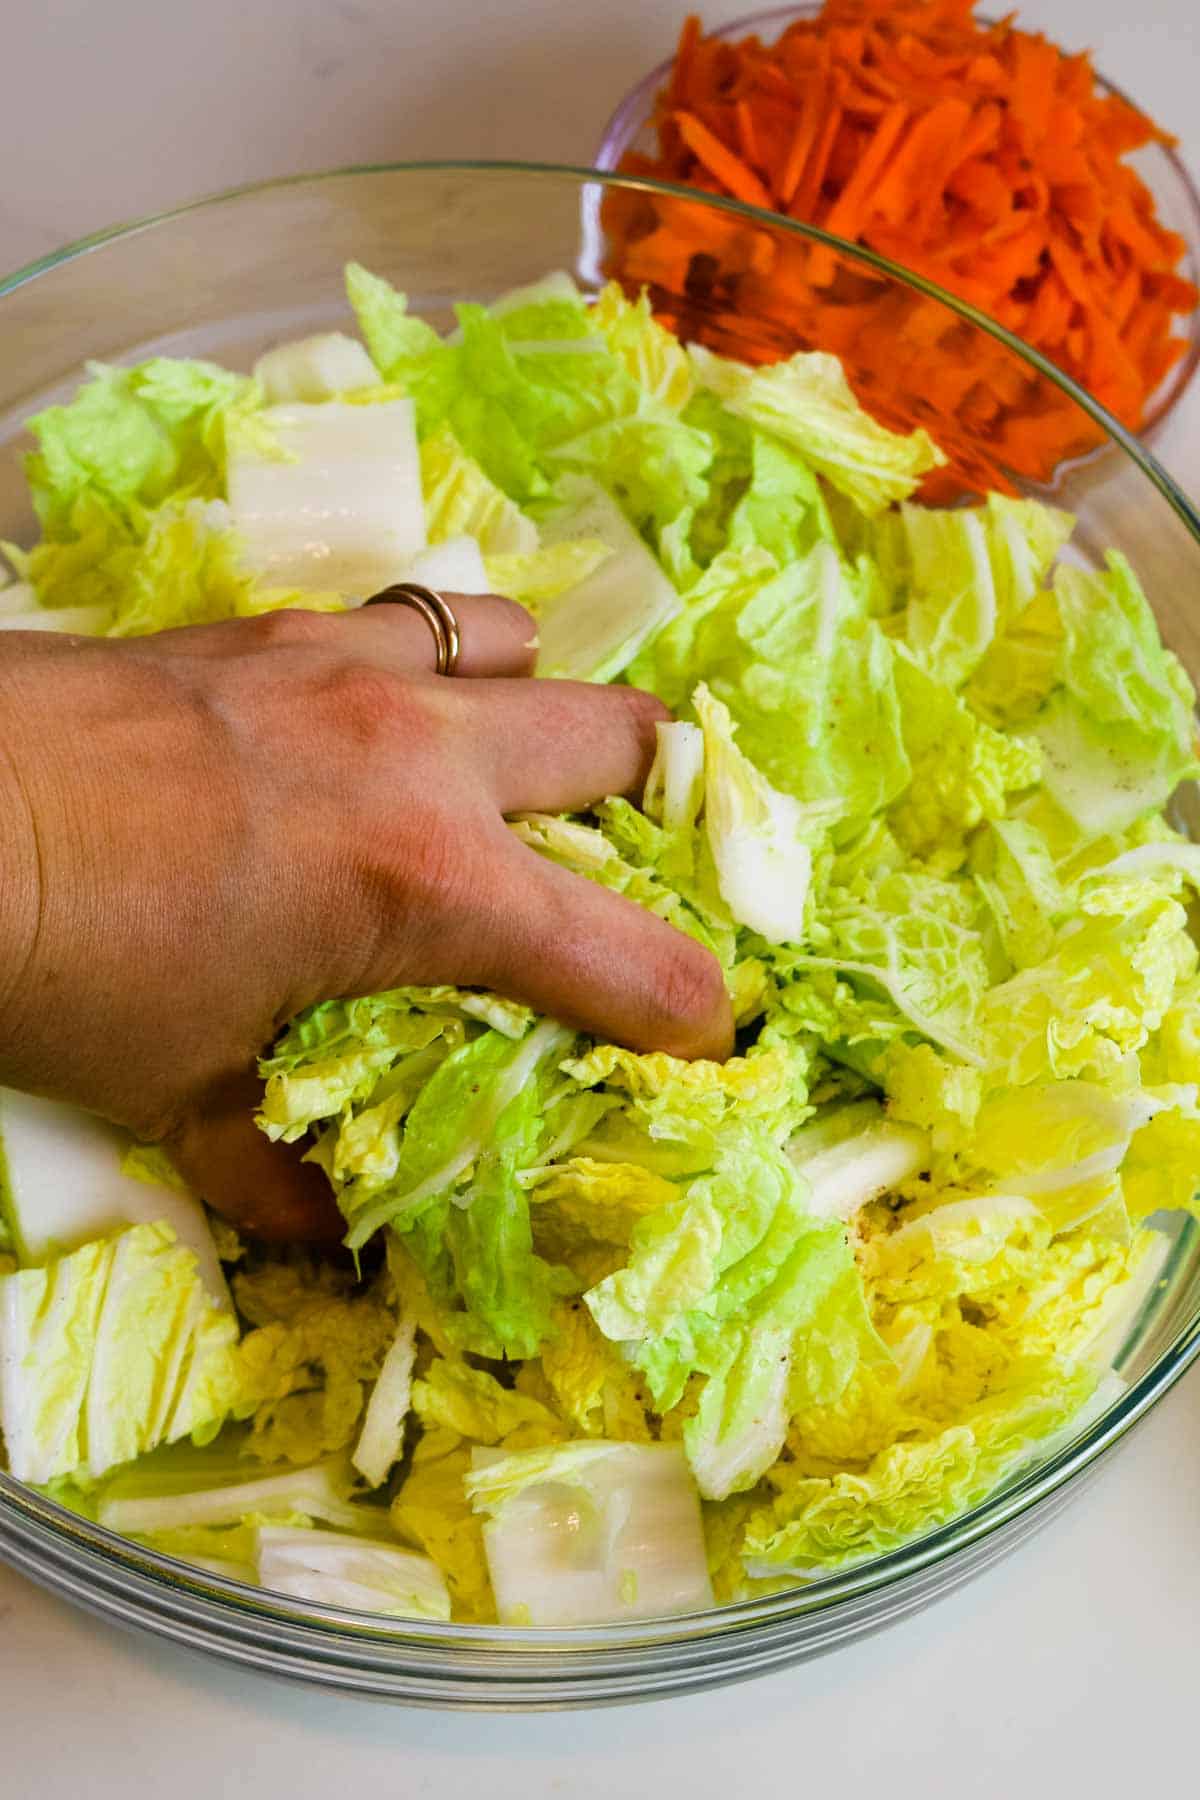
Step 1. Massage
In a large bowl, add chopped cabbage cut into bite-size pieces and sprinkle salt over it. Gently massage cabbage for a few minutes until it starts to release juices.
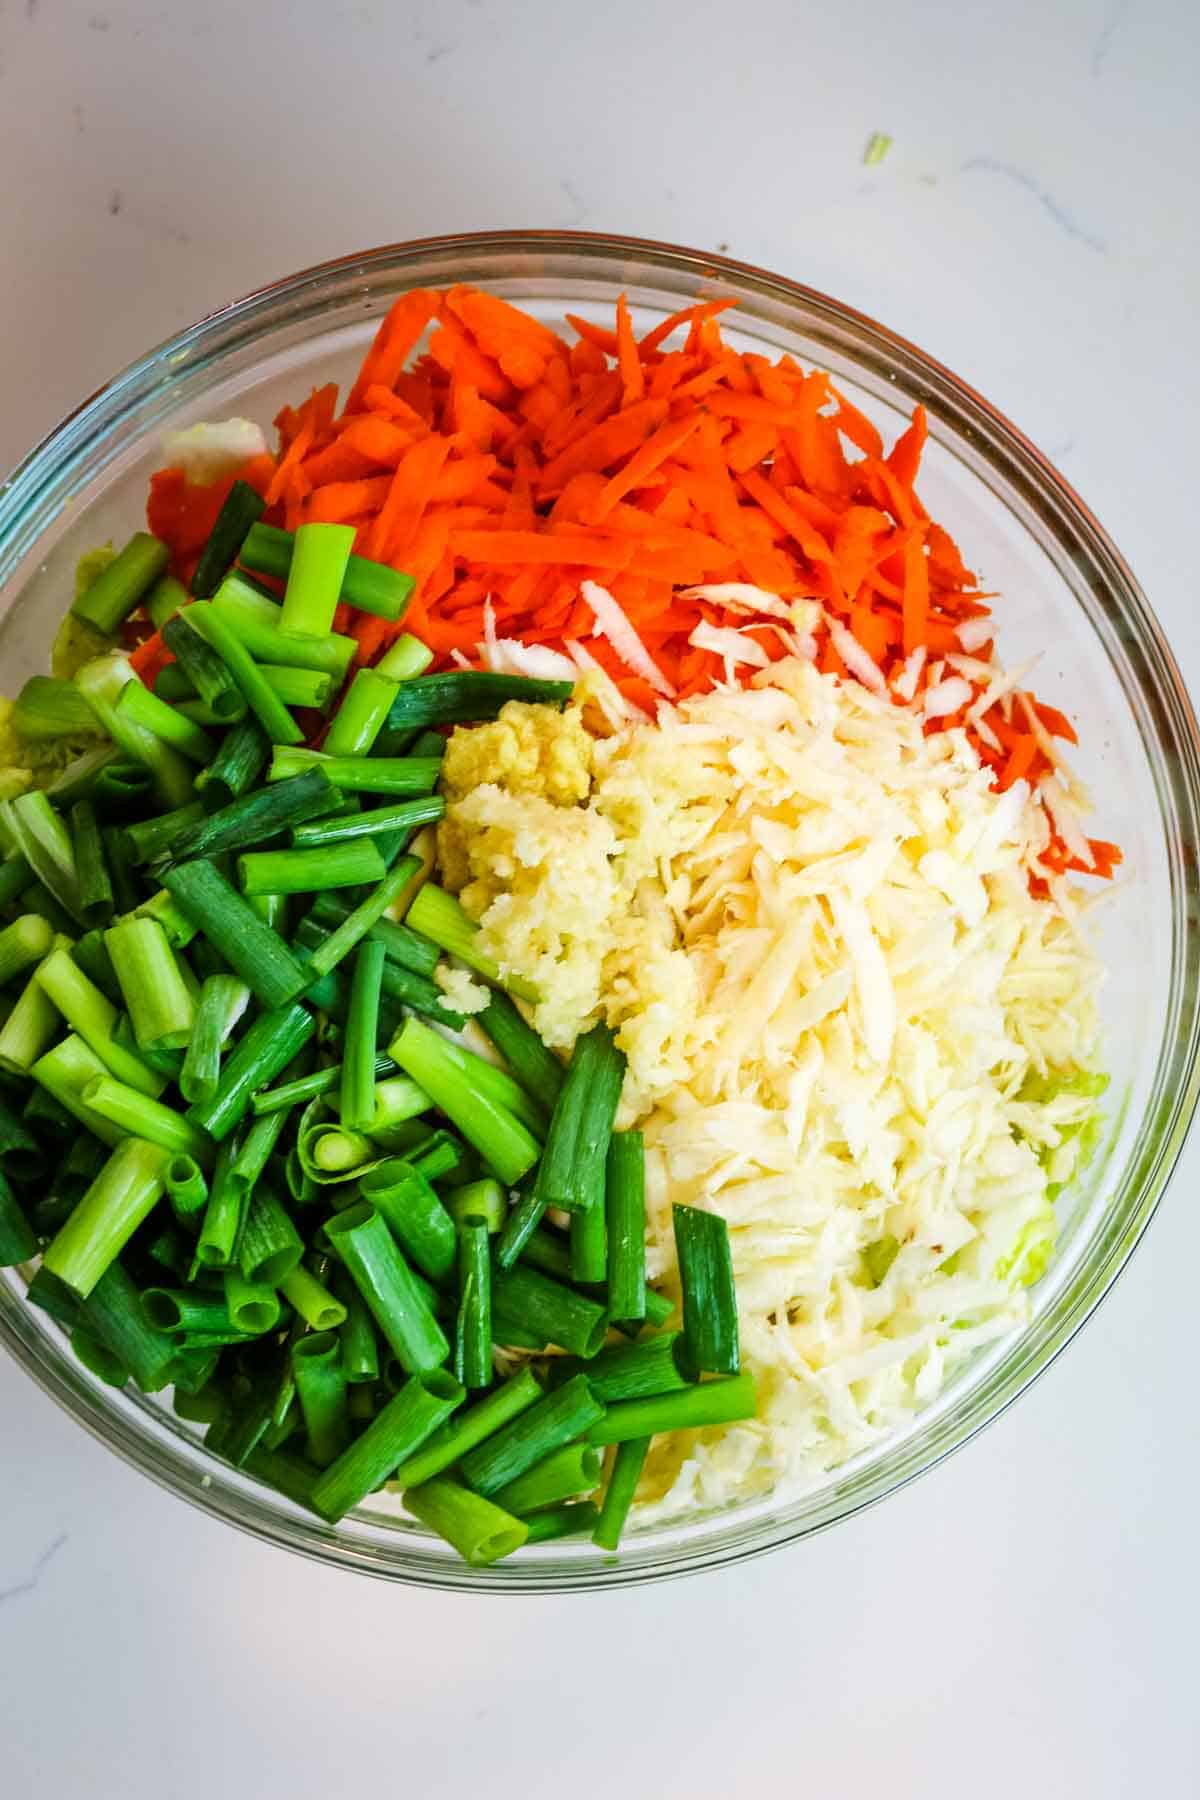
Step 2. Add
Add shredded carrots, daikon radish, and green onions cut into one-inch pieces to the napa cabbage.
💭Pro tip: Don't be afraid to get your hands in there and give the cabbage a good massage before fermenting! If you need to - wear gloves.

Step 3. Season
Add minced garlic, ginger and gochugaru to the vegetables. Pour fish sauce.
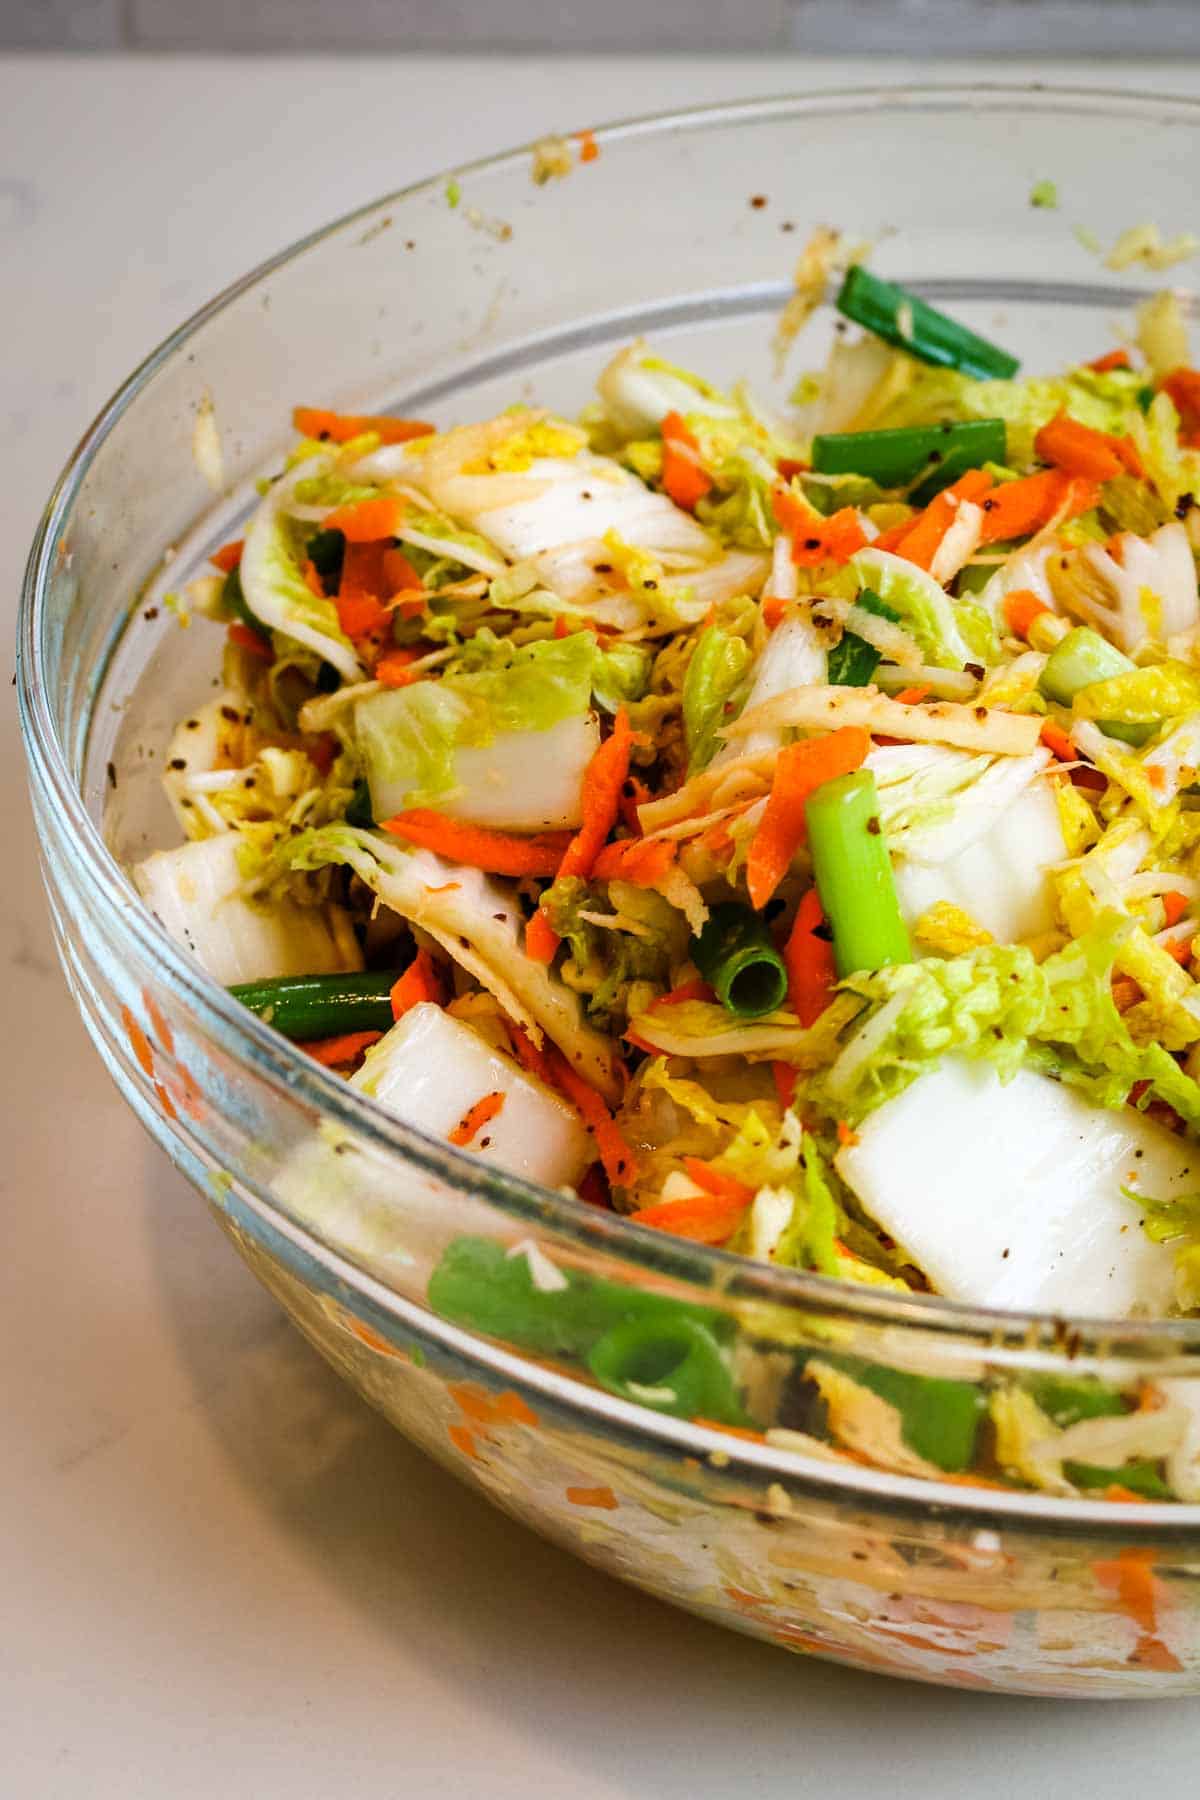
Step 4. Combine
Mix the vegetables, ensuring that every piece is well coated with the seasonings.
💭Pro tip: You can combine garlic, ginger, gochugaru, and fish sauce in a small bowl first then add to the vegetables so it's equally dispersed.
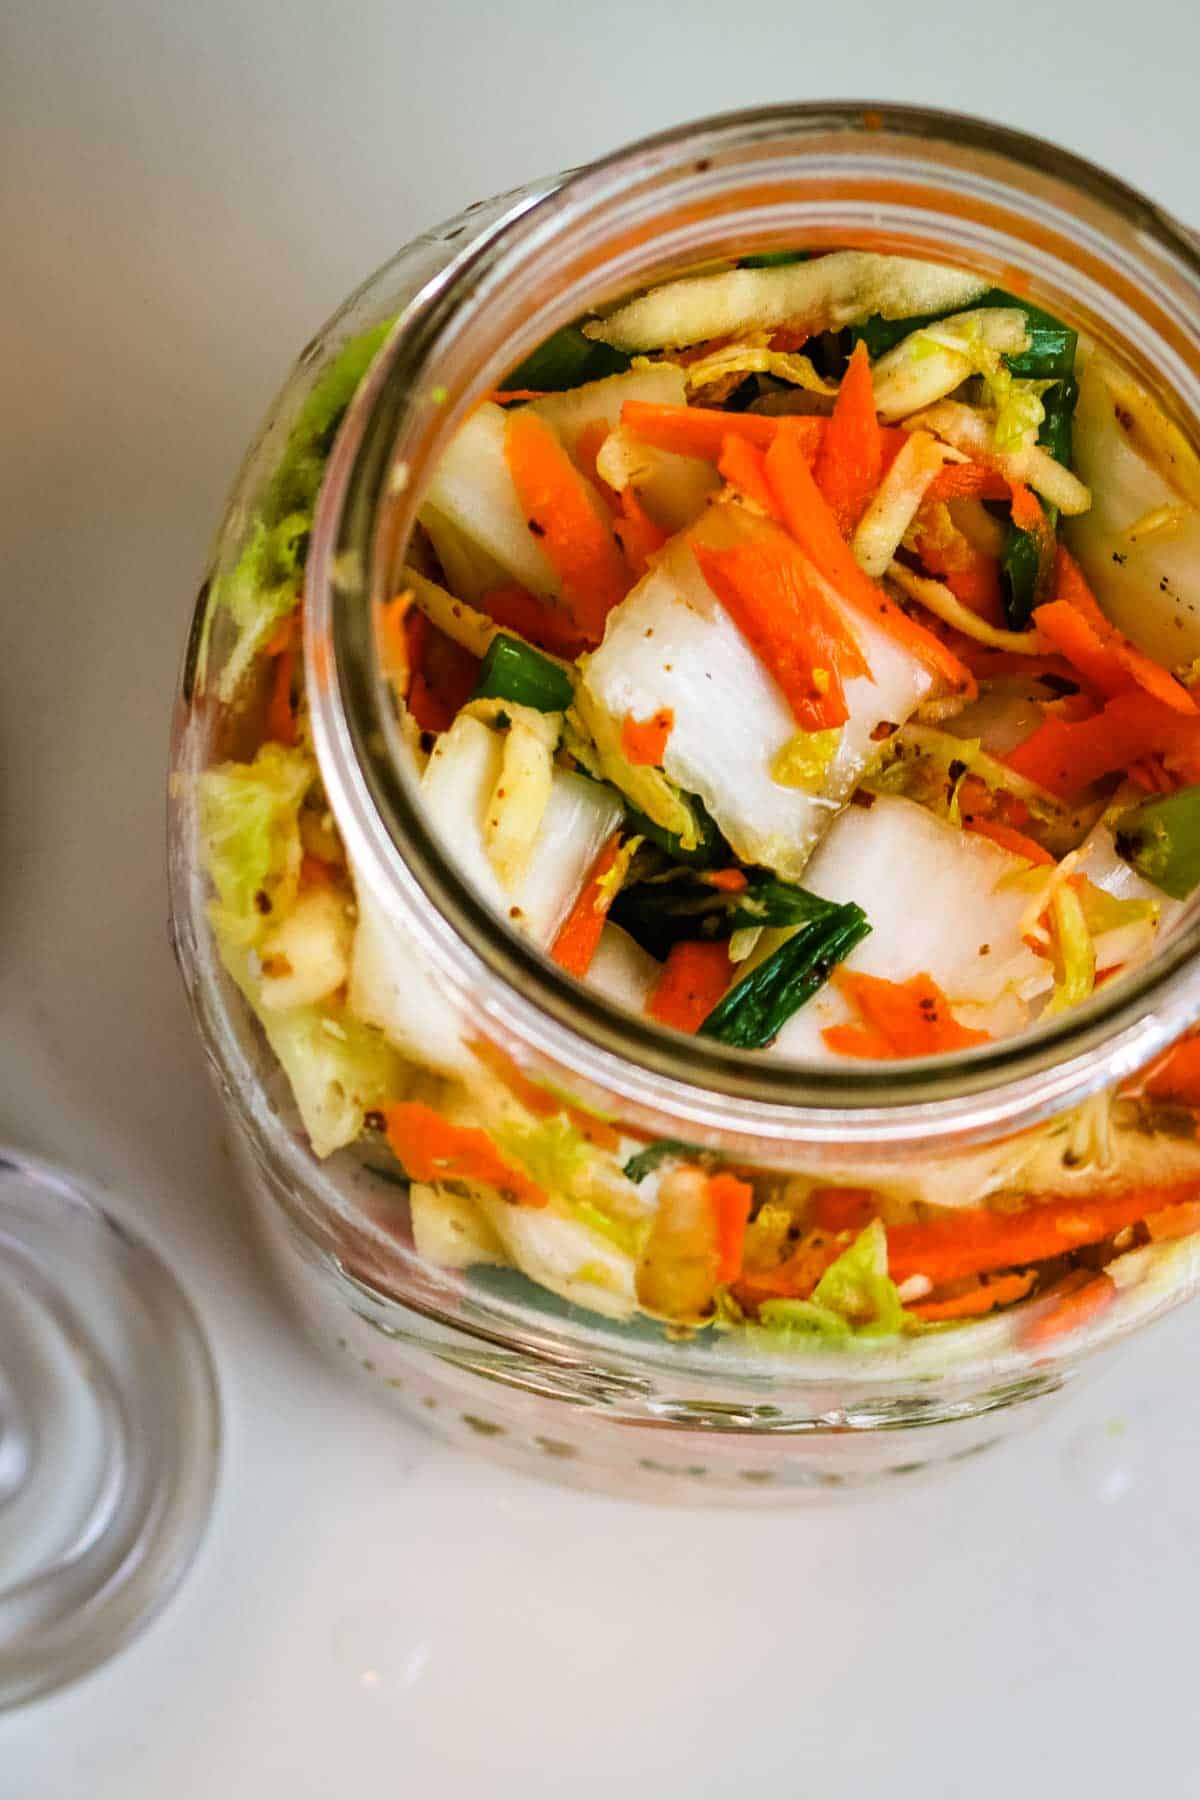
Step 5. Transfer
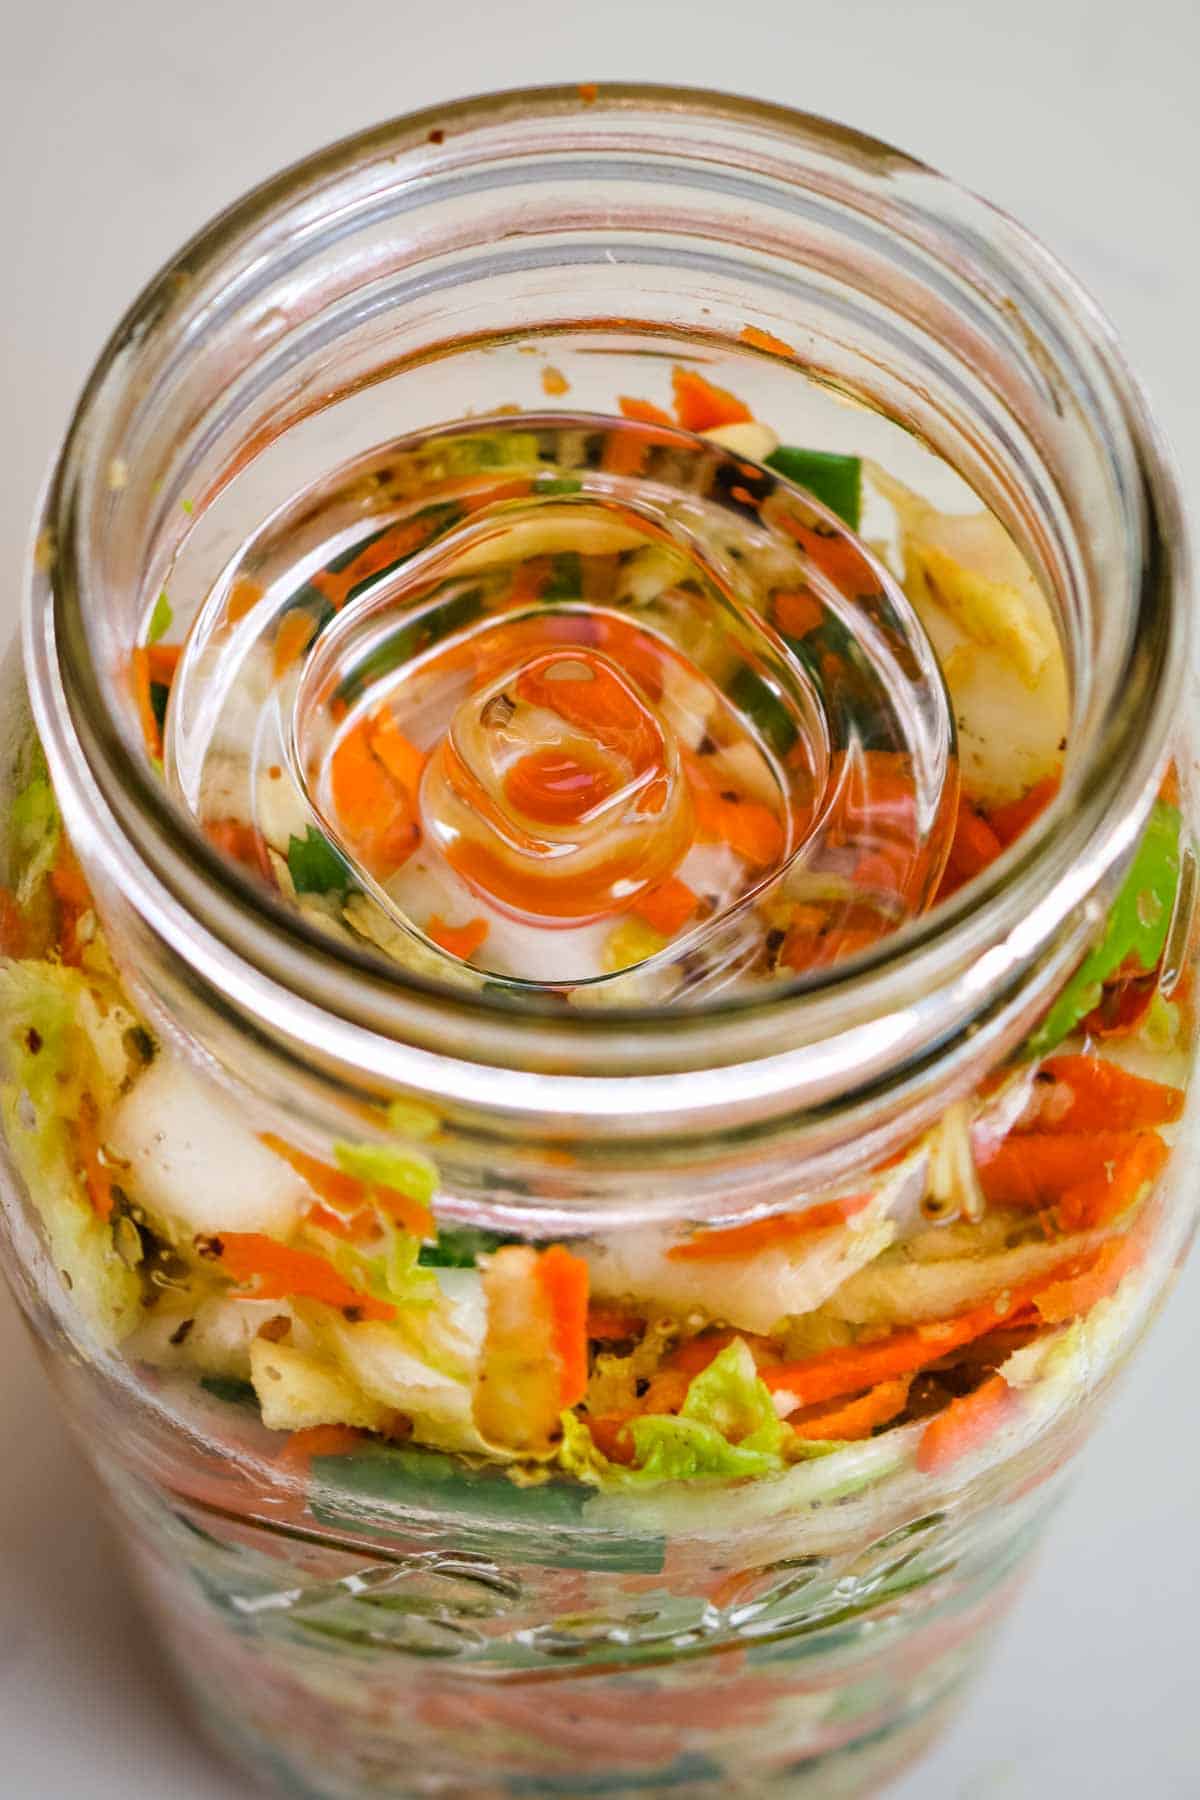
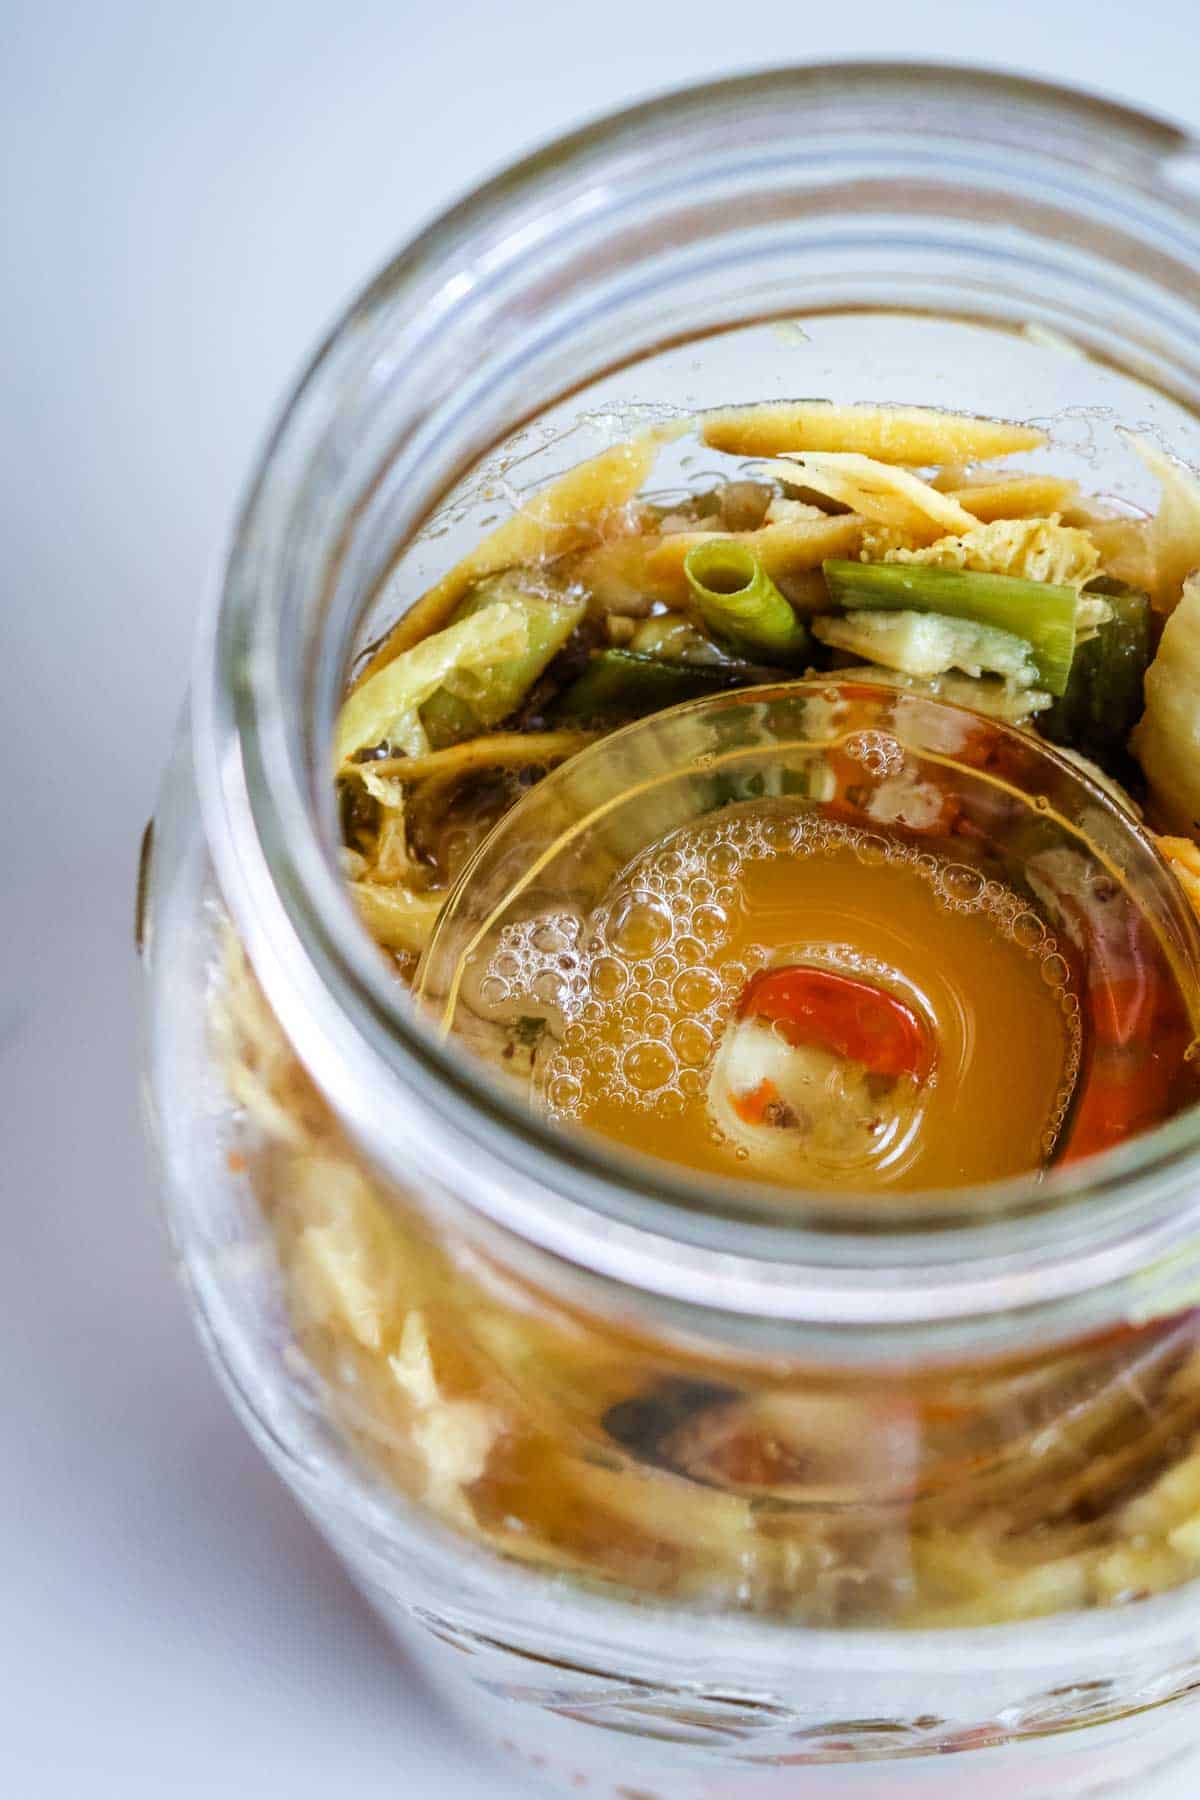
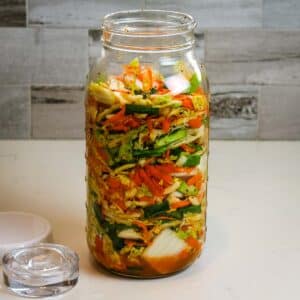
Transfer the kimchi mixture into clean glass jars, pushing it down firmly to remove any air pockets and ensuring all vegetables are submerged in the brine. Place a fermentation weight on top of the kimchi.
Step 6. Ferment
Leave some headspace for pressure to buildup. Seal the jar tightly and place it over a small plate or bowl to catch any overflow. Let it sit at room temperature for the first few days to initiate fermentation.
Helpful Tips for Homemade Kimchi
Start with clean cabbage - Napa cabbage hides dirt and bugs between the leaves, much like bok choy. After rinsing and cutting the cabbage into chunks, rinse it well under running cold water to remove dirt and impurities. Then run it through a salad spinner to remove excess water.
Use coarse salt - The large salt granules will break down the cabbage leaves quicker, which will aid in the fermentation.
Catch overflow of brine - As the vegetables soften and release more natural juices, the pressure will start pushing the contents higher, and as a result, the brine may seep out. Leaving headspace and placing the jar over a small sheet pan or shallow bowl is helpful to catch any overflow.
Weigh ingredients for best results - Use weight measurements instead of volume for consistent results. Weight measurements are included in the recipe card for your convenience. You can read more about the importance of using a salt calculator in this sauerkraut recipe post.
💭Meal Prep Suggestion: A small batch of Korean traditional kimchi will last you a long while. It makes an excellent side dish or condiment at every meal to keep up with good digestive health.
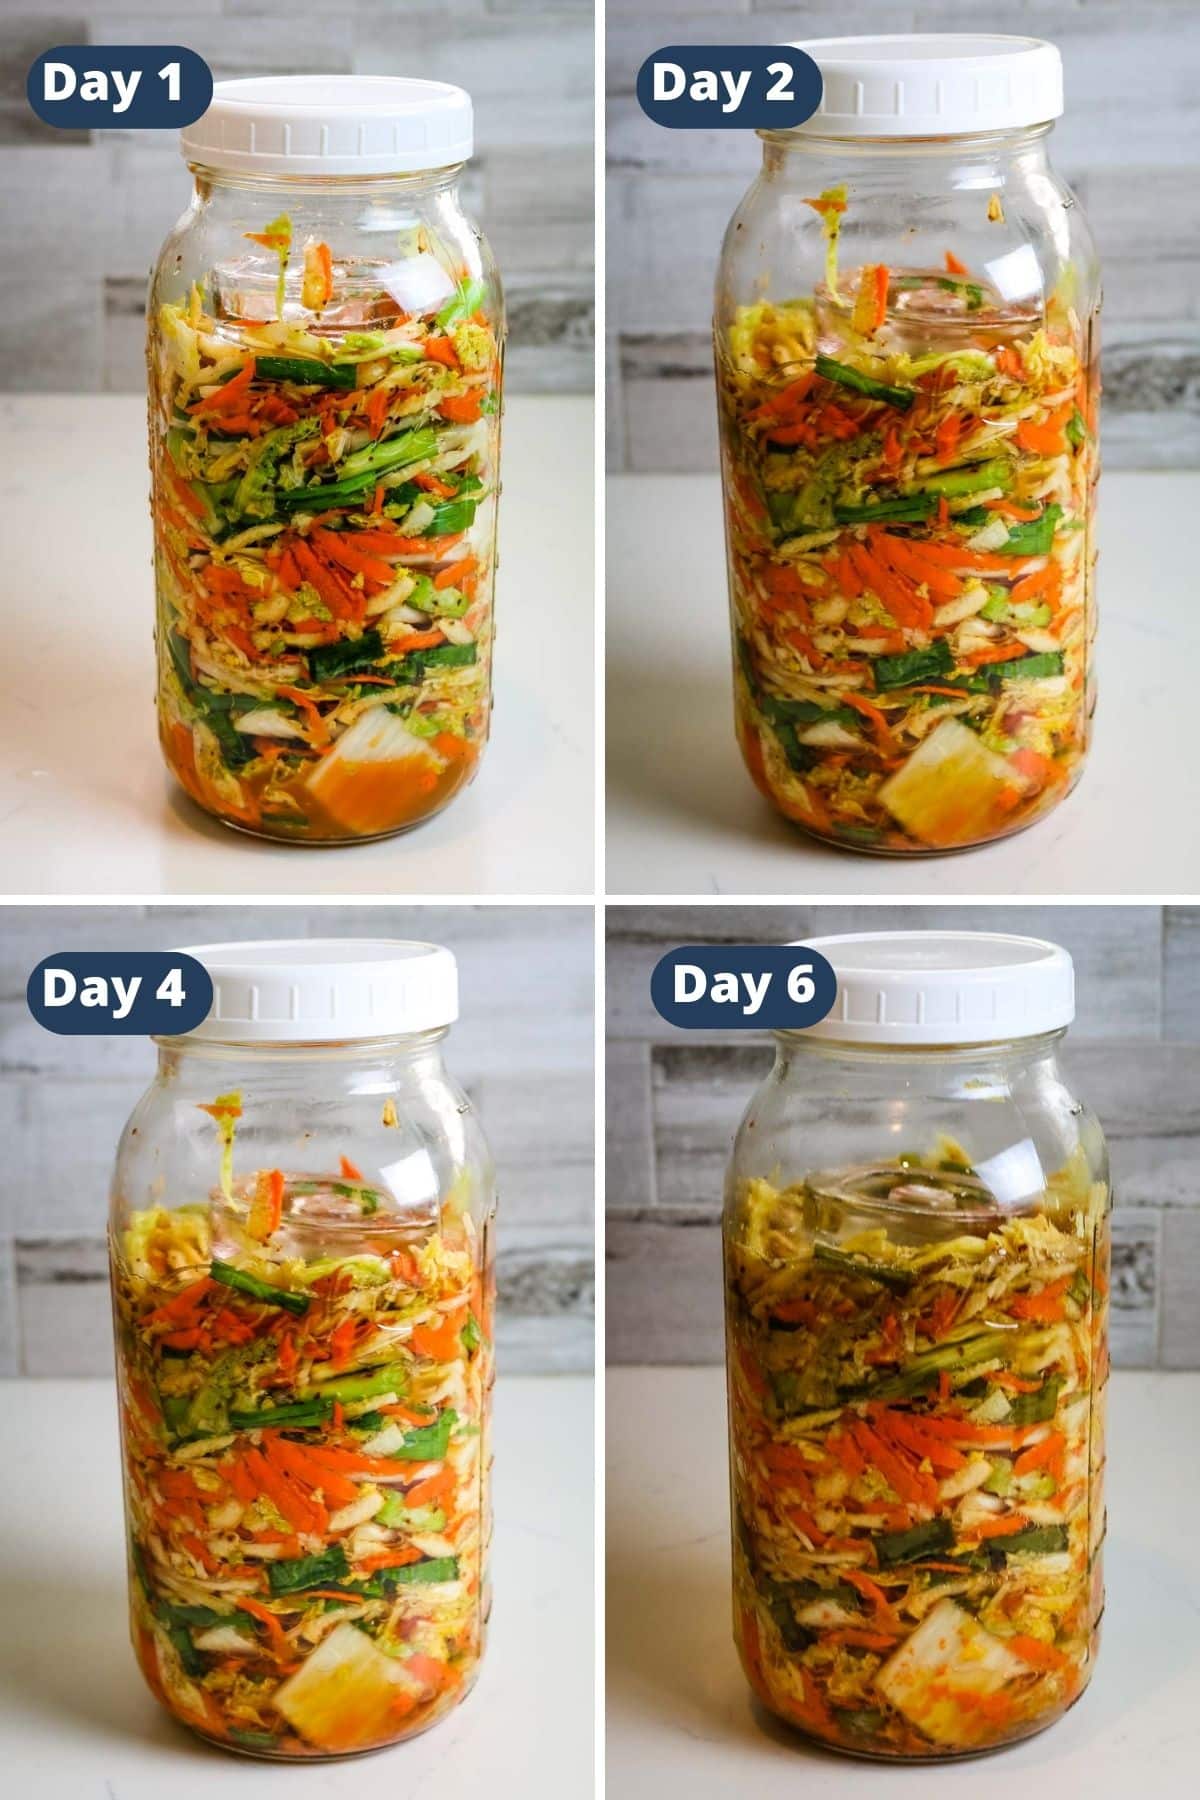
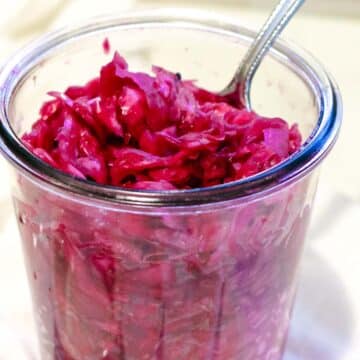
Kimchi Fermentation Timeline
During the initial fermentation period (first 2-5 days, depending on the temperature of your house), burp kimchi daily to release carbon dioxide buildup.
How to burp kimchi? Simply open the jar regularly to release carbon dioxide buildup.
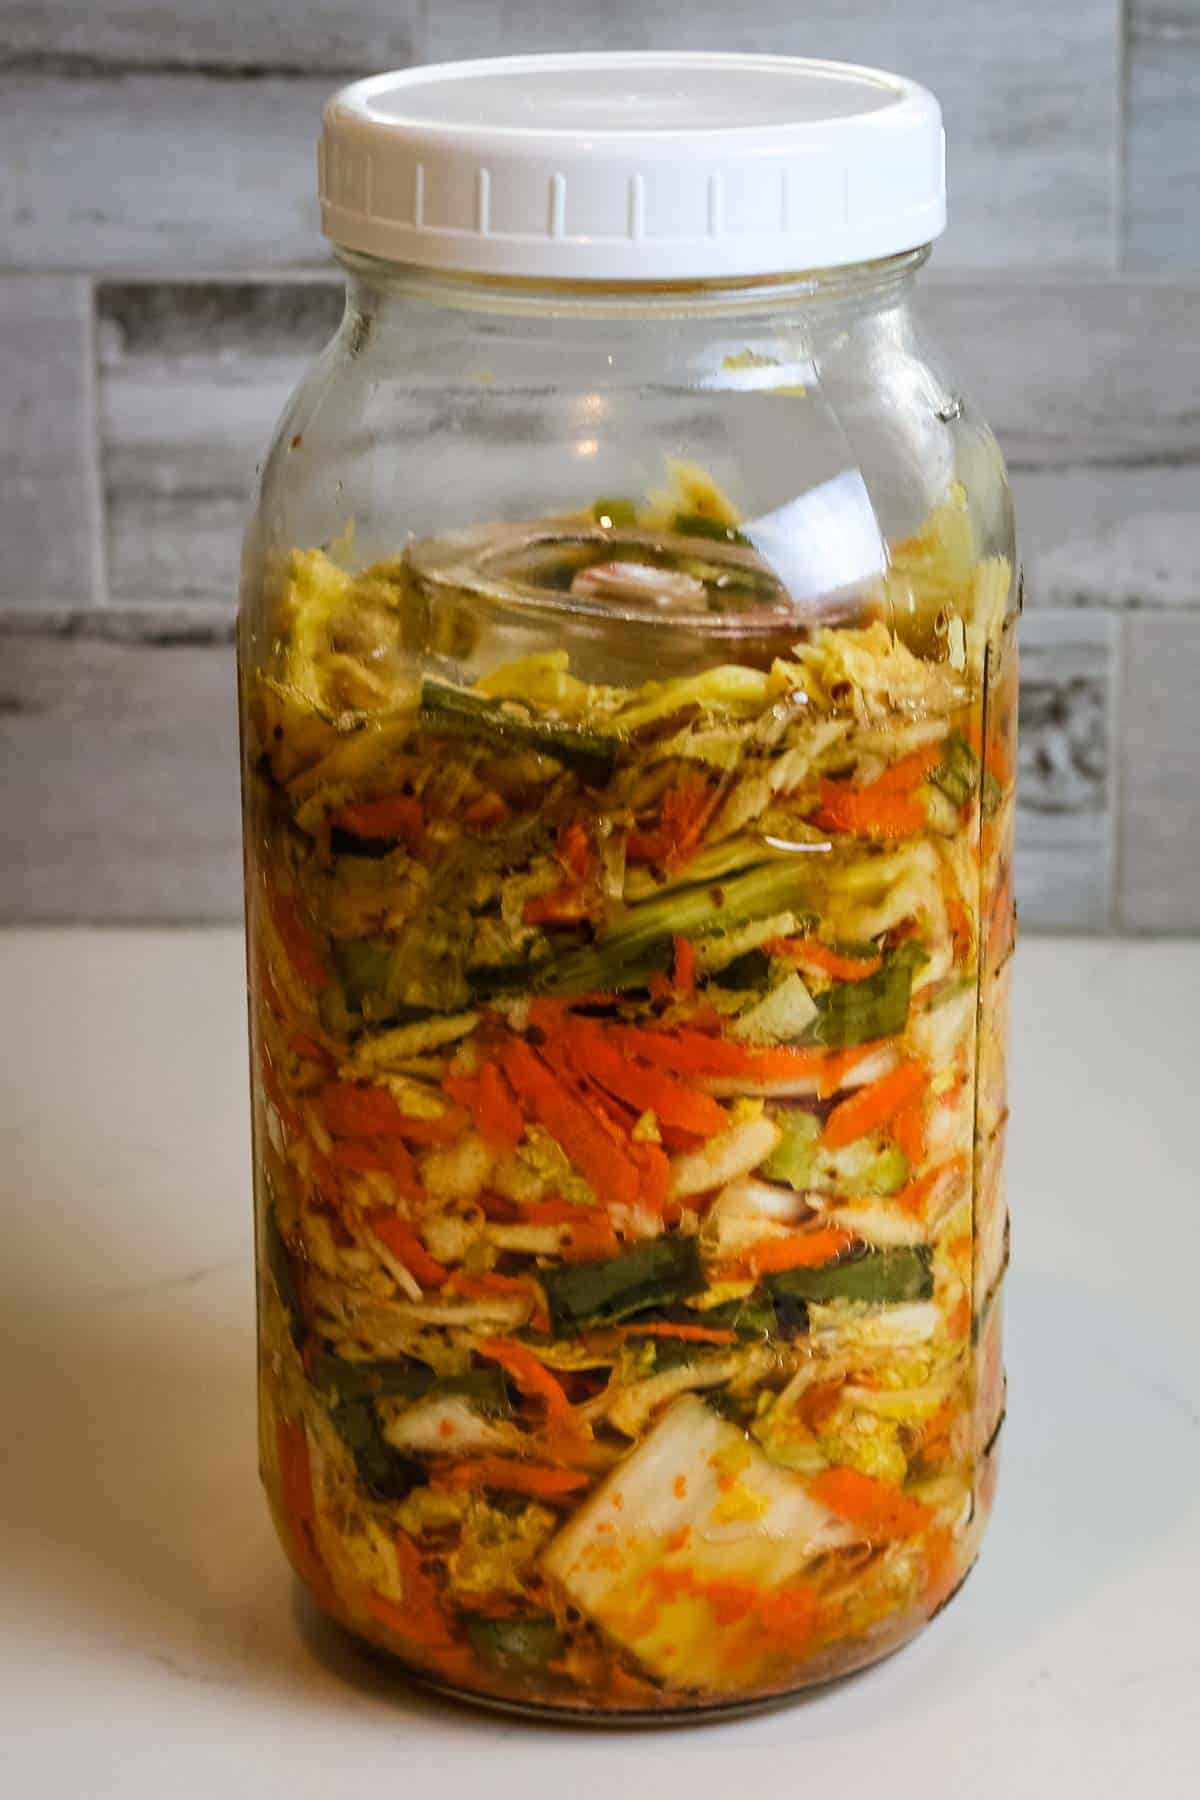
Let the kimchi ferment at room temperature away from direct sunlight for up to 8 days. Taste daily until it reaches the desired flavor.
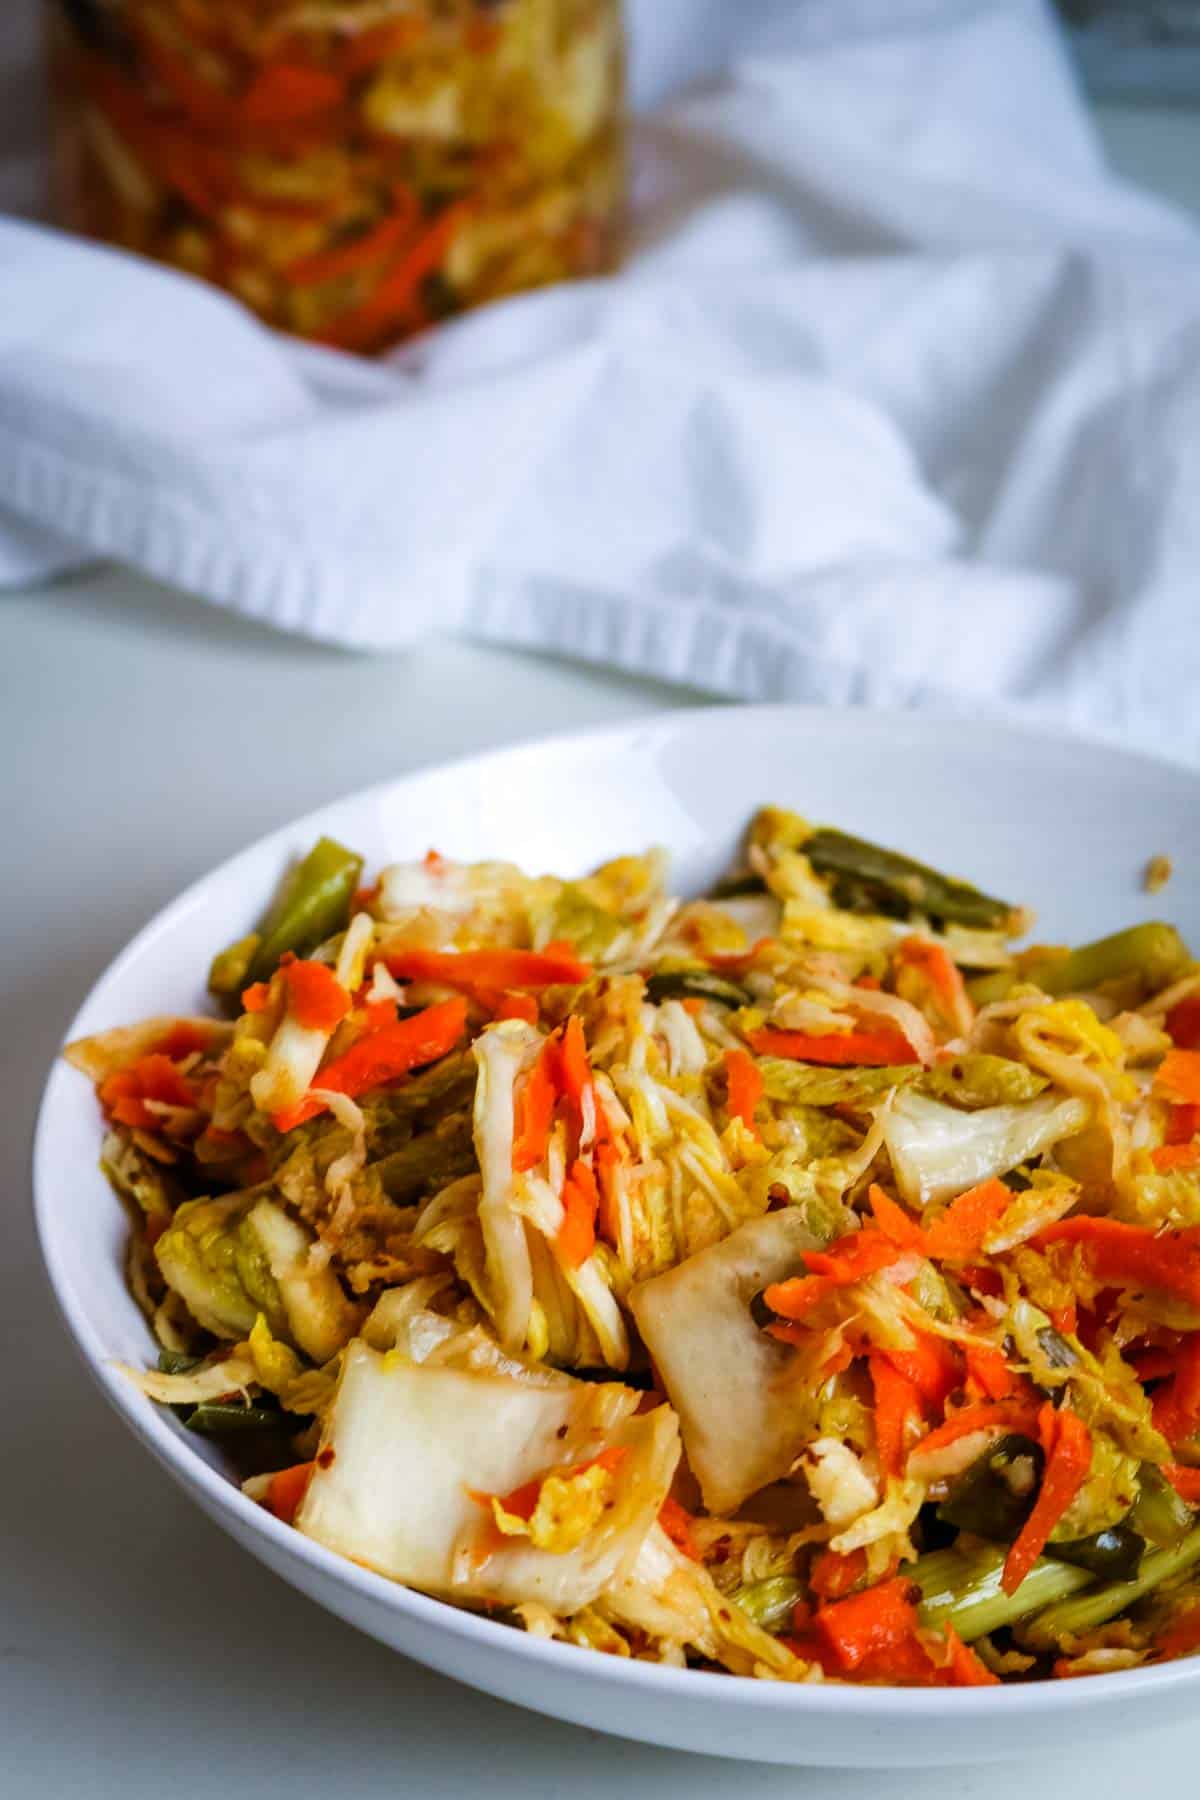
Once the kimchi is ready, it can be enjoyed immediately but will continue to ferment slowly in the refrigerator, developing more flavor over time.
Check out the transformation of napa cabbage kimchi over a period of 6 days. You can see the vegetables become a more muted color
Tools & Links to Make Kimchi at Home
Below are some affiliate links that may be helpful to you as you make this kimchi recipe. You can find some of these items cheaper at your local store, but having a link helps you know what you're looking for.
- Tools: chef knife, cutting board, large mixing bowl, salad spinner, digital kitchen scale, fermenting glass weight, food processor to quickly grate carrots and turnip
- Ingredients: real salt, gochugaru (Korean red pepper), fish sauce
- Storage Supplies: quart-size mason jars, wide-mouth mason jars, Weck preserving jars, Avoid plastic containers to avoid having anything leach into your foods, as this uses lactic acid fermentation.
Serving Suggestions
Kimchi is an excellent accompaniment to fried eggs in the morning. Or go all out and serve it with sheet pan breakfast or hash browns. Somehow, breakfast potatoes and kimchi really hits the spot.
But more importantly, kimchi, like most fermented foods, are best served as a condiment to a meal for flavor and probiotic effects.
Kimchi pairing suggestions


Storage Instructions
To store: After the initial 8-10 days of active fermentation at room temperature, transfer the kimchi to the fridge for up to 12 months! That's right - it will likely go well past that but we usually finish it by then.
Storage containers: I love keeping all my ferments in an airtight container or a glass jar like wide mouth mason jars. Use quart size mason jars for smaller quantities and half-gallon mason jars for larger batches. Jars are convenient because they already come with a tight fitting lid.
FAQs
The fermentation time for kimchi can vary depending on several factors, including the desired level of sourness and the temperature at which it is fermented.
Generally, kimchi, like all wildly fermented vegetables are left to ferment for a few days to a several weeks. I prefer fermenting kimchi at room temperature for up to 8 days, followed by retarded (slow) fermentation in the refrigerator for months.
Sealing the jar or fermentation crock is recommended as it helps create an anaerobic (oxygen-free) environment, which is favorable for the fermentation process and the growth of beneficial bacteria. It also helps prevent contamination from outside microorganisms.
During the initial days of fermentation, burp the kimchi jar once or twice a day to release buildup gas. If the fermentation is active or the room temperature is warm, burp the jar every 8-12 hours. Once the kimchi is in the refrigerator, there is no need to burp it.
However, it's important to note that during the initial stages of fermentation, gases may be produced as a byproduct, causing pressure to build up inside the jar.
To avoid any potential explosion or leakage, you can use a fermentation lid or leave some headspace in the jar to accommodate the gas buildup. Additionally, it's a good practice to "burp" the jar occasionally by slightly loosening the lid to release excess gas.
Looking for more fermented recipes? Here are some ideas:

Did you make this? Please leave a ⭐ recipe rating in the recipe card below and leave a review in the comments. Thank you!💚
Printable Recipe
Easy Fermented Kimchi Recipe
Ingredients
- 1 napa cabbage (hakusai), medium-large approximately 700 grams
- 2 carrots, large approximately 200 grams
- 1 daikon radish, medium-large approximately 130 grams
- 1 green onion bunch approximately 100 grams
- 1 ½ tablespoons unrefined salt approximately 28 grams
- 2 tablespoons fish sauce
- 3 tablespoons gochujang paste
- 2 tablespoons gochugaru (Korean red pepper)
- 4 garlic cloves
- 2 tablespoons grated ginger
Instructions
- Prep cabbage: Rinse the napa cabbage, ensuring to get between the leaves. Run it through a salad spinner to dry it well. Cut it into quarters, lengthwise, removing the core. Then cut crosswise into 1" pieces.
- Massage: Add the cabbage to a large bowl and sprinkle salt over it. Gently massage until juices start to release, about 3-5 minutes. Set aside.
- Prep vegetables: Meanwhile, shred or julienne the carrots and daikon radish. Cut the green onions into 1" pieces. Mince ginger and garlic.
- Combine: Add carrots, radish, green onion, ginger and garlic, gochijang, gochugaru, and fish sauce to the cabbage and toss to combine well.
- Transfer: Pack kimchi mixture into clean wide-mouth jars, pushing it down firmly to remove any air pockets and ensuring all vegetables are submerged in the brine.
- Ferment: Place a fermentation weight over the kimchi, leaving headspace for pressure buildup. Seal the jar tightly and place it over a small plate to catch any overflow. Let it sit at room temperature for a few days to initiate fermentation.
- Burp kimchi: Open the jar daily to release carbon dioxide. Ferment at room temperature away from direct sunlight for up to 8 days. Then transfer to the refrigerator.
Notes
- Recipe makes 2 quarts or 16 servings. Serving size is ½ cup.
- Storage: Allow the kimchi to ferment at room temperature away from direct sunlight to your liking, up to 8 days. Afterwards, transfer to the refrigerator. Kimchi will be good in the fridge for up to 12 months.
- Use weight measurements instead of volume for more consistent results. Weight measurements are included in the ingredient notes for your convenience.
- To accurately weigh kimchi ingredients: Turn on your kitchen scale and set it to weight in grams. Place your prep bowl on scale and zero/tare it out. Add chopped cabbage, and other ingredients until you reach the approximate weight.
- Substitutions:
- Daikon radish - use turnip or radishes instead.
- Fish sauce - anchovy paste, mashed anchovies, or coconut aminos will work.
- Gochugaru - this is an excellent gochujang substitute but you can use the paste if you desire a more robust flavor. Or use dried red pepper flakes and paprika in lieu of gochugaru.


Miz Helen says
Thanks so much for sharing your awesome Kimchi Cultured Napa Cabbage with us at Full Plate Thursday. Have a great week and come back real soon!
Miz Helen
Jessica says
I love kimichi but haven't made it myself. Thanks for linking up to Simply Natural Saturdays.
Stefani says
Thanks for sharing this on Simply Natural Saturdays! I've been getting into fermented foods lately to try to heal my leaky gut and autoimmune issues. I haven't had the courage to try it, but you made it look easy {and oh so delicious!}. This is next on my list 🙂
Anya says
Thanks Stefani. Give this a try, but do go easy.
Raia says
I made kimchi once and my family would not eat it! My kids said it was too spicy. :p But right now I have a jar of the "real stuff" from a Korean friend in my fridge and - no joke - that stuff is so hot is makes me almost start crying. It made my version taste wimpy. 🙂 I might have to give your version a try... maybe it'll be somewhere in the middle!
Thanks so much for sharing this with us at Savoring Saturdays, Anya! 🙂
Anya says
Yes - most Kimchi is/are (?) spicy, very spicy. Believe me, I've reeeeaaally had to bring that gochugaru down a notch or two. It's the pepper that gives Kimchi it's red hue so you can imagine how much of that they use in their recipes. Mine isn't nearly as spicy as what I've tried before.
Emily @ Recipes to Nourish says
I can't get over how yummy this looks! My husband and I love kimchi but I've never made any. Thanks for sharing this with us at Savoring Saturdays linky party. I'll be featuring your recipe today.
Renee Kohley says
I am such a sucker for kimchi! Your recipe looks great!
Anya says
Me too, Renee, me too...