

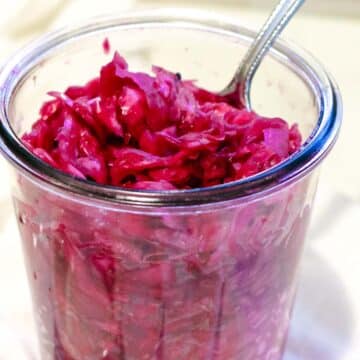
Making traditionally fermented sauerkraut at home isn't time consuming and doesn't require special supplies. This Simple Raw Sauerkraut Recipe is foolproof and will ensure you get perfectly crunchy probiotic-rich fermented food every time.
An important tenant of a nourished kitchen is the regular practice of lacto-fermenting foods. And we have a growing plethora of those foods with fermented jalapenos, salsa, and cherry tomatoes.
Cultures around the world have their traditional and favorite ferments. Sauerkraut is one of the most ancient ferments, with recipes differing wildly amongst various Eastern European and Asian regions.
Some recipes include caraway seeds like in this red cabbage sauerkraut; others add shredded carrots or apples for additional flavor. Hello, spicy sauerkraut with ginger and garlic!
This, on the other hand, is a very basic 2-ingredient recipe that can be used as a framework to create your own sauerkraut.
But buckle up. This post is long but packed with very important information. For your convenience, you can jump to recipe above or click through any of the table of contents links below. But there is valuable information in the body of the post, so grab yourself a warm cup of tea and get comfortable.
Jump to:
What is raw sauerkraut?
Raw sauerkraut implements a wild fermentation process instead of the use of heat.
Preserved sauerkraut in jars is not a live food. That sauerkraut has been processed at high heat, destroying all friendly bacteria. Sure, it may still come with health benefits but it will be absent of live probiotics and enzymes.
Raw sauerkraut uses lacto-fermentation, a process where sugars and starches in the cabbage is converted to lactic acid by various species of the good bacteria.
Lactic acid works as a natural preservative because it inhibits the growth of bad bacteria.
Our ancestors understood how important fermentation was to health as the proliferation of these lacto-bacilli in fermented vegetables aids in digestion and provides many enzymes and key minerals.
That is what raw sauerkraut does.

Why you'll love this recipe
- Taste & texture: briny and crunchy because no one likes mushy sauerkraut
- Money saver: cabbage is a super inexpensive vegetable, even organic cabbage is reasonably priced; great money saver for the nutrition powerhouse that sauerkraut is.
- Foolproof: there's a very simple method that you need to be aware of for consistent reliable results (i.e. no mold & crunchy sauerkraut). No water or whey is needed to achieve these great results.
💭Good to Know: Prior to refrigeration, fruits and vegetables harvested during prolific seasons was preserved using the process of lacto-fermentation.
History of Sauerkraut
Fermented foods have a long history in many cultures, with sauerkraut being one of the most common foods to wildly culture.
Contrary to many speculations, sauerkraut did not originate in Germany. Some claim that the art of fermenting cabbage was practiced during the building of the Great Wall of China. And this process was then shared from China to Europe by the Tartars.
Others argue that Romans pickled various forms of cabbage and were more likely to be the pioneers of modern-day sauerkraut.
One thing is certain: prior to refrigeration as we know it, our ancestors preserved many foods through wild fermentation or culturing. They learned that this would provide a source of nutrients during the non-growing months.
Captain James Cook always brought a large batch of sauerkraut with him on his long sea voyages because he quickly learned it prevented scurvy, a disease resulting from vitamin C deficiency.
No matter where sauerkraut originated, we're glad it made a comeback because there are many reasons to love this raw kraut.
Raw Sauerkraut Benefits
Raw sauerkraut is a lacto-fermented food with health benefits far beyond fresh cabbage.
As is true with all fermented foods, sauerkraut is rich in beneficial gut-healthy probiotics. One of the benefits of consuming foods rich in probiotics and live enzymes is that it makes the nutrients more bio-available, making it easier to digest.
Sauerkraut is rich in fiber, vitamins C, K1, and B6. It's also a great source of iron, manganese, folate, and copper. These nutrients contribute to a healthy immune system.
In addition to improving digestion, sauerkraut probiotics help the body absorb these nutrients more easily, making it more nutritious.

Sauerkraut Salt Calculator
Using weight measurements (grams) instead of volume (cups) produces most reliable results. That's because cabbage weight varies by season, freshness, and storage.
Weighing your ingredients is extremely helpful, especially if this is your first time making fermented sauerkraut. I hope that over time, you will be confident to make this without using a kitchen scale. I have included volume measurements in the recipe card for your convenience.
But let's talk about that sauerkraut salt calculator.
This recipe uses a 2.5% salt concentration. That means for every 100 grams of cabbage (plus other add-ins should you choose), you will need 2.5 grams of sea salt. This recipe calls for 650 grams of cabbage (which is approximately ½ cabbage head).
Based on this equation, 2.5% of 650 grams is 16.25 grams. I rounded it down to 16 grams of sea salt needed. You can use a 2% salt concentration but I wouldn't go any lower to avoid mold.
You can use this sauerkraut salt calculator to make any batch of sauerkraut, however small or large.
This is a very simple raw sauerkraut recipe. But you can adapt it to include other fun additions like shredded carrots. Just take 2.5% of total weight of the volume of your cabbage plus other veggies if using and that will be your salt amount in grams.
For more information on unrefined salt, see my post on Unrefined Salt Guide and the importance of mineral-rich salts.
Helpful Tips
- Fermentation Tip: During the fermentation process, keep your sauerkraut at room temperature and out of direct sunlight. And burp your jar daily for the first two weeks or during the bubbly stage.
- Money Saving Tip: Use the leftover brine as "gut shots" for their prolific beneficial bacteria or use it as a starter culture in other ferments.
- Make-Ahead Tip: Double the recipe and use the entire head of cabbage since you already have everything out.
- Food Safety: Never eat anything with mold on it. Toss the food immediately if you see any kind of mold growth that looks fuzzy, pink, blue, or green.
💭Make it Nutrient-Dense: For optimal gut health, practice including fermented foods with every meal. It's an easy way to consume naturally grown Lactobacillus bacteria.
Ingredients
Ready to make your own sauerkraut? All you need are these two ingredients:
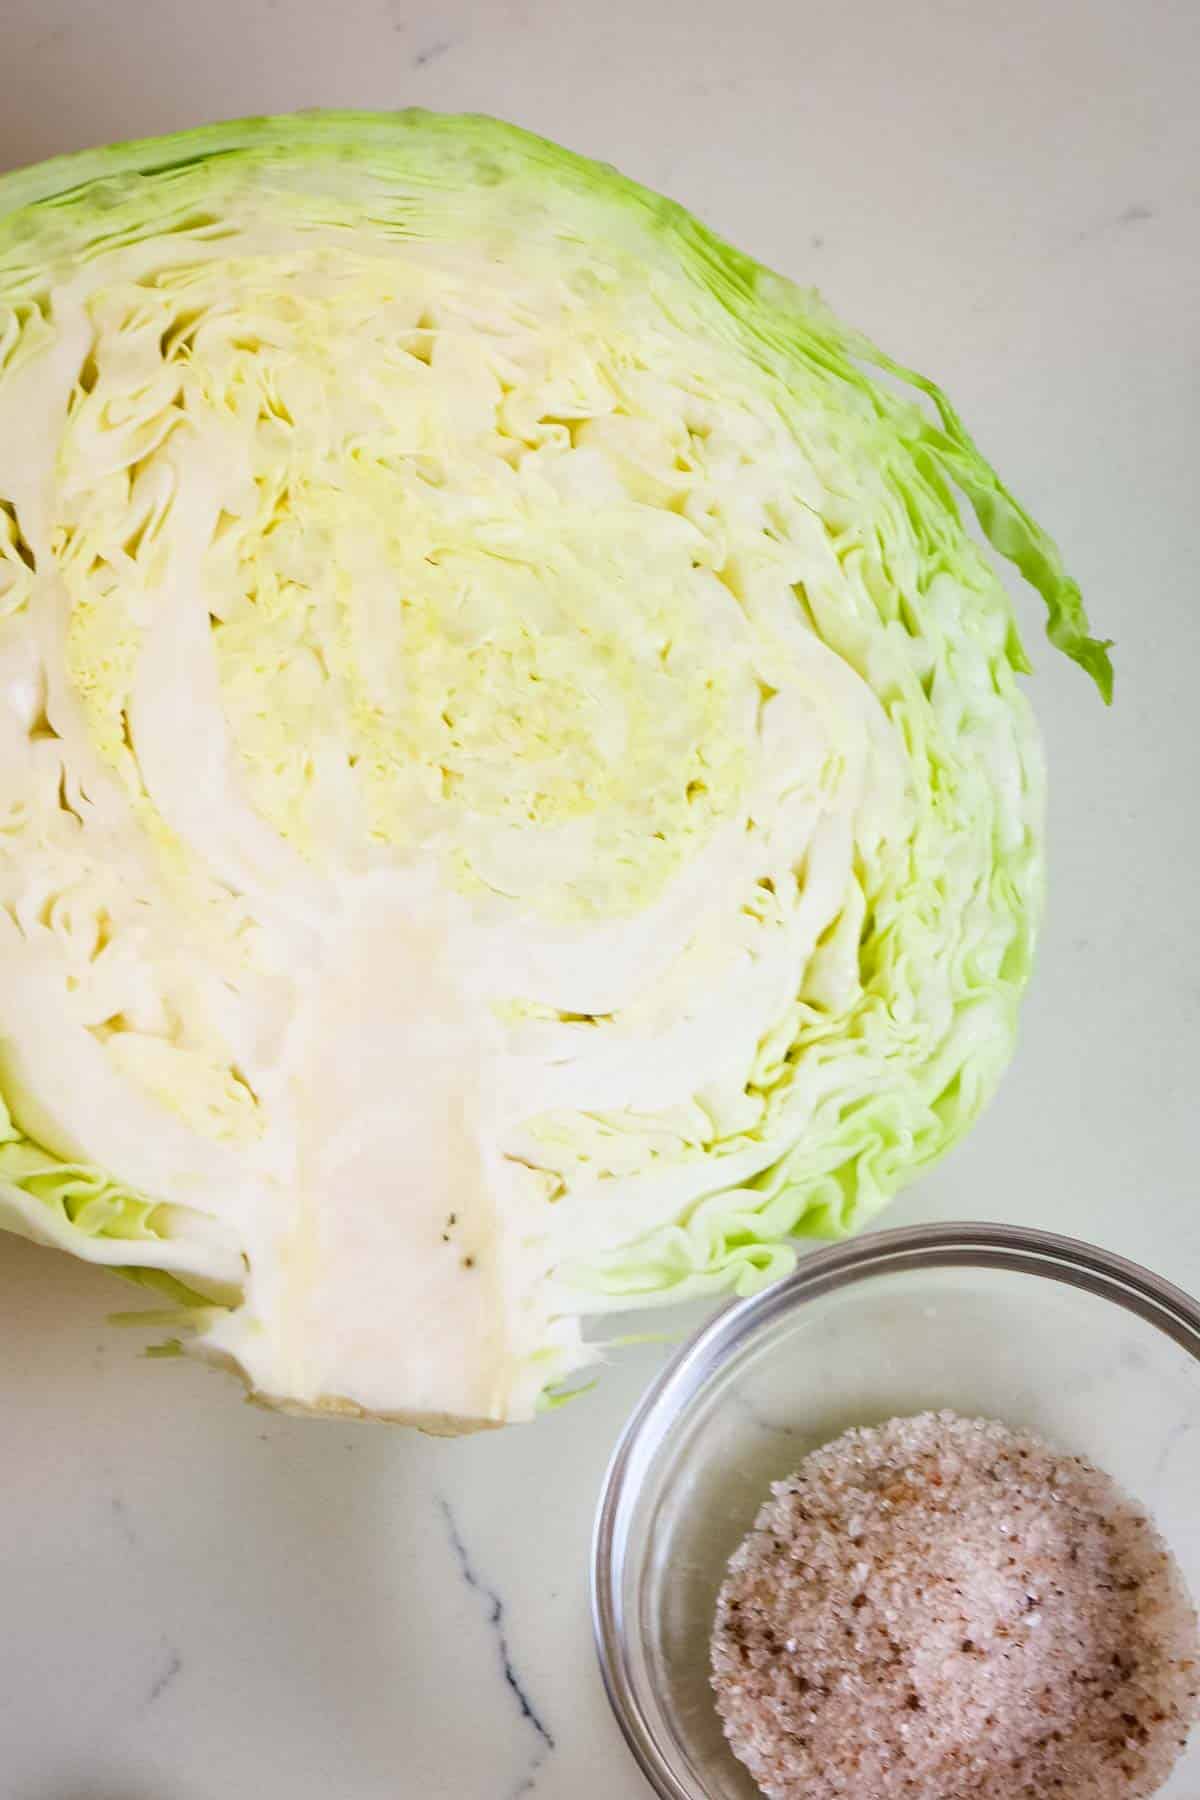
- green cabbage: As with most fermented foods, organic is best but if not feasible conventional cabbage will work. Cabbage is on the EWG's Clean 15 list and we're removing outer cabbage leaves anyways, so don't fret if non-organic is all that you have.
- unrefined sea salt: kosher grains or fine salt is best but avoid coarse salt. And for the love of all good and fermented things, please don't use iodized salt. Our favorite is Redmond's Kosher Sea Salt. Use code NOURISH for 10% off.
A digital kitchen scale is helpful for making fermented sauerkraut for the first time. In lacto-fermentation, it's a good idea to use high salt concentration to avoid bad bacteria overgrowth as the bad yeasts do not tolerate salt.
We will use a 2.5% salt concentration in this recipe. If you use this basic sauerkraut recipe on a regular basis, using the kitchen scale will eventually become unnecessary.
Step-by-Step Instructions
The complete printable recipe is below in the recipe card for your convenience.
This homemade sauerkraut recipe calls for these two basic ingredients: green cabbage and unrefined salt.
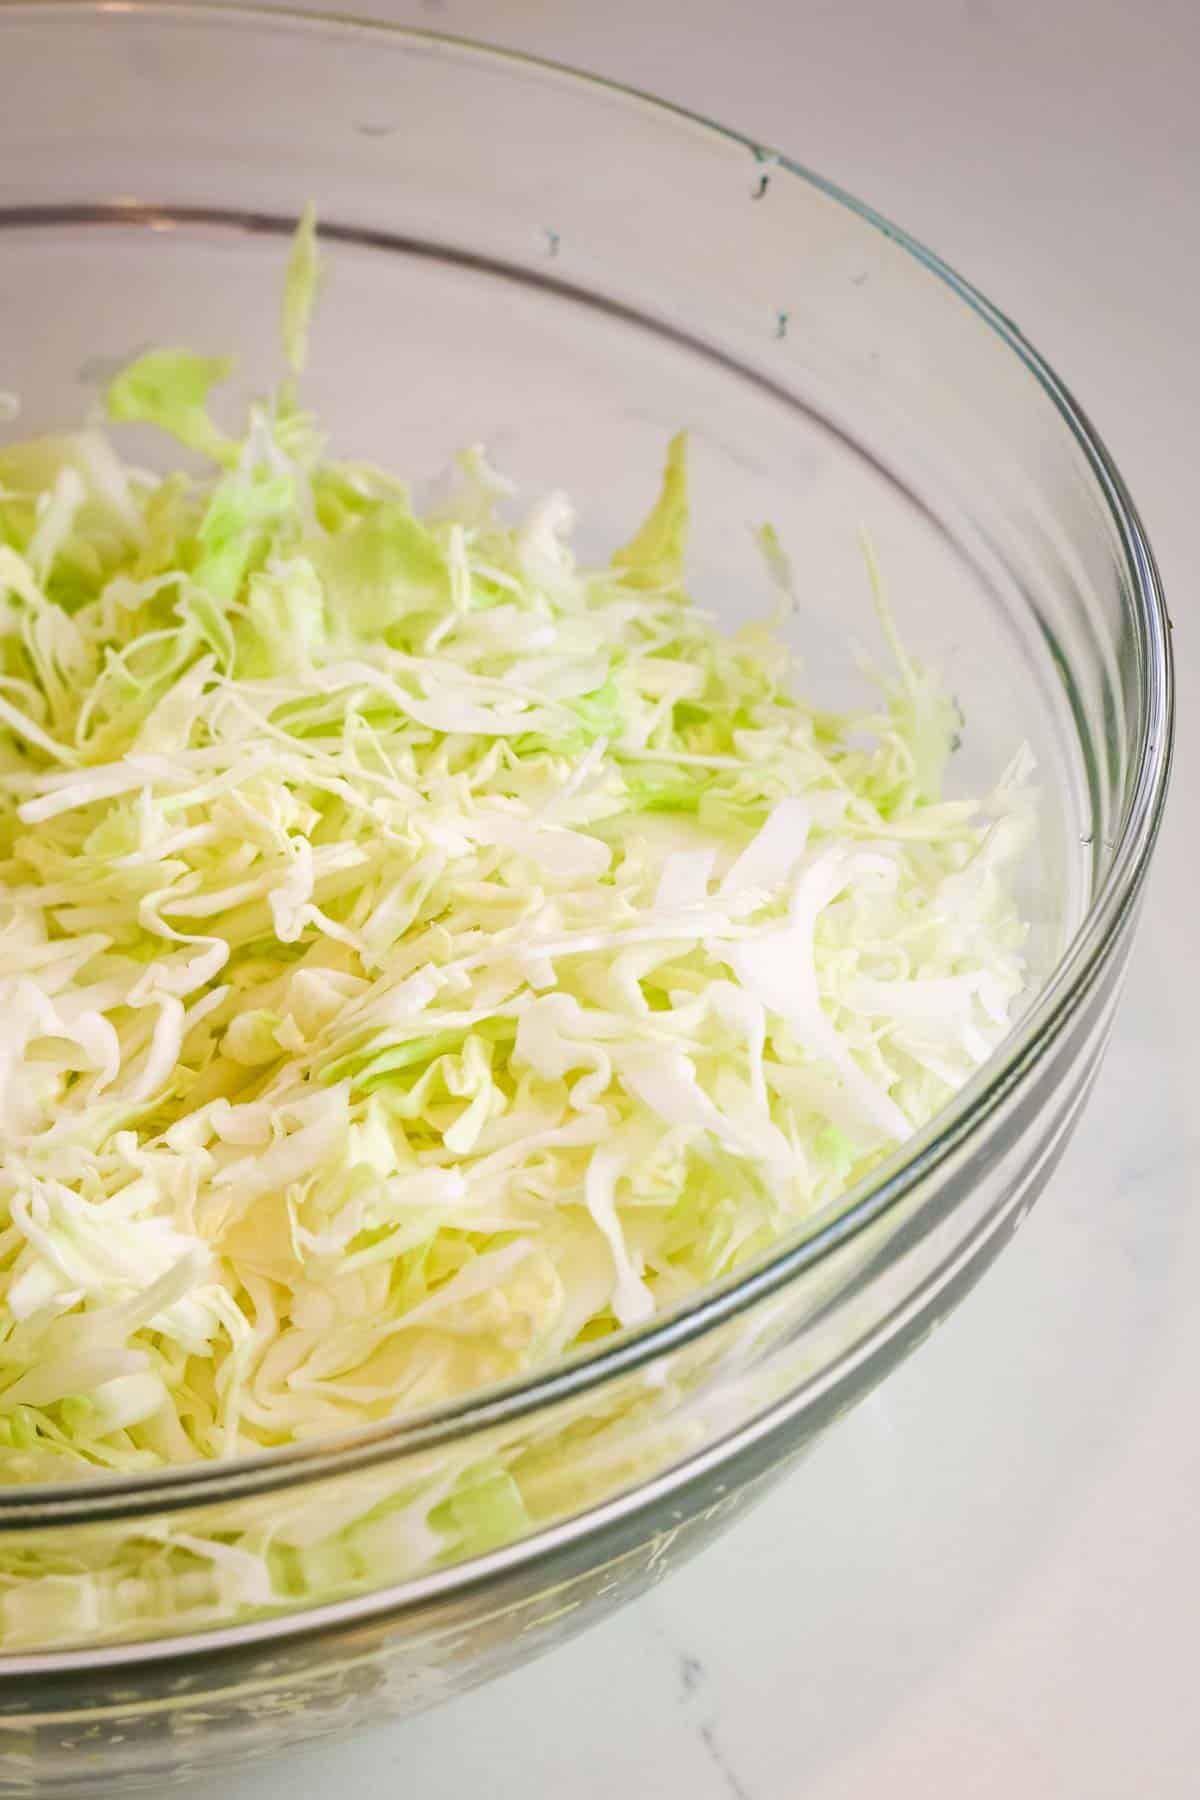
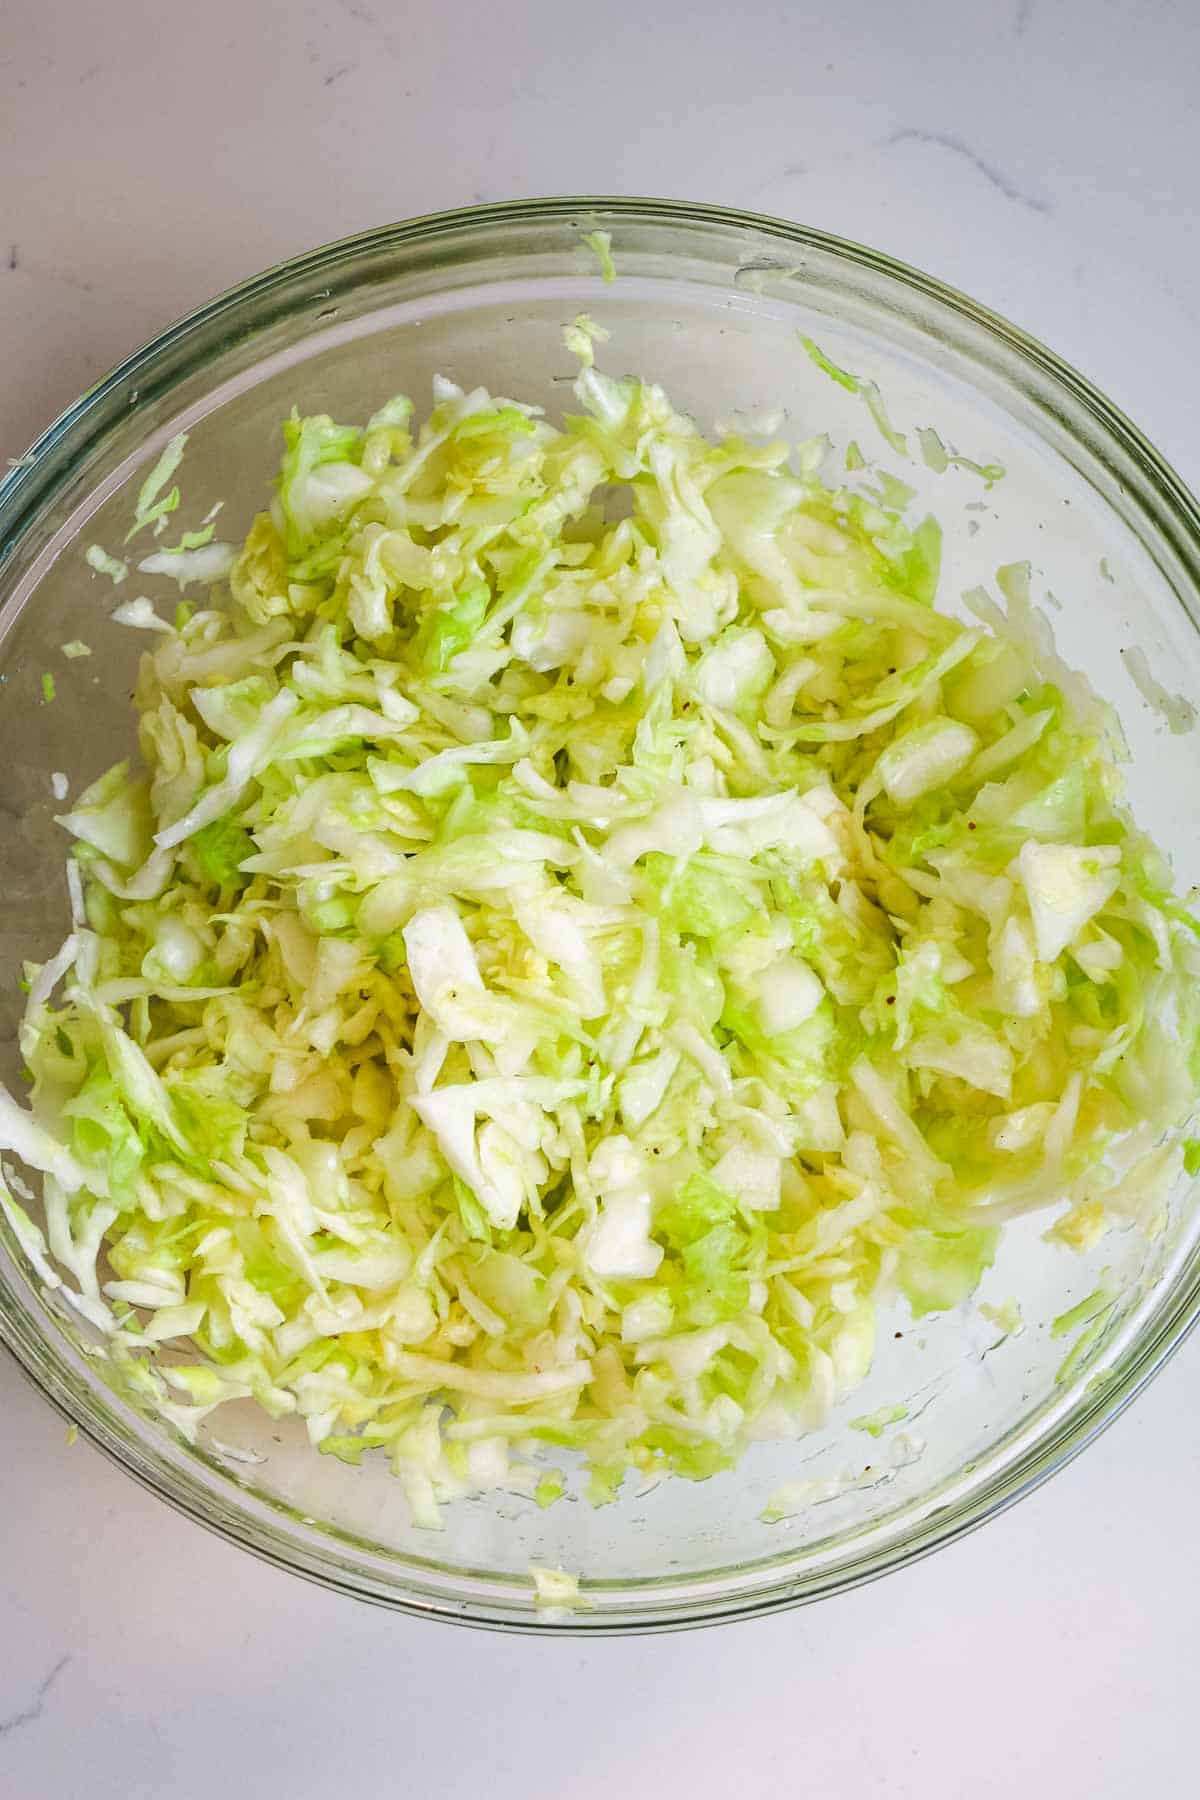
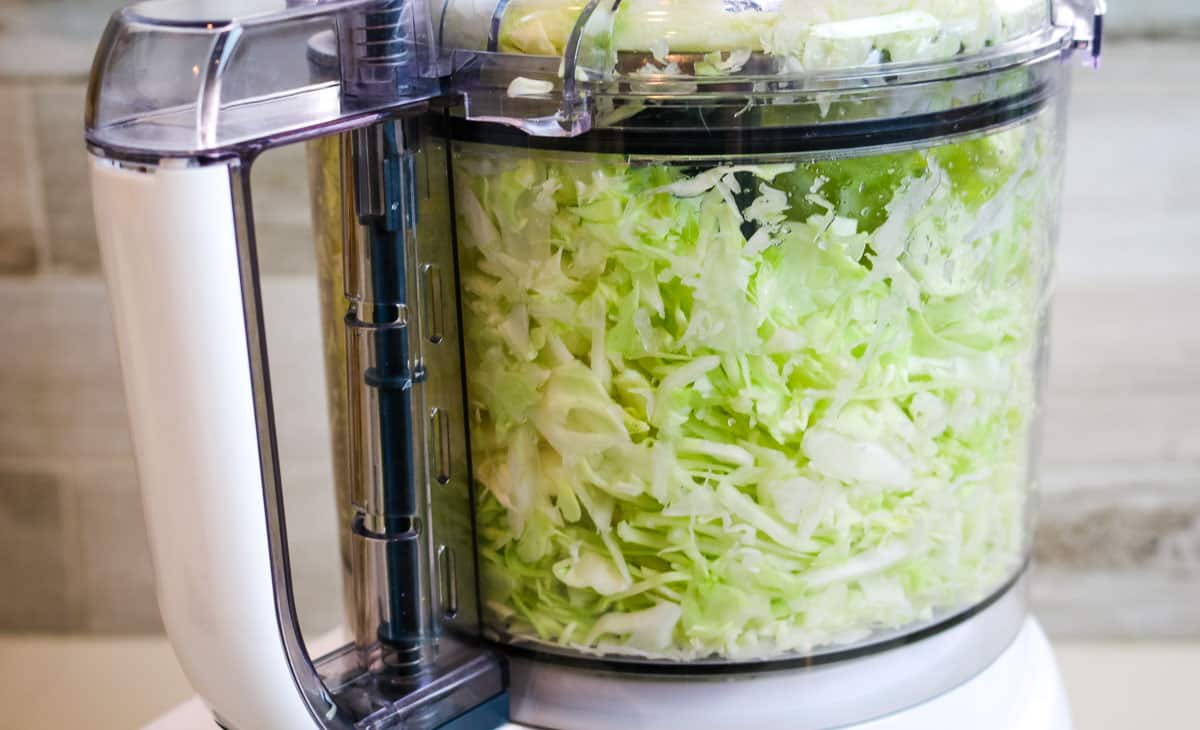
Step 1. Shred cabbage
Shred half of a head of fresh cabbage. Add to large mixing bowl. Weigh the cabbage to have the appropriate amount of sliced cabbage.

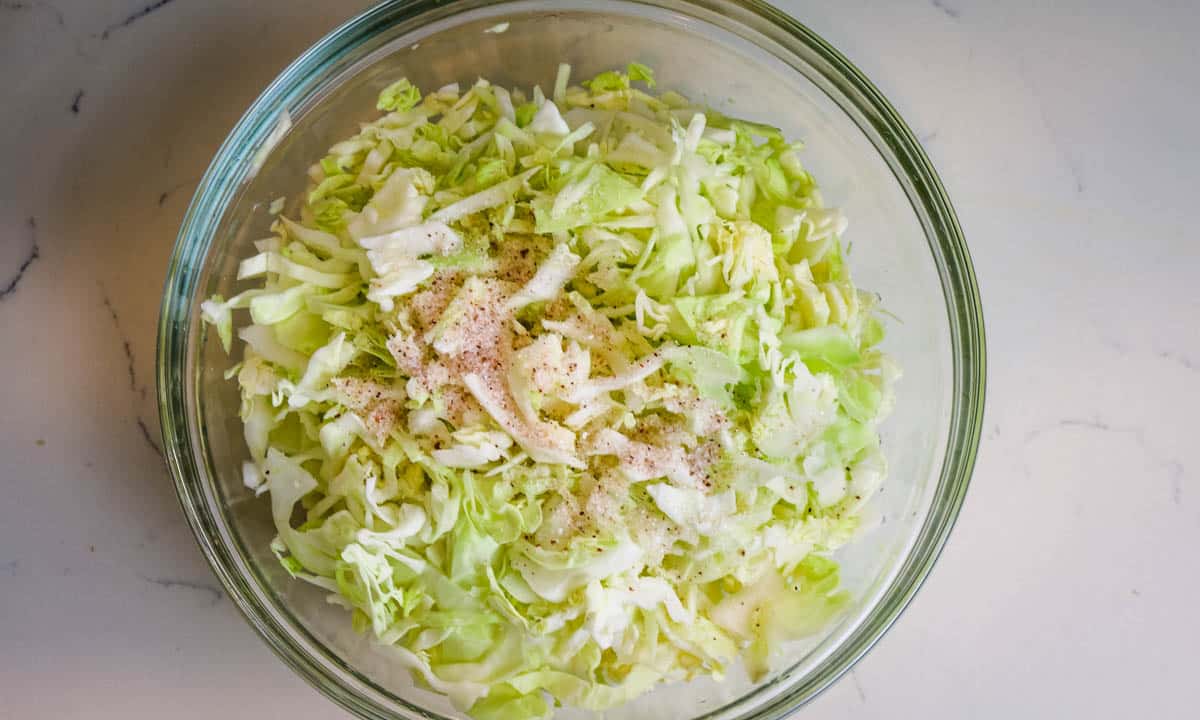
Step 2. Add salt
Add unrefined sea salt. This too should be weighed using a kitchen digital scale.
💭Pro tip: There are various methods to shred cabbage. The easiest is using a food processor because it's fast, convenient, and you get thinly shredded cabbage. Using a mandoline comes a close second and lastly, you can cut the cabbage with a chef's knife.
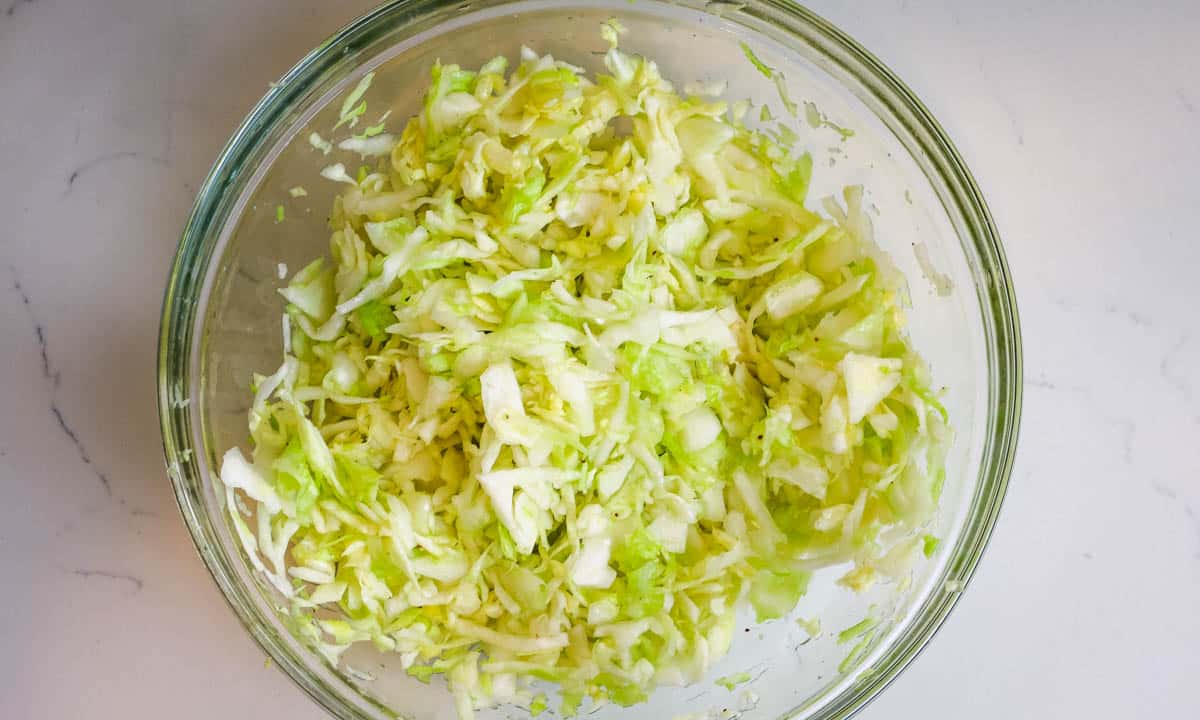
Step 3. Massage cabbage
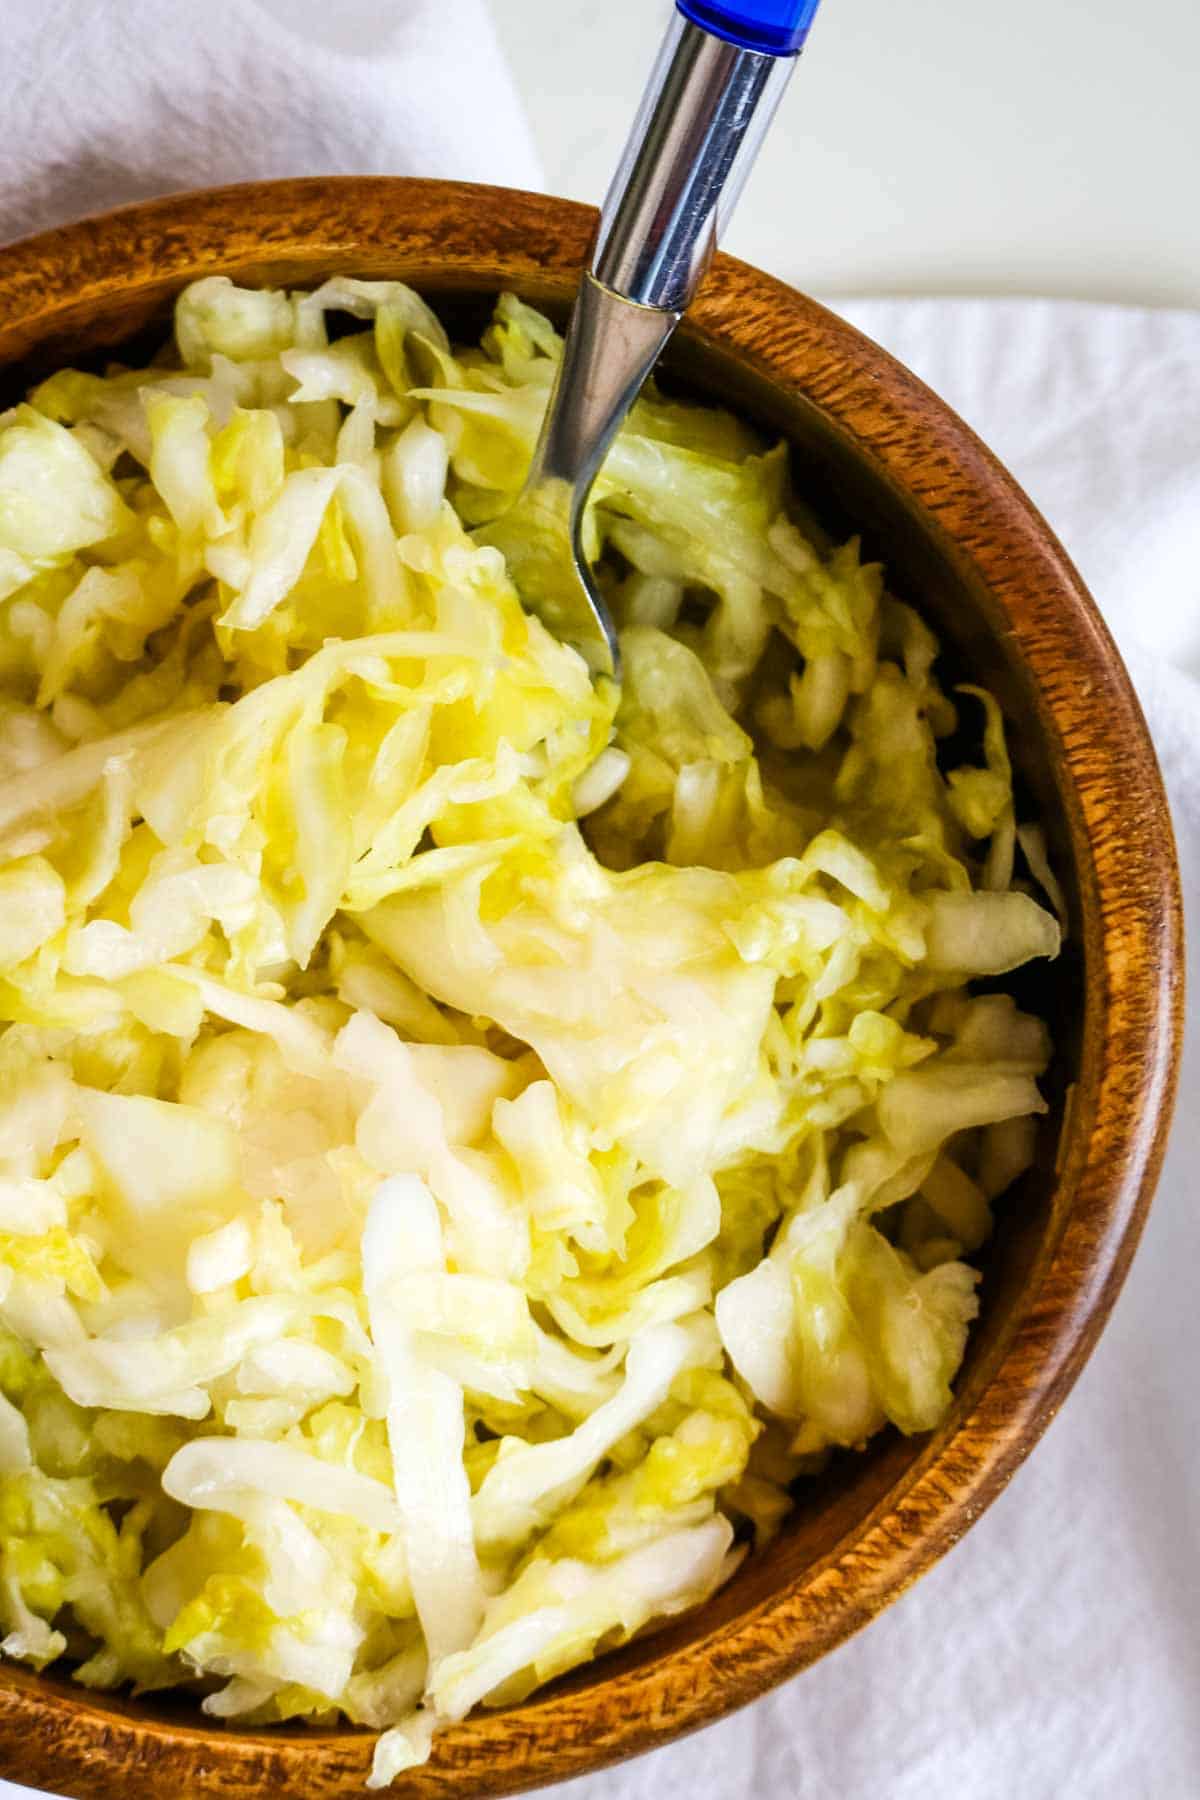
Using hands or a wooden pounder, massage the cabbage and salt until it starts to release liquid.
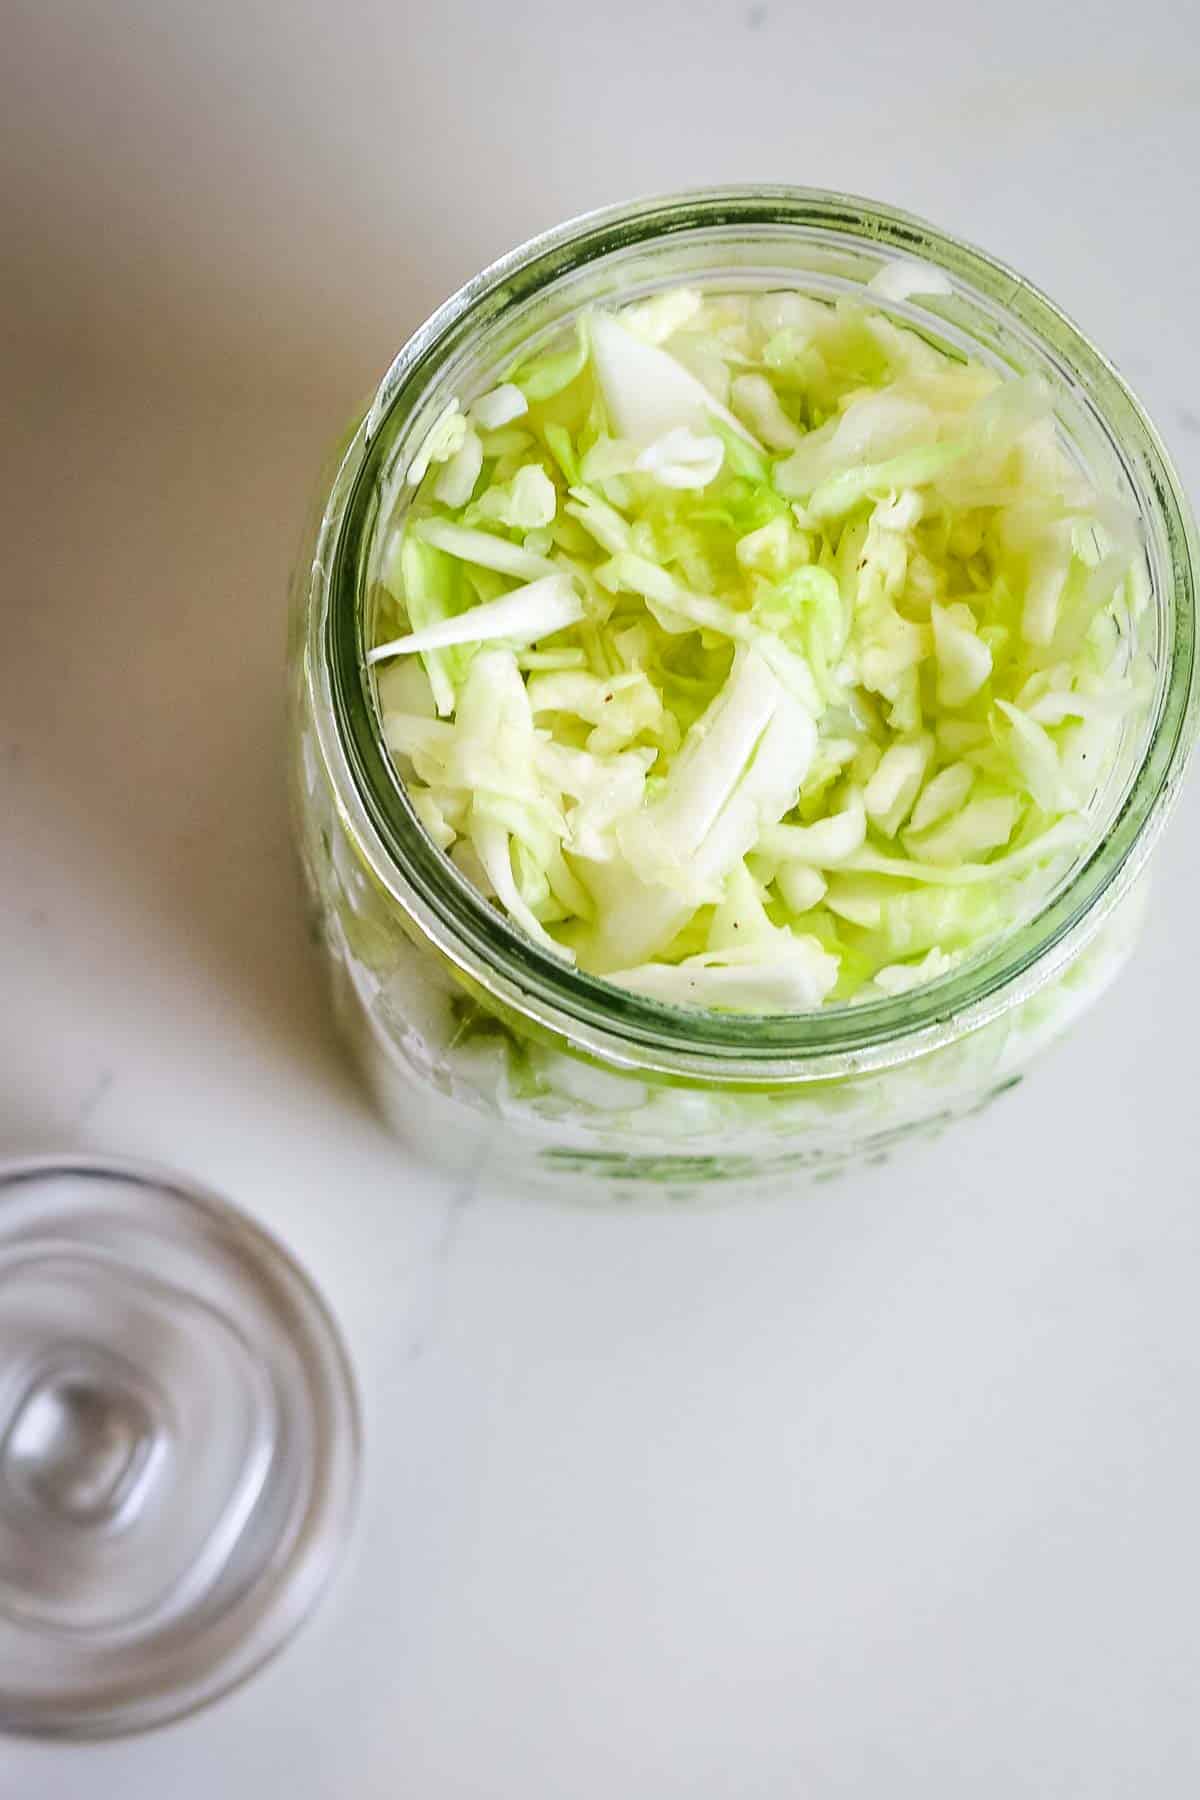
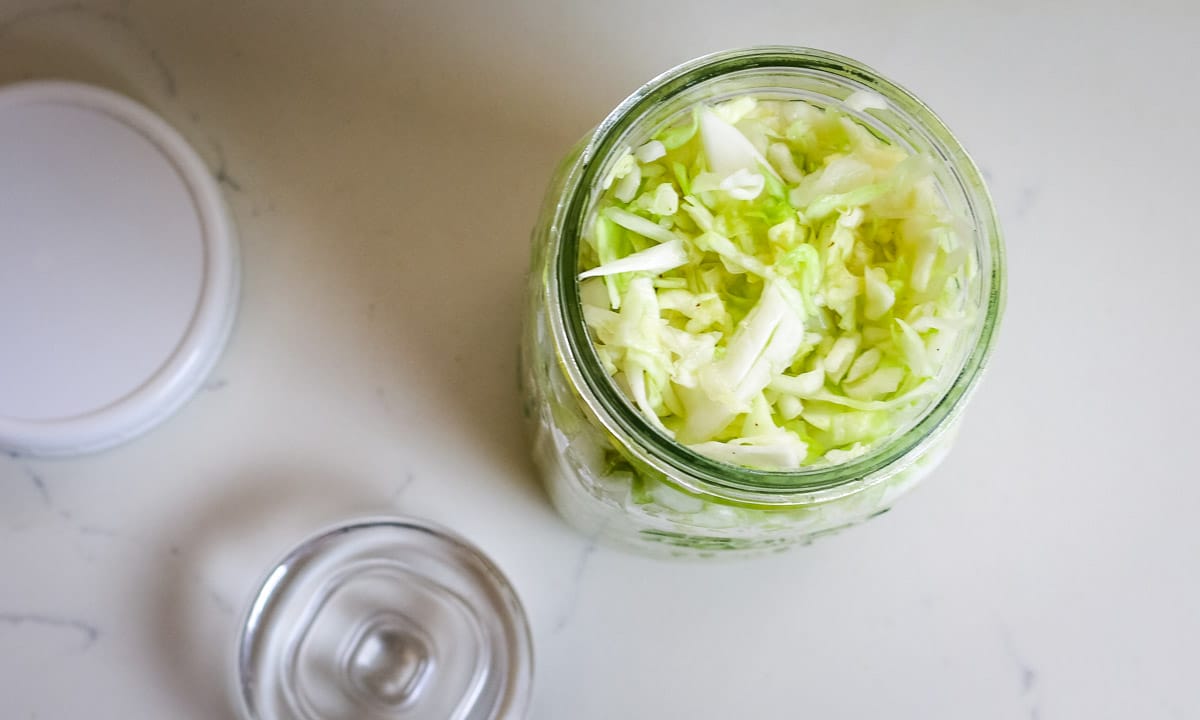
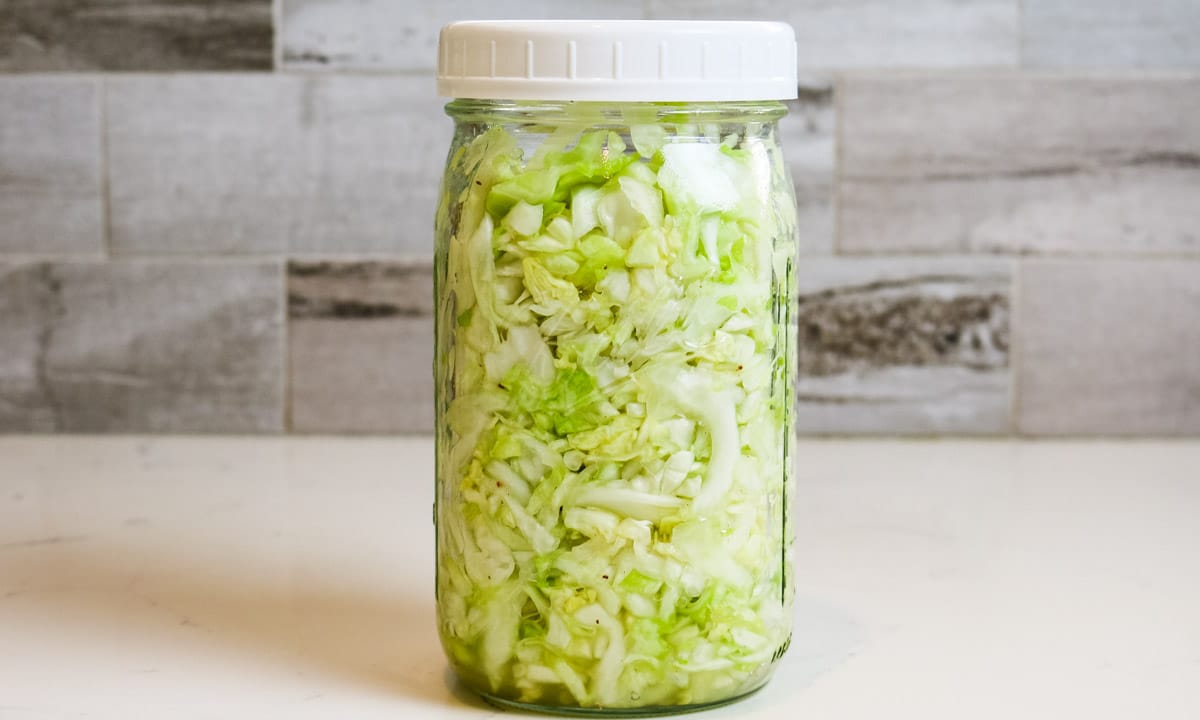
Step 4. Transfer to jar
Transfer the cabbage and all juices to a quart size jar or a fermenting crock (I used a mason jar), packing it in very well.
💭Pro Tip: For softer sauerkraut, massage the cabbage vigorously. For crunchier results, massage just enough to release some liquid and combine the salt.
Step 5. Add weight
Place your fermentation glass weight on top of the sauerkraut. Feel free to push the weight down to make sure it all fits. If you don't have glass weights, use a cabbage leaf instead.
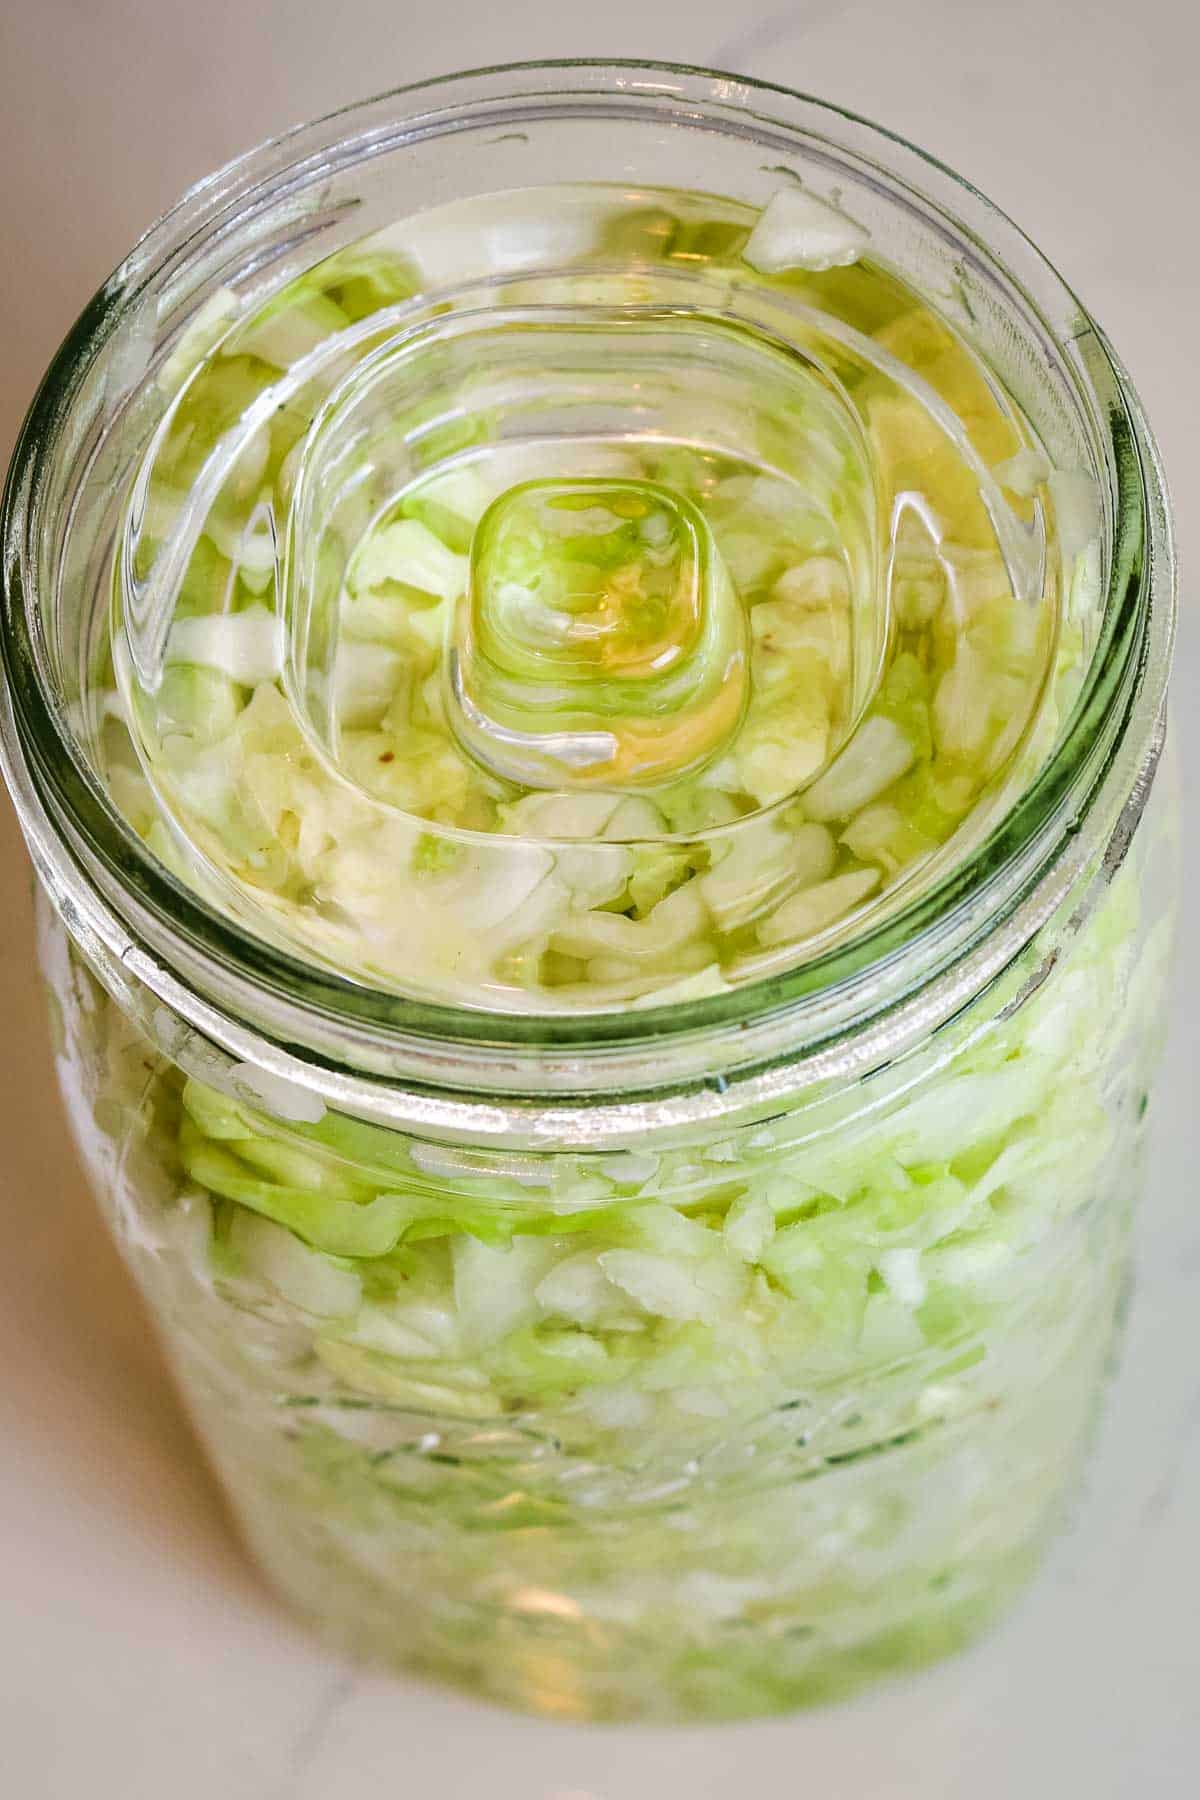
Step 6. Set aside to ferment
Over the next few days, cabbage will release more liquid making it easy to keep all cabbage fully submerged in brine. Burp the jar daily to release carbon dioxide.
Fermentation Timeline
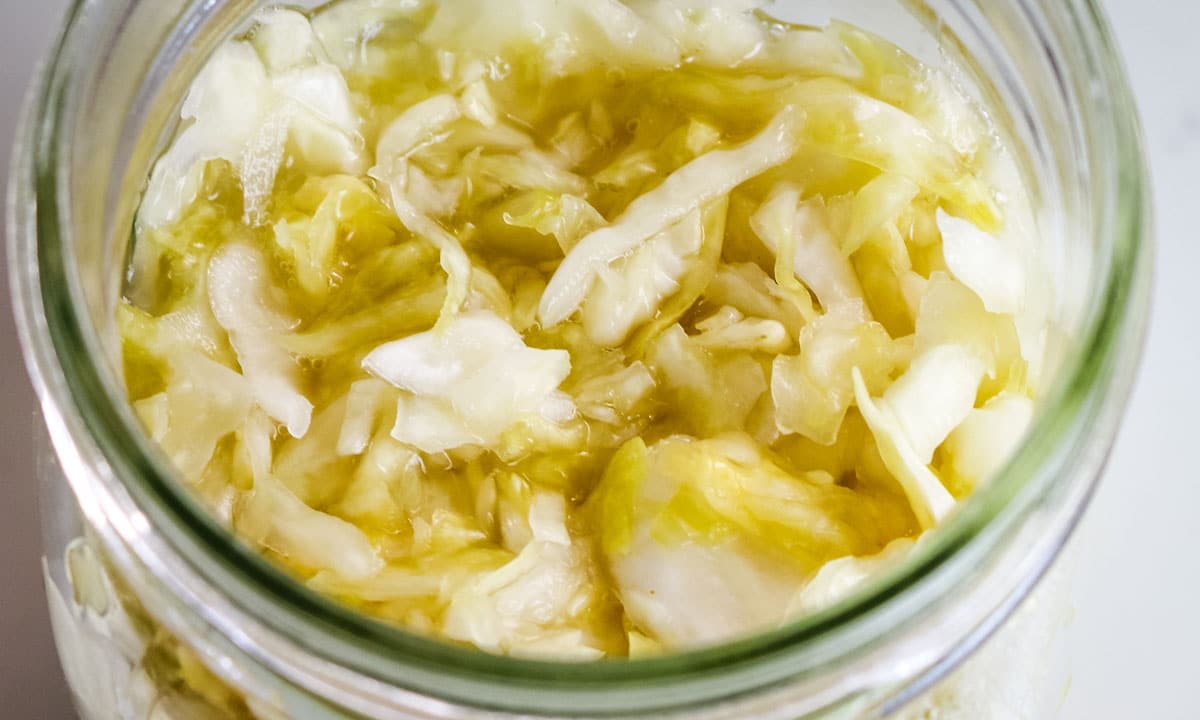
During the bubbly phase of fermentation, open the jar to release carbon dioxide daily. Keep the raw kraut loosely covered.
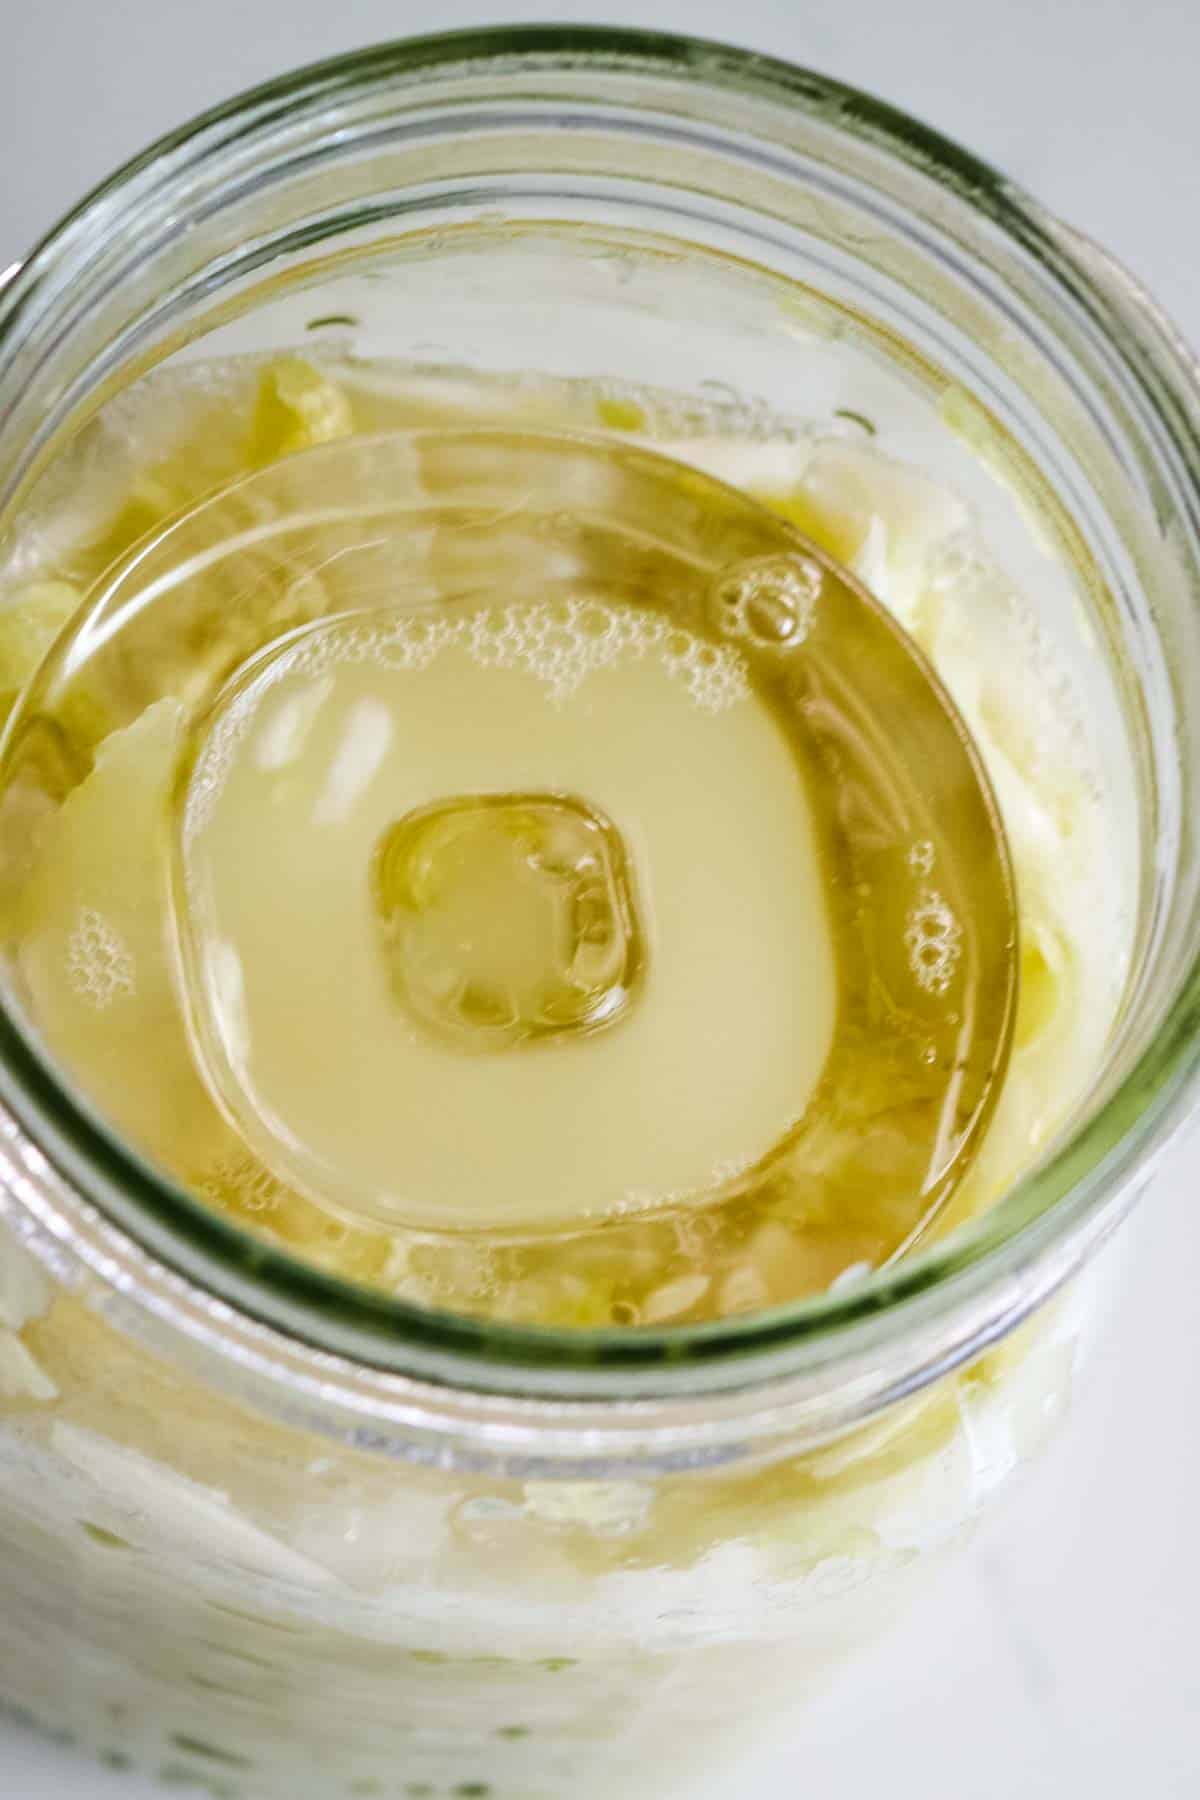
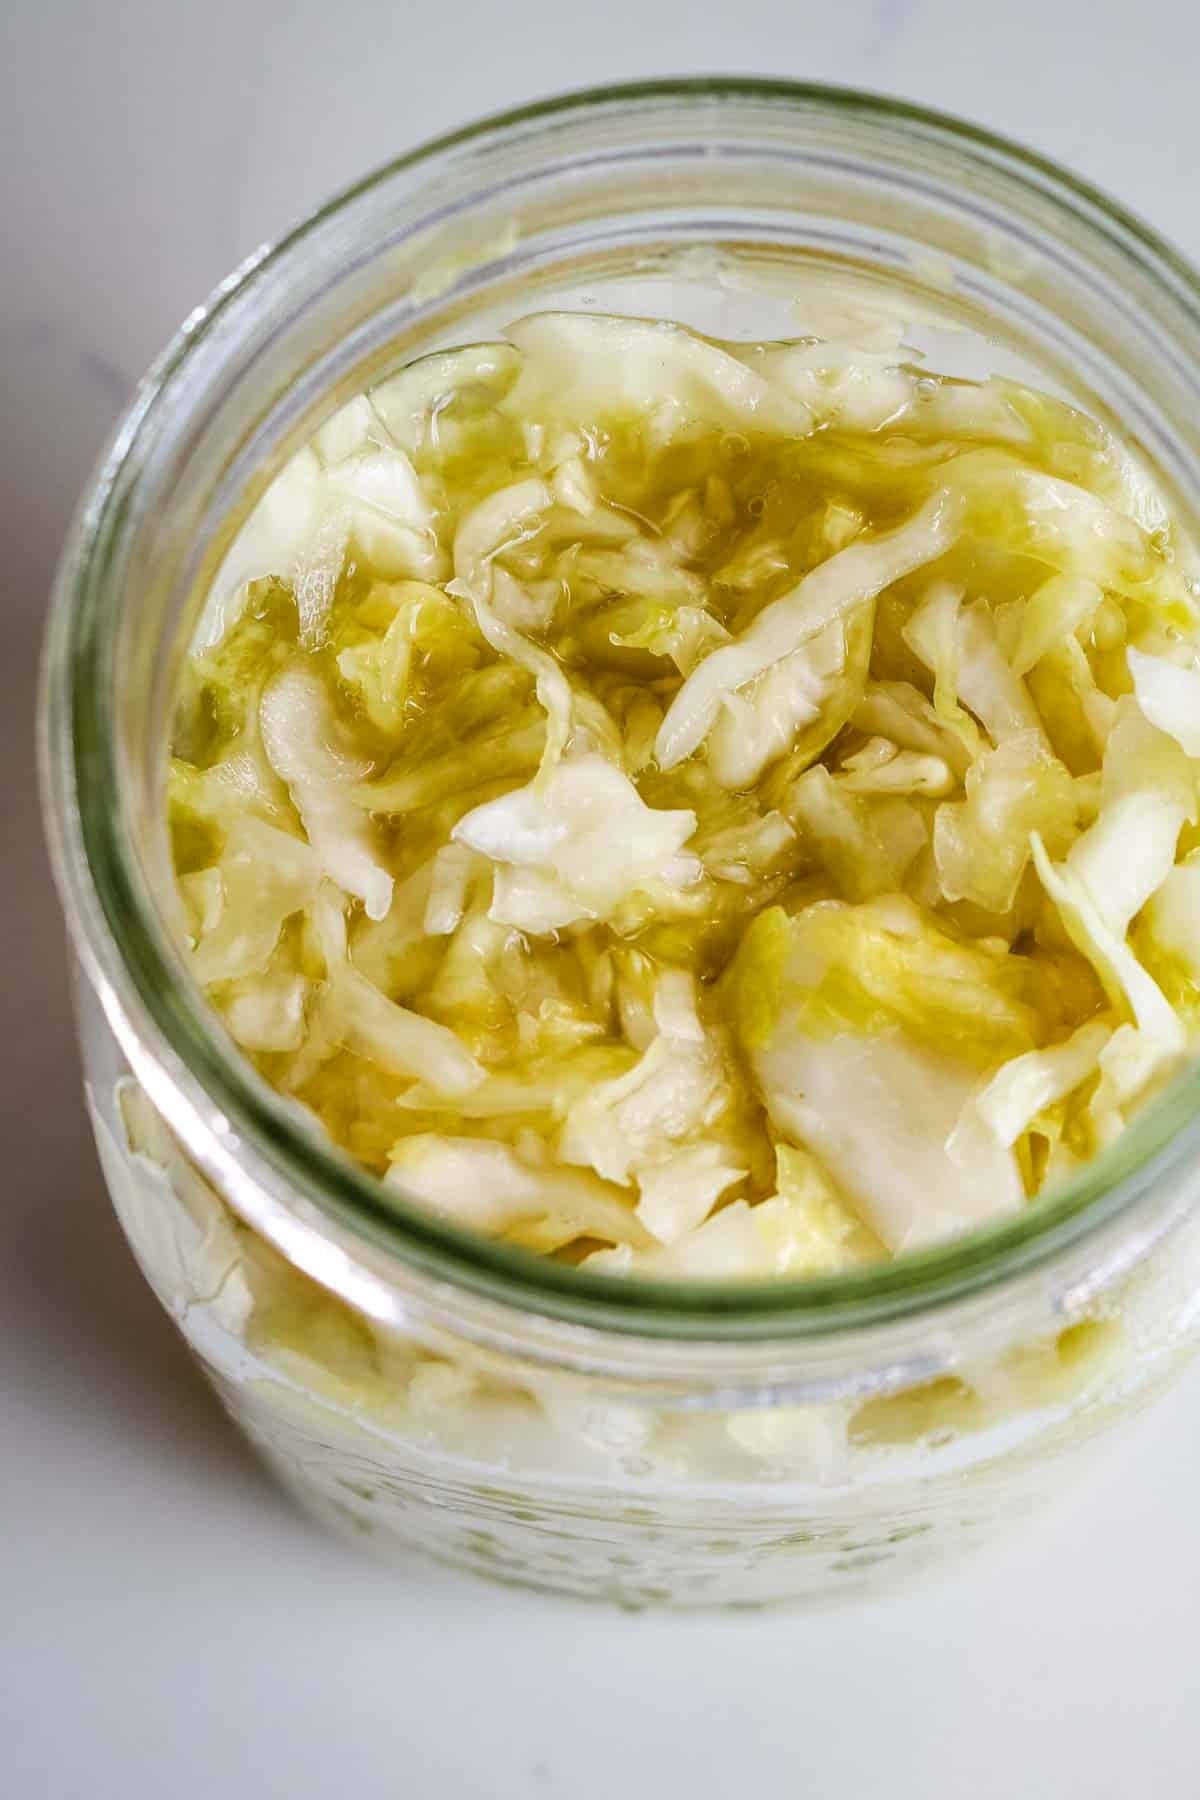
You'll notice that the amount of brine (salty water) will increase each day. It will be noticeably cloudy. The cabbage will also lose its luster of green hue and become more muted.
Check out this picture of the fermentation process. Notice the color of the cabbage as well as the amount of juices released on Day 6.
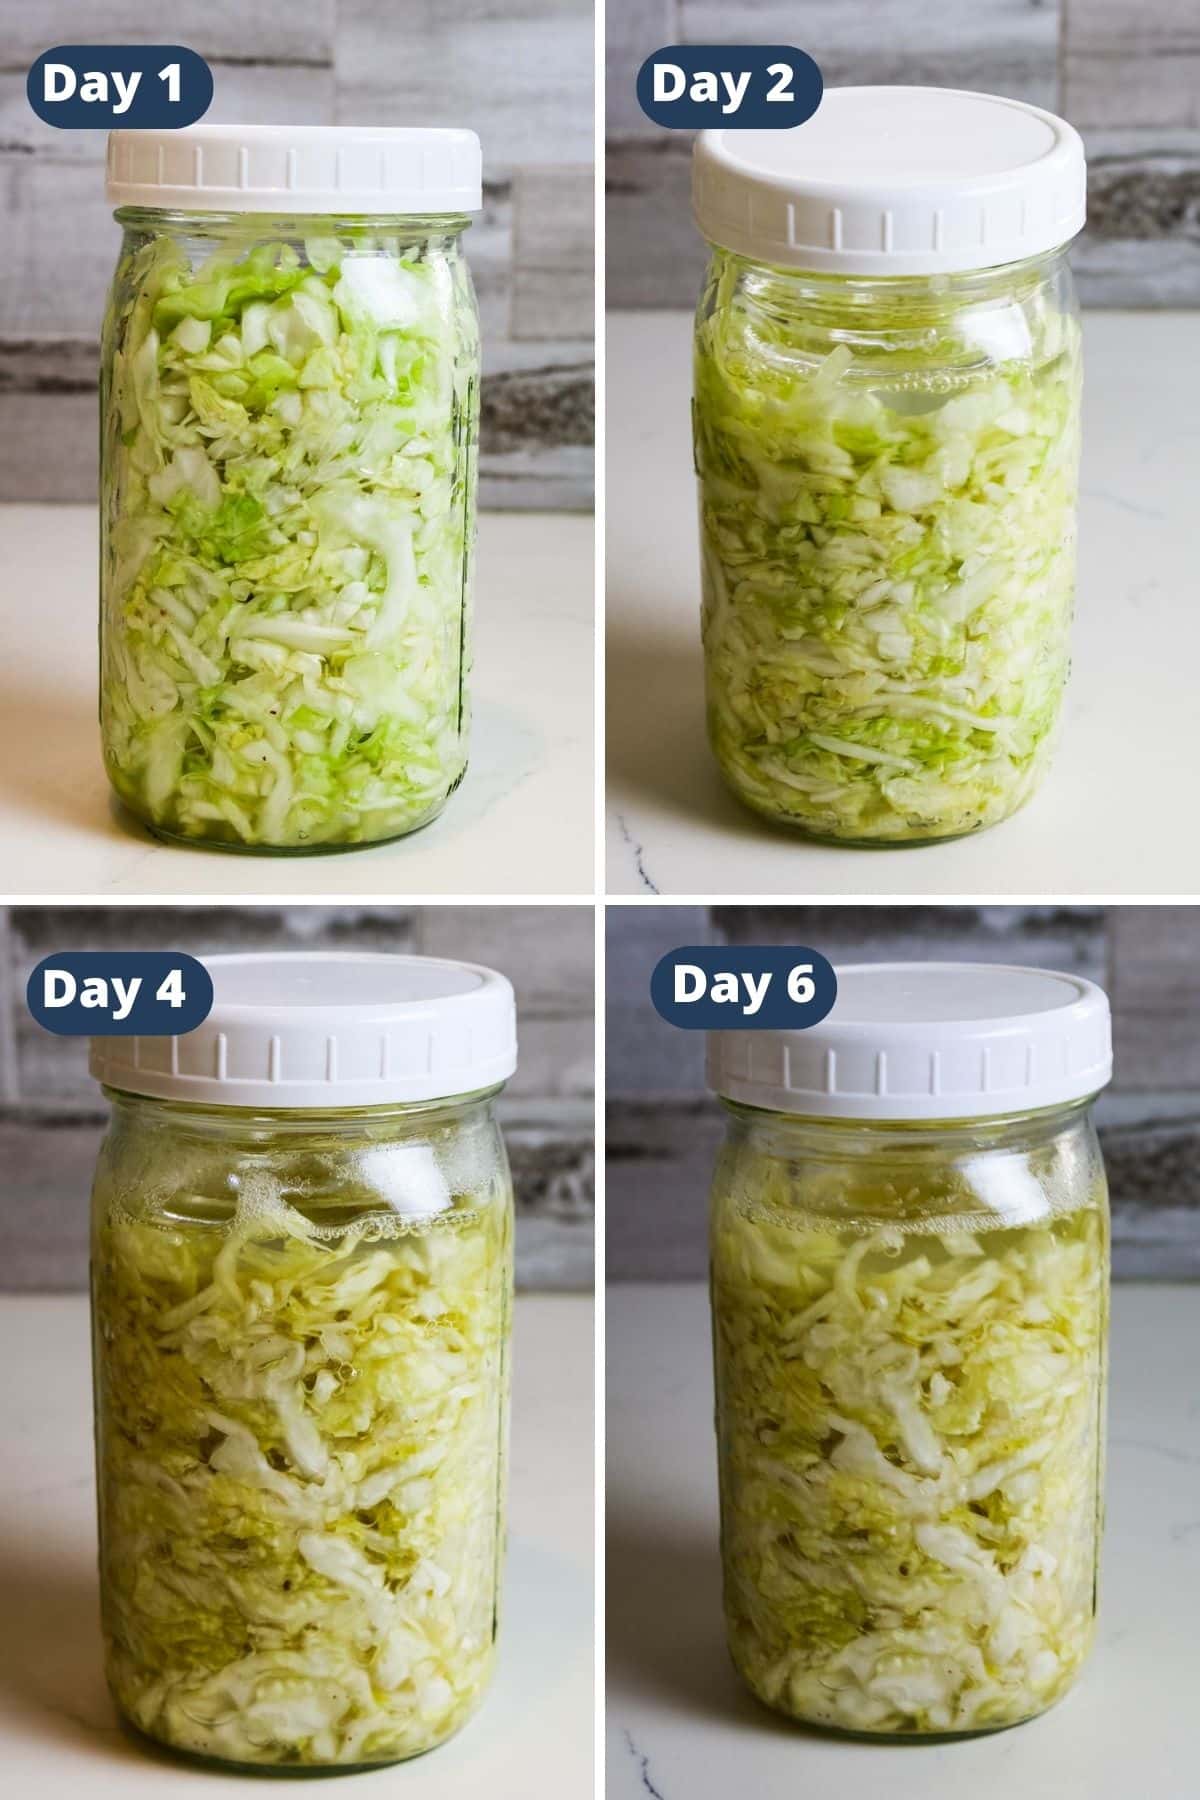
I find it so fascinating how much water is in the cabbage. That's why I love this recipe - no additional water is added yet it yields consistent results every time. Instead, we're drawing water out of the cabbage that naturally occurs during fermentation.
This homemade version of sauerkraut can take up to 3 weeks to ferment at room temperature. Keep in mind there are so many variables that can speed up or delay this fermenting process.
So as with any other fermented food, the best way to gauge fermentation is by doing a taste test. I typically start tasting around day 5. But it may need the full 21 days of fermentation at room temperature.
Continue burping the jar daily and checking on it to ensure all cabbage is submerged in the brine.
Transfer to the refrigerator when it has cultured to your liking. It can be kept in a cool place like the refrigerator for up to 6 months.
FAQs
Sauerkraut is incredibly nutritious. Raw sauerkraut retains all the healthy live enzymes and probiotics. Sauerkraut is rich in vitamins, minerals, and fiber. The probiotics helps the body absorb these nutrients, increasing the nutrient content even further.
Weighing your ingredients will give you consistent results. Follow these instructions: Turn on your kitchen scale and set the unit to grams. Place your prep bowl on scale and press tare (this will subtract the weight of the bowl, giving you a 0.0 weight).
Add cabbage until you reach 650 grams. Zero out the scale again (press tare) and add 16 grams of sea salt. Remove the bowl from the kitchen scale and proceed with the rest of the recipe.
A kitchen food processor is the easiest way to shred cabbage for sauerkraut. Discard the outer leaves of the cabbage and rinse the cabbage head under running water. Cut the cabbage in half, then in quarters, and remove the core.
Cut the quartered wedges in half, lengthwise, creating eight wedges. Run these wedges through a food processor using a thin grater attachment. If using a knife, place the wedges on a large cutting board and press down to secure them. Run a sharp knife across the wedges cutting into thin ribbon-like strips.
Helpful Tools & Links
Below are some affiliate links that may be helpful to you as you make this recipe. You probably have most of these on hand. The best thing about this recipe is that you don't need any specialty items (besides the kitchen scale).
You can find most of these items cheaper at your local store, but having a link helps you know what you're looking for.
- Tools: chef knife, cutting board, large mixing bowl, kitchen digital scale, food processor, mandoline slicer, fermenting weight
- Ingredients: real salt - a good salt is important!
- Storage Supplies: wide-mouth mason jars for leftovers, Weck preserving jars
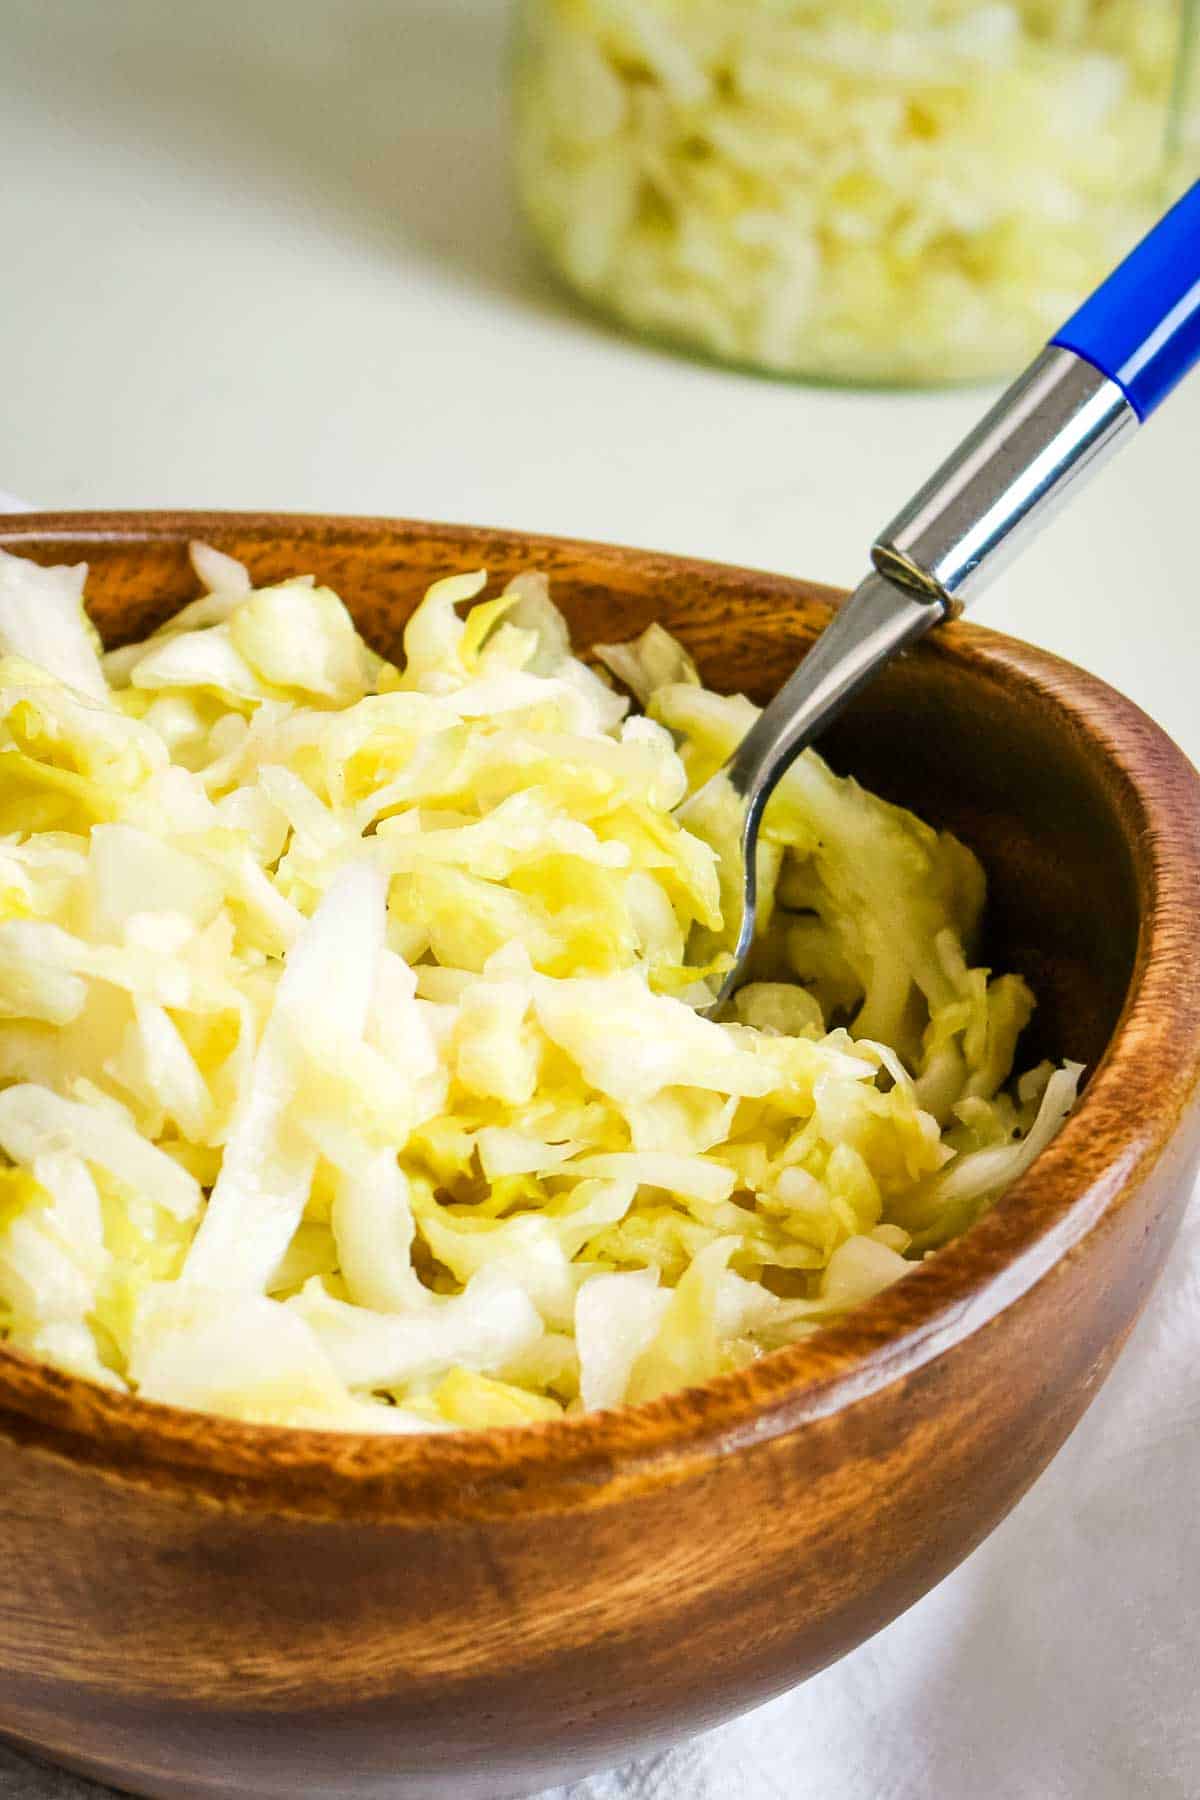
Serving Suggestions
In Slavic cultures, sauerkraut was considered a salad. After all its nutritious characteristics, it makes sense that it would be served as a salad. It was often enjoyed with a little red onion, and fresh dill and tossed with a flavorful oil.
My favorite way is to gently toss it with a blend of roasted walnut oil (for it's robust flavor) and MCT oil (for its' many health benefits). The fats in the oil make the nutrients more bio-available.
Just 3 tablespoons of raw sauerkraut is a lovely addition to any meal. It adds wonderful nutrients and probiotics.
In addition, sauerkraut is a timeless topping to hot dogs, polish sausages, and specialty soups.
How will you be enjoying homemade raw sauerkraut? Share in the comments below.
Looking for ways to use up the other half of cabbage? Here are some ideas:


Did you make this? Please leave a ⭐ recipe rating in the recipe card below and leave a review in the comments. Thank you!💚
Printable Recipe
Raw Sauerkraut
Ingredients
- 650 grams green cabbage approximately ½ medium-large cabbage head or 9 cups of shredded cabbage
- 16 grams sea salt approximately 2-½ teaspoons
Instructions
- Discard outer leaves of the cabbage and rinse the cabbage under running water. Cut the cabbage in half, then in quarters and remove the core. Cut the quartered wedges in half, lengthwise creating 8 wedges. Cut thin ribbon-like strips across these wedges. Or run the wedges through a food processor using the grater attachment.

- Add 650 grams of shredded cabbage to your bowl. This will be approximately ½ medium-large cabbage head or 9-½ cups. (See notes how to accurately weigh your ingredients).

- Add 16 grams of unrefined sea salt.

- Massage cabbage with your hands until it starts releasing liquid. For softer sauerkraut, massage cabbage vigorously. For crunchier result, massage just enough to combine the salt.
- Transfer the cabbage and all the released juices to a quart-size jar, packing it in very well.
- Place your fermentation weight on top, making sure all shredded cabbage and the weight is fully submerged in the liquid. Feel free to push the weight down. Over the next day, as cabbage releases more liquid, the fermentation weight will easily be submerged in the brine.
- Set aside at room temperature away from direct sunlight for 21 days or until fermented to your liking. Afterwards, transfer to refrigerator. Burp the jar daily during the fermentation phase.

Notes
- It's always best practice to sterilize your fermentation jar and weight before proceeding with recipe. Make sure it's washed well first. To sterilize: fill the jar with boiling hot water and allow to sit for 5 minutes before pouring the water out.
- Using weight measurements instead of volume will give you consistent results. Cabbage weight will vary by seasons, freshness, and storage, so using a kitchen scale will garner best results.
- To accurately weigh: Turn on your kitchen scale and set it to weight in grams. Place your prep bowl on scale and zero/tare it out (this will subtract the weight of the bowl, giving you a 0.0 weight). Add cabbage until you reach 650 grams. Zero/tare out the scale again and add 16 grams of sea salt. Remove the bowl from the kitchen scale and proceed with the rest of the recipe.
- Recipe makes 1 quart or 16 servings. Serving size is ¼ cup.

Christopher Stogdill says
I ferment my kraut in a food-safe plastic bucket fitted with a gamma lid that has a grommet for an airlock installed. When I'm done shredding/mashing the cabbage I put a sliver of dry ice in the liquid and put on the lid and airlock. They CO2 form the dry ice is heaver than the air already in the lid and as the dry ice "melts" it pushed out all the "regular" air. The end result is much cleaner and there is no mold in the anaerobic conditions inside the bucket.
I usually let mine ferment for months and can it, which is less than ideal. This method gives me more "juice" so I never have to add any liquid when canning.
Anya says
That's interesting, Christopher. Never heard of adding dry ice to the sauerkraut. But I have left kraut to ferment for extended periods of time. Thanks for stopping by. 🙂
Joy @ Joy Love Food says
I'm a big fan of sauerkraut, but have never made my own, I need to try this! Thanks for sharing at What'd You Do This Weekend?!
Danielle says
Hi! Wondering how long the sauerkraut is good in the fridge for? Thank you!
Anya says
A very long time as long as it stays submerged under brine. Keep checking to make sure it's in liquid and it will last months!