

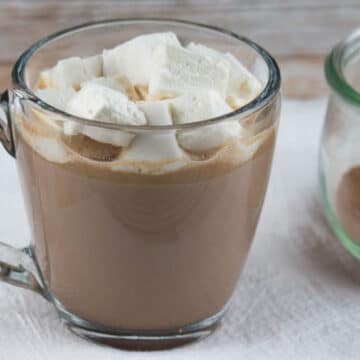
These easy homemade healthy marshmallows have no corn syrup and are made with just 3 simple ingredients. Sweetened with honey and thickened with protein-rich gelatin, this homemade marshmallow recipe offers the same nostalgic texture as store-bought marshmallows but with a wholesome and nourishing twist. You'll love these irresistibly soft and fluffy pillows of sweetness - perfect to top your hot cocoa or roast over a cozy fire.
If you haven't ventured into making homemade marshmallows - these will rock your world! If you've never experienced the joy of biting into your own homemade marshmallows, these will rock your world!
Marshmallows are pretty forgiving when it comes to candy making (and yes, they are a candy!) so this is the perfect way to get your feet wet. And although you do have to be careful with the hot honey syrup, making homemade marshmallow recipe is quite simple to pull together.
And with 4 simple marshmallow ingredients that you likely have on hand, you're already well on your way to making the best healthy marshmallows.
Looking for more healthy sweet treat recipes?
Check out condensed milk recipe, bedtime gummies, and gluten-free crepes.
Jump to:
- Recipe Overview
- Why you'll love Healthy Marshmallows
- Marshmallow Ingredients
- Substitutions and Variations
- Make it using Ancestral Wisdom
- How to Make Healthy Marshmallows
- Helpful Tips for Healthy Marshmallows
- Recommended Tools & Links
- Serving Suggestions
- Storage Instructions
- Frequently Asked Questions
- Printable Recipe
Recipe Overview
- Prep and Cook Time: 35 minutes to prep and cook and 4 hours to set
- Cooking Method: Stove-top
- Dietary Info: Gluten-free, Grain-free, Dairy-free
- Tools Needed: Saucepan, Stand mixer, Sheet pan
- Skill Level: Moderate
Why you'll love Healthy Marshmallows
Suitable for dietary needs - These honey marshmallows come with health benefits from high protein in the collagen to zero refined sugar. Truly, healthy marshmallows you'll feel good about making and eating!
Versatile serving options - Enjoy your own marshmallows just as you would store-bought marshmallows. You can make them into mini marshmallows or make them nice and jumbo-sized!
No special equipment needed: You don't need anything fancy to make perfectly fluffy marshmallows.
💭Fun Fact: Traditionally marshmallows have been made with marshmallow root, which is a perennial herb that is known in folk medicine to treat digestive and respiratory conditions. It naturally contains mucilage which was largely responsible to thicken this confection.
Marshmallow Ingredients
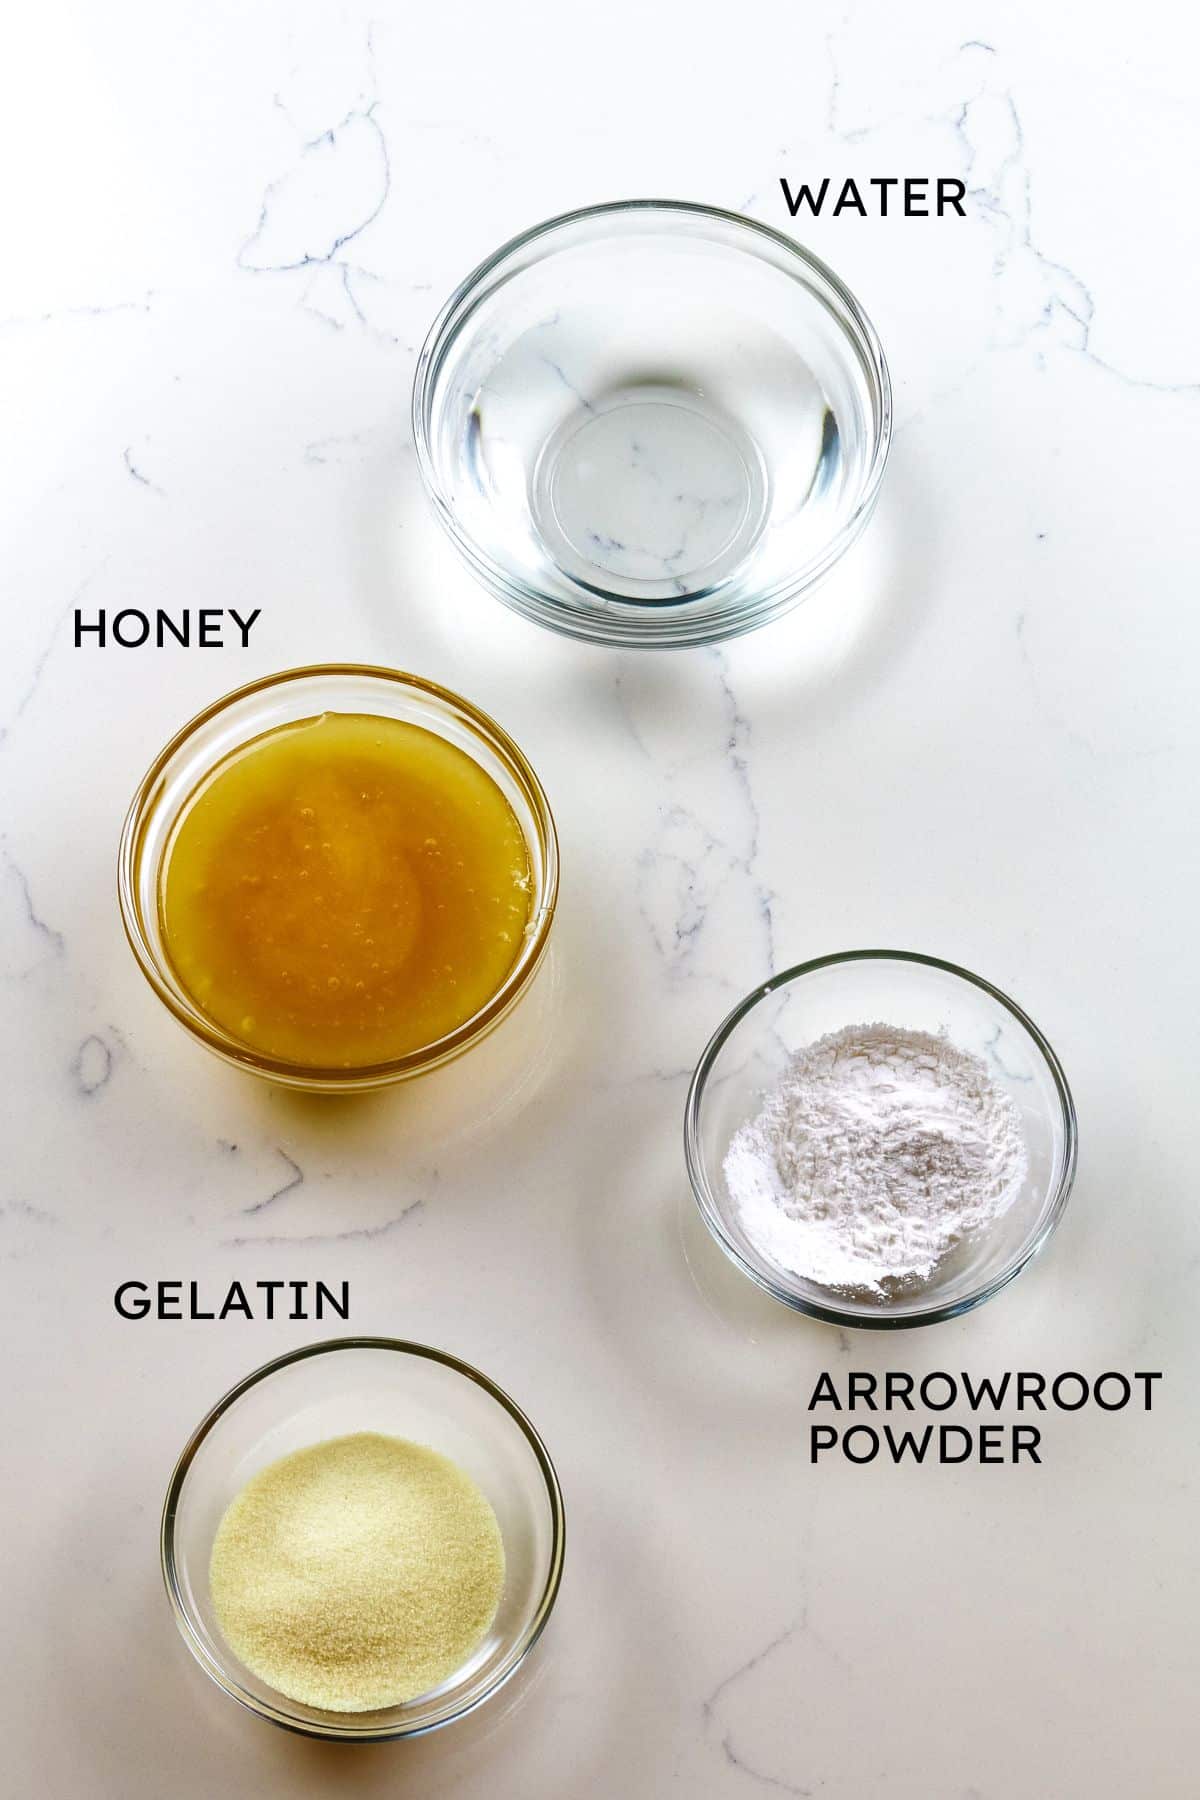
- Gelatin: The most important ingredient in homemade marshmallows as it serves as the base in giving them that stretchy, gooey texture. My favorite gelatin for marshmallows is grass-fed gelatin from Perfect Supplements.
- Water: Used to bloom the gelatin and kick start the setting process.
- Honey: This is the sweetener of choice and used to replace high fructose corn syrup. It's a healthier alternative and works exceptionally well in healthy marshmallows, giving the perfect amount of sweetness.
- Arrowroot powder: Used to dust the marshmallows, making them easier to handle. You can use tapioca starch in a pinch. In order for these healthy homemade marshmallows to remain gluten-free and better for you, I would refrain from using flour, corn starch, or potato starch.
See the recipe card for exact quantities.
Substitutions and Variations
- True Vanilla - My favorite add-in is vanilla bean, and I prefer the powder as it's super concentrated and gives the lovely brown specks of vanilla bean.
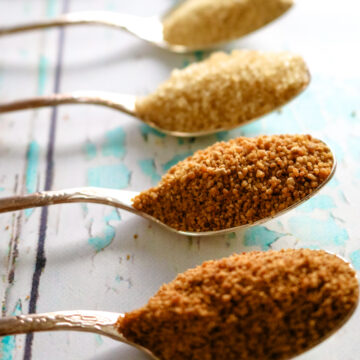
- Try a different sweetener - Try maple syrup to give it more robust flavor. Learn more about healthier choices when it comes to unrefined sugars.
- Food extracts - Vanilla extract is always a classy choice but any real food extracts will work. I recommend adding them toward the end of the whipping process. Try hazelnut or almond extract, peppermint extract, coconut for a tropical flare, or a touch of espresso.
Make it using Ancestral Wisdom
Staying true to the heart of what Prepare and Nourish is all about, there are ways to ensure you get the maximum nutrition in this healthy marshmallows recipe by following ancestral and traditional dietary philosophy. Check out these simple tips to make this recipe nutrient-dense.
Use gelatin from grass-fed cows. Bovine gelatin from Perfect Supplements is my favorite gelatin for marshmallows. It's great in quality, price, and sustainability. Use code PREPARE10 for a 10% off discount.
Know your sugars. I love using honey to make healthy marshmallows but you can use any syrup-like natural sweetener. Be sure to follow this guide for the best unrefined sugars.
How to Make Healthy Marshmallows
The complete printable recipe is below in the recipe card for your convenience. Follow these simple step-by-step instructions for the best results.
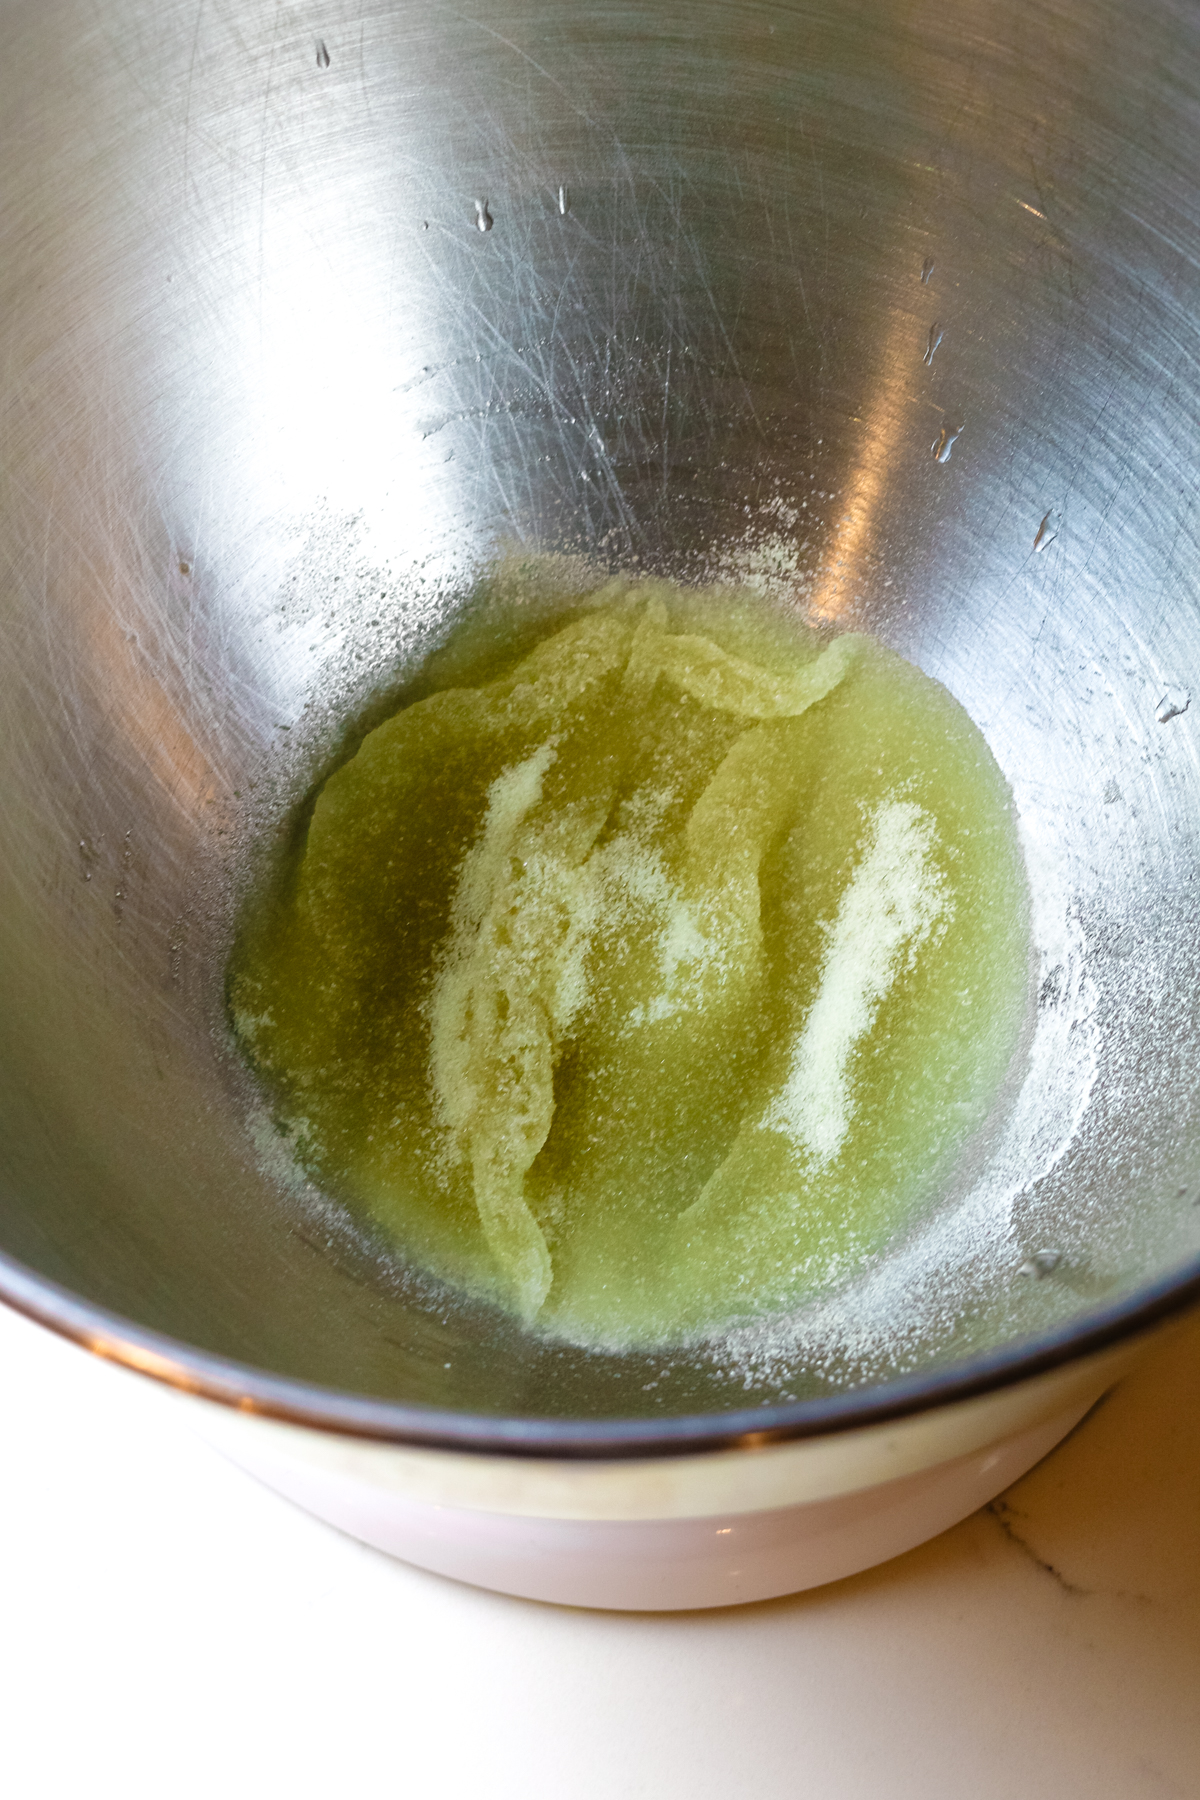
Step 1. Bloom gelatin
Add your favorite gelatin for marshmallows to the bowl of the stand mixer. Add water and quickly whisk to combine. Set aside for the gelatin to "bloom" or thicken slightly.
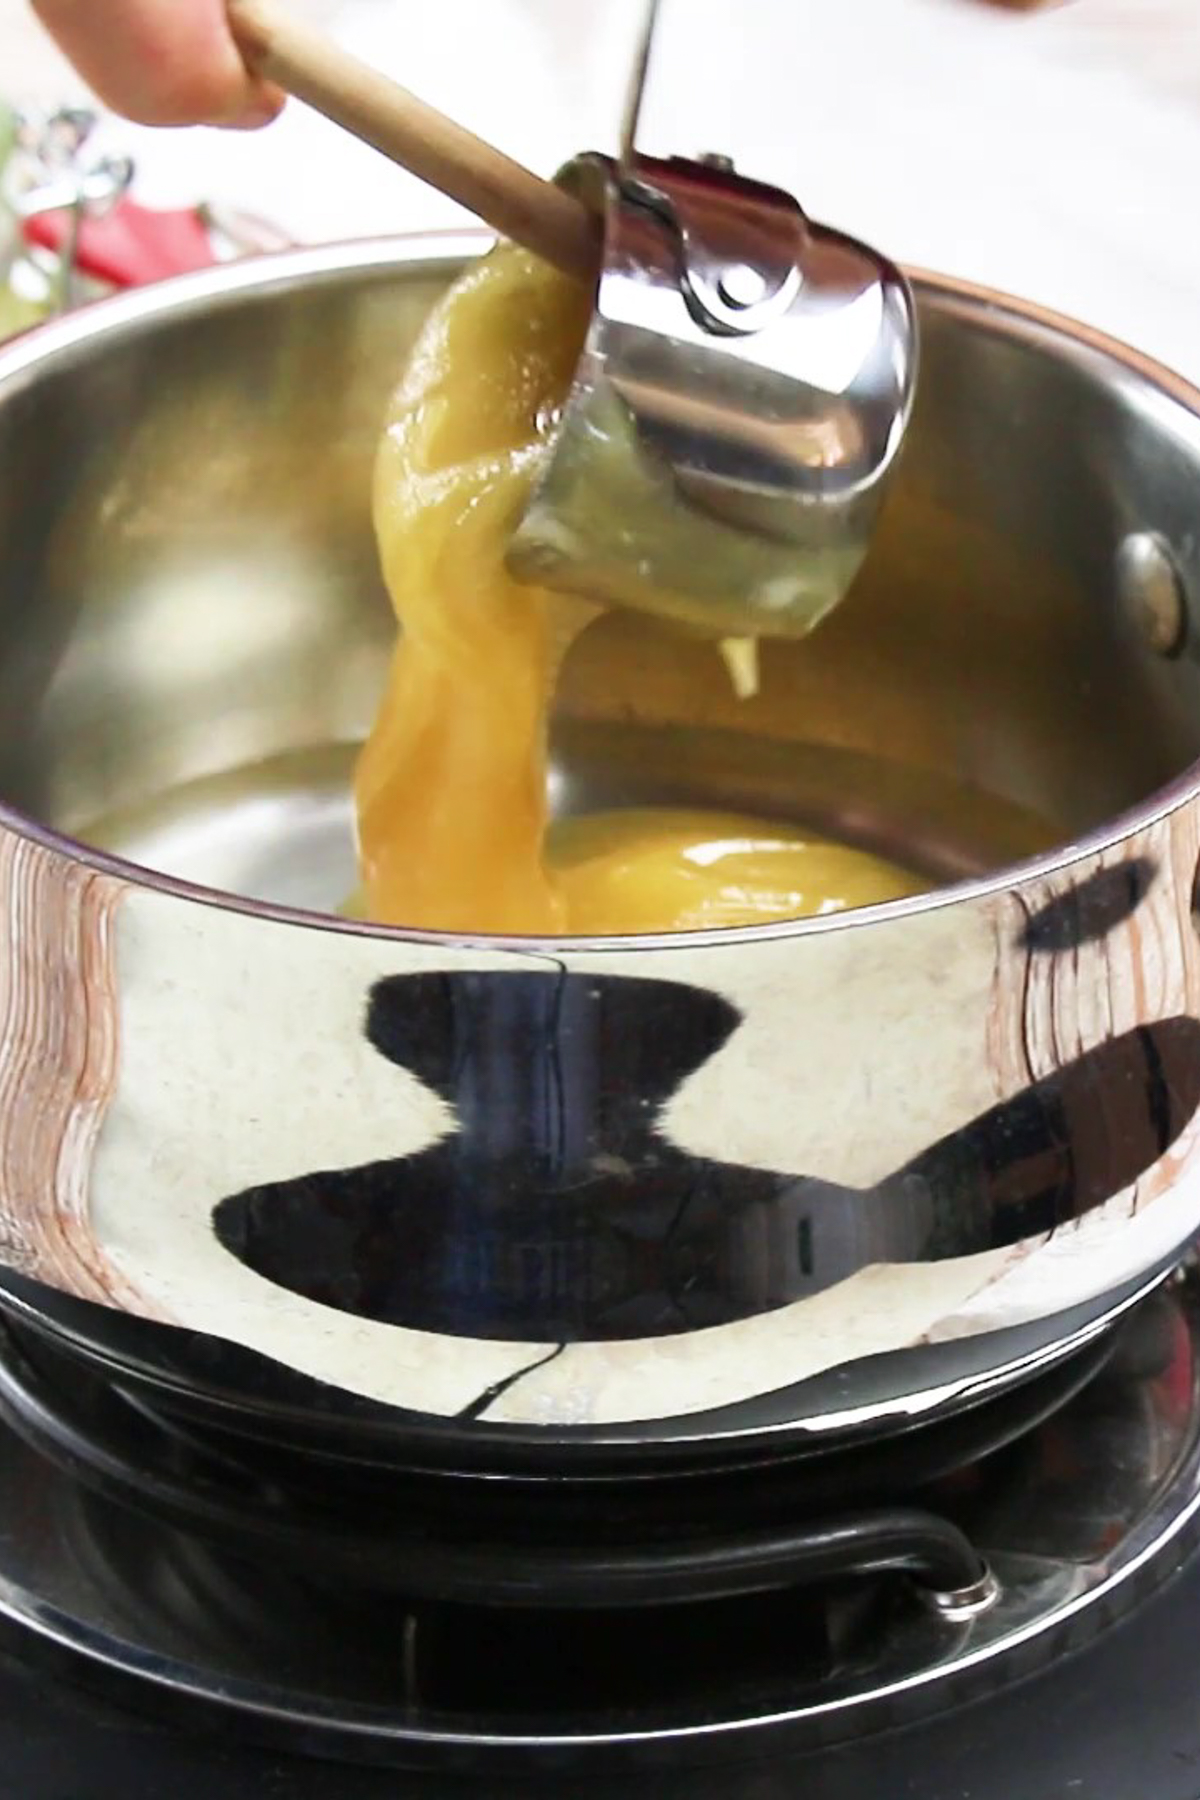
Step 2. Heat honey
In a heavy-bottomed saucepan, heat honey and remaining water. Bring to a boil, then reduce heat, and gently simmer on medium heat undisturbed, for another 8 minutes. Avoid excessive stirring.
💭Pro tip: Keep a close eye on the honey mixture so it doesn't boil over. It will start to bubble and rise but keep the heat on medium to maintain proper temperature.
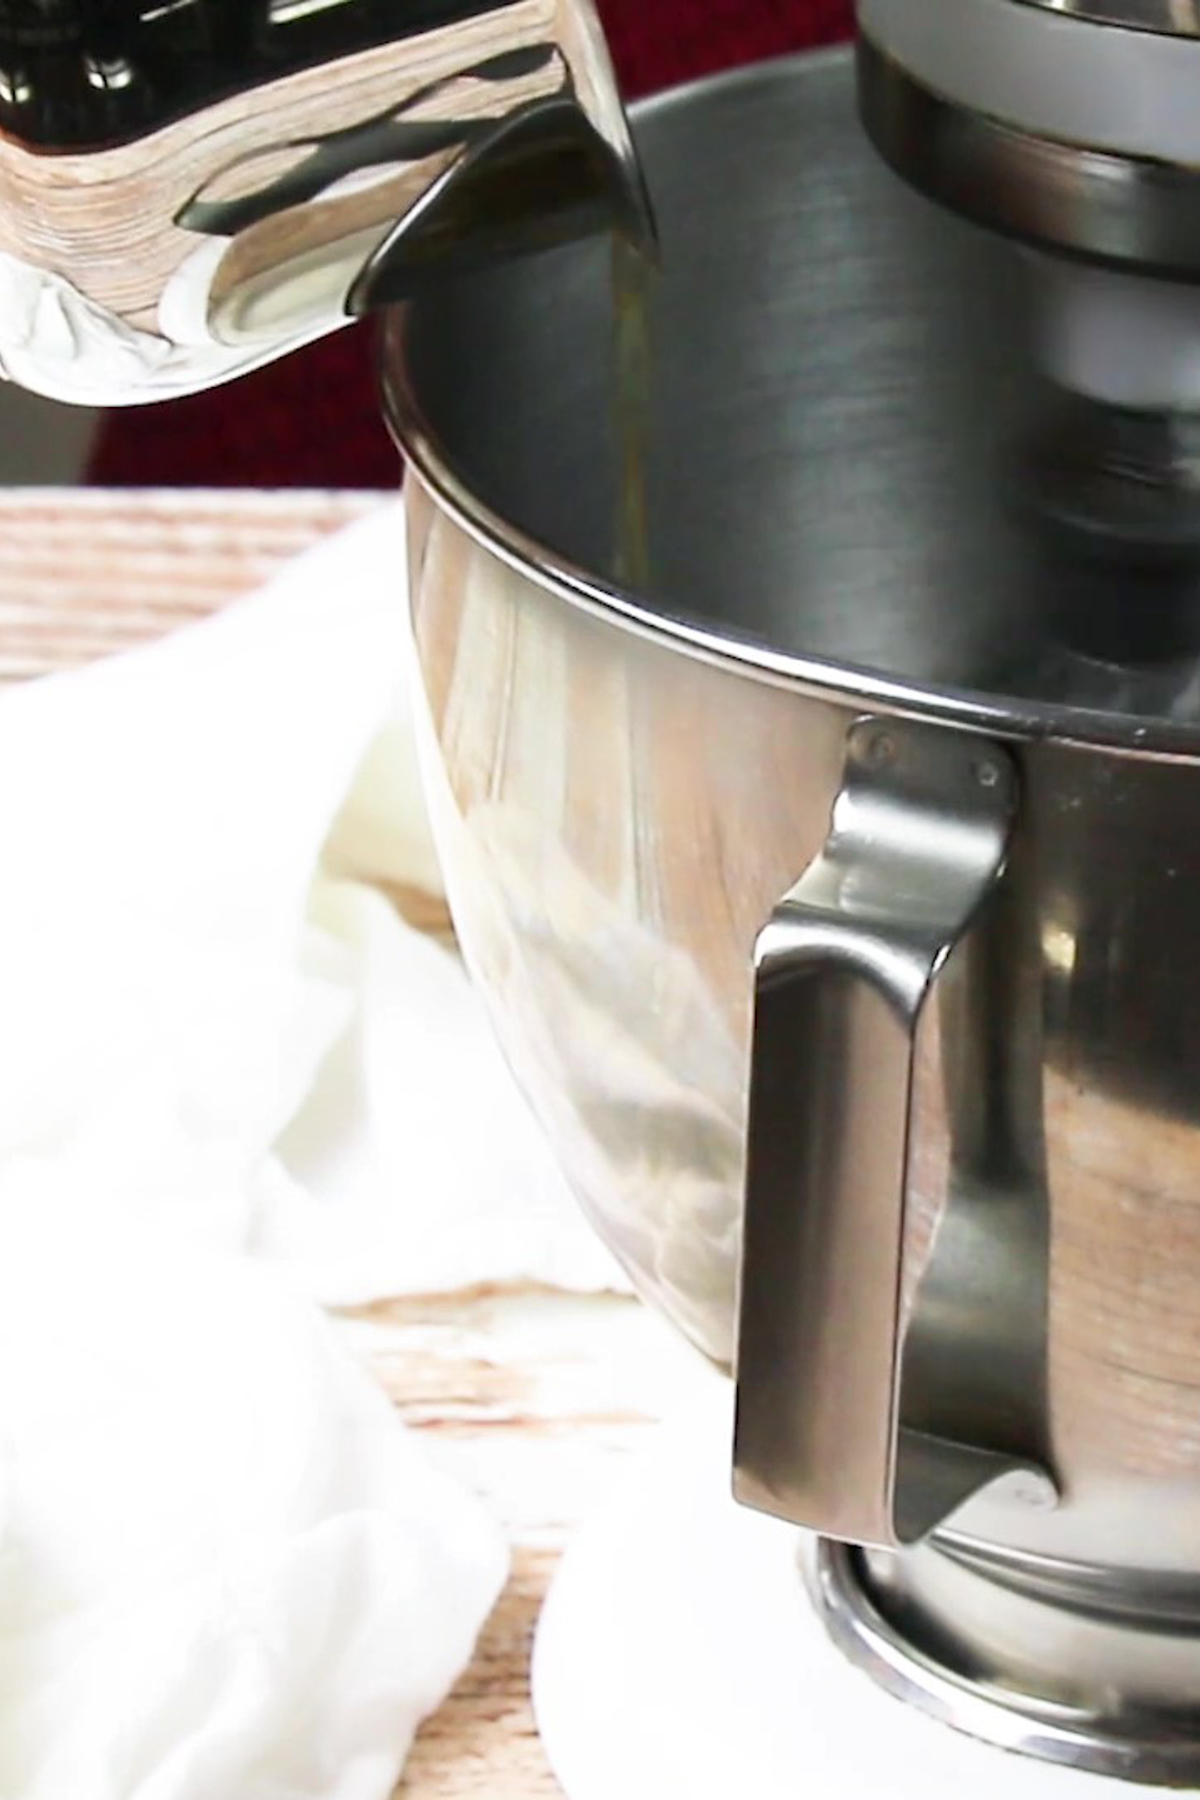
Step 3. Whisk on low speed
Turn the stand mixer with a whisk attachment on low speed to break apart the bloomed gelatin. Gently and very slowly, pour the honey mixture in a thin stream, ensuring it pours down the sides of the bowl and not directly into the gelatin mixture.
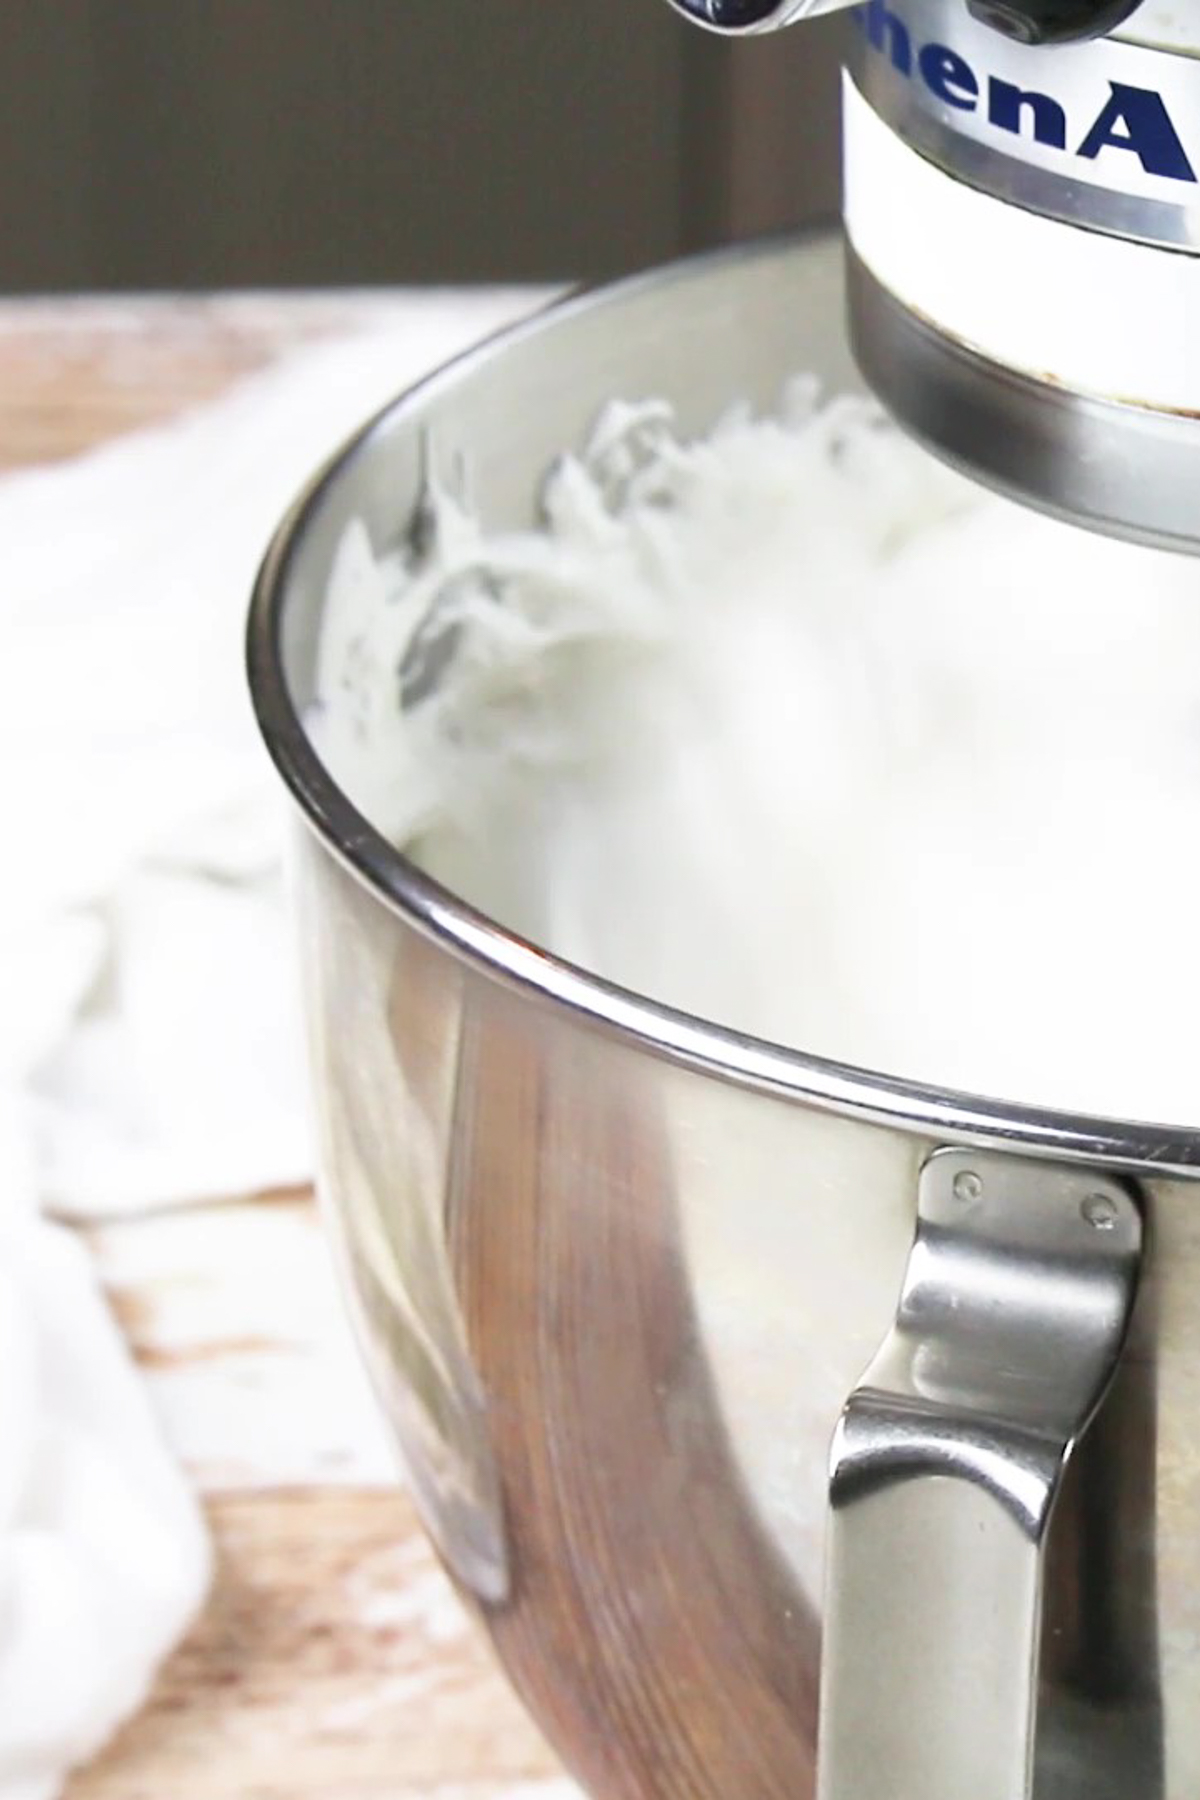
Step 4. Beat on high speed
Once all honey mixture has been added to the gelatin, increase the mixer to high speed and whisk until it turns to marshmallow fluff consistency, approximately 6-8 minutes. Avoid overwhipping as that will create a tacky mess.
💭Pro tip: Continue to beat until the mixture is very stiff and the marshmallow fluff has cooled to lukewarm. If adding any food flavoring, add it towards the end of the whisking.
Step 5. Spread marshmallow fluff
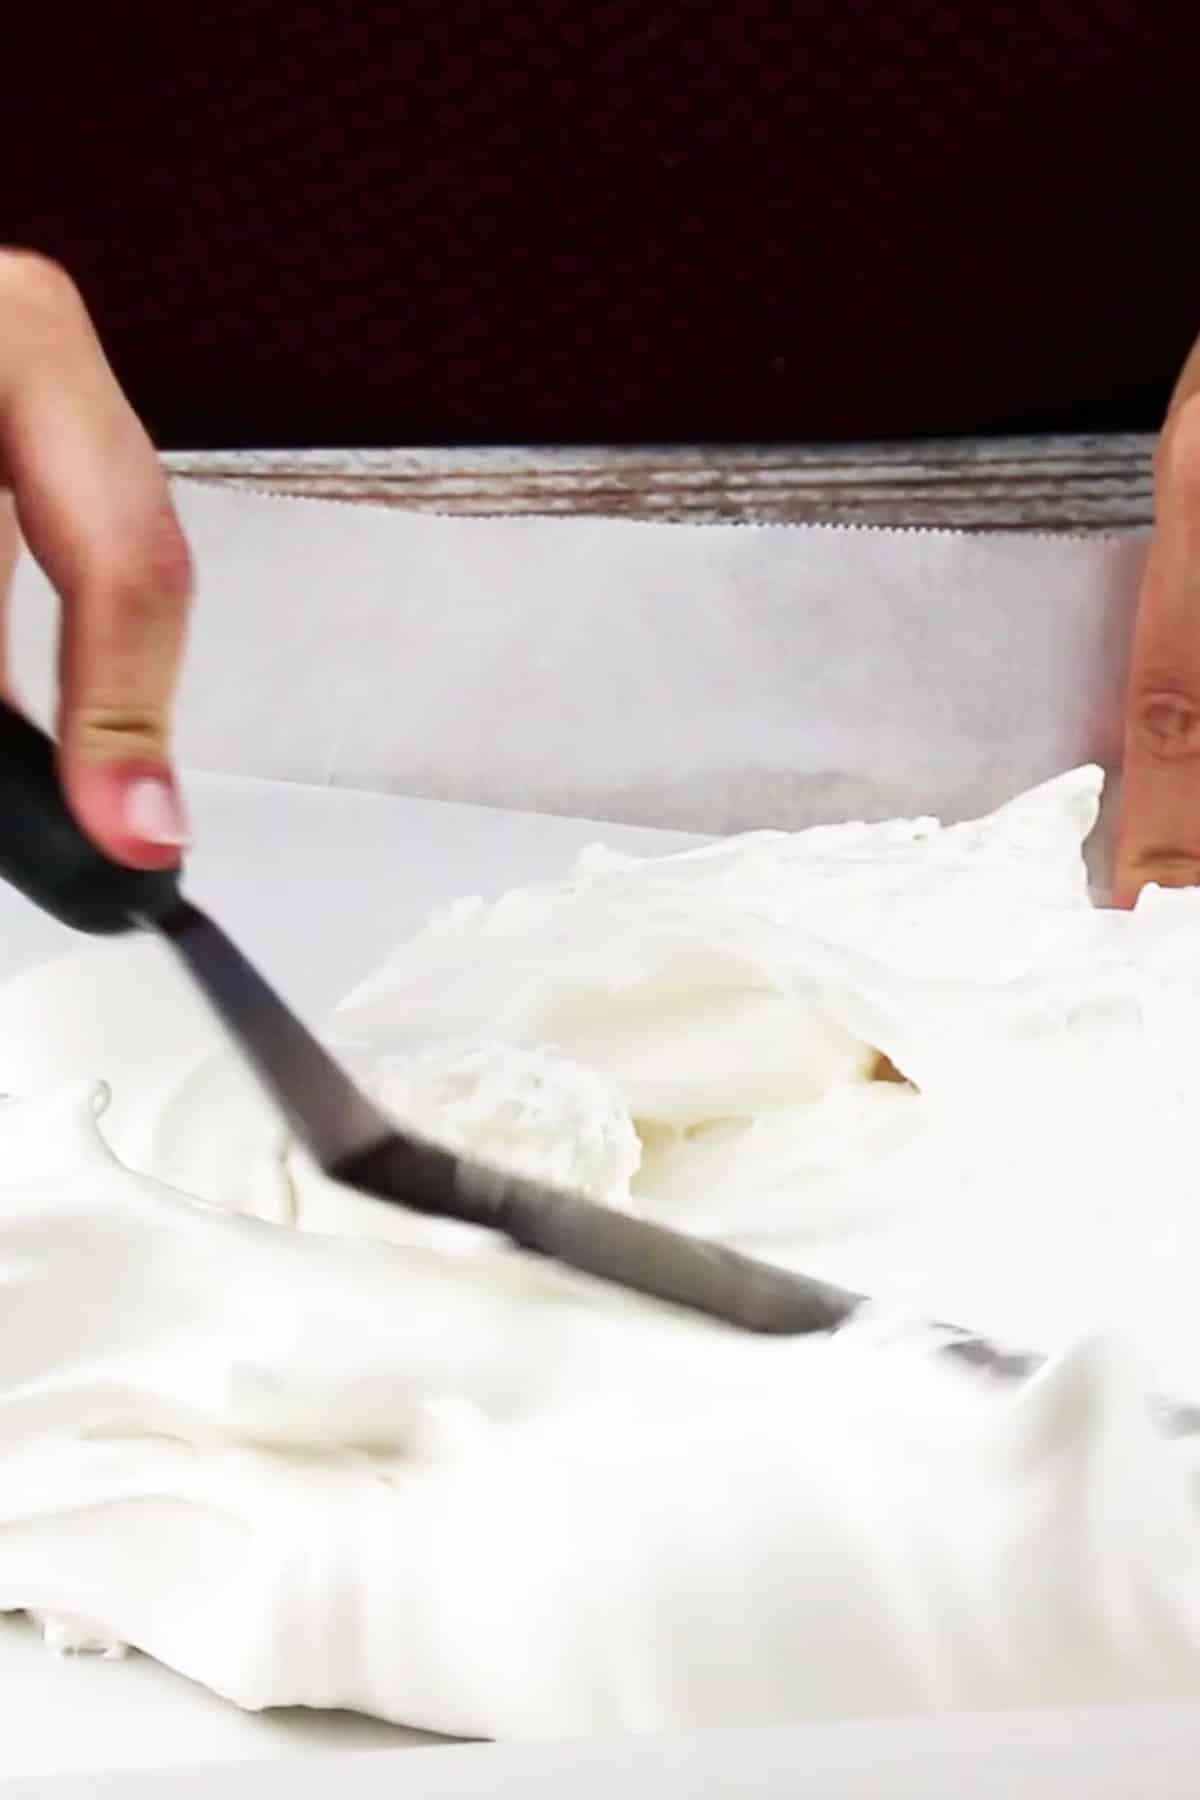
Transfer the marshmallow mixture into a shallow baking dish lined with parchment paper and dusted with arrowroot powder. Spread evenly with a flat offset spatula. You want to do this step promptly as you don't want the gelatin to set in the bowl, making the mixture stiff. Set aside at room temperature to completely "cure" for at least 4 hours or overnight uncovered.
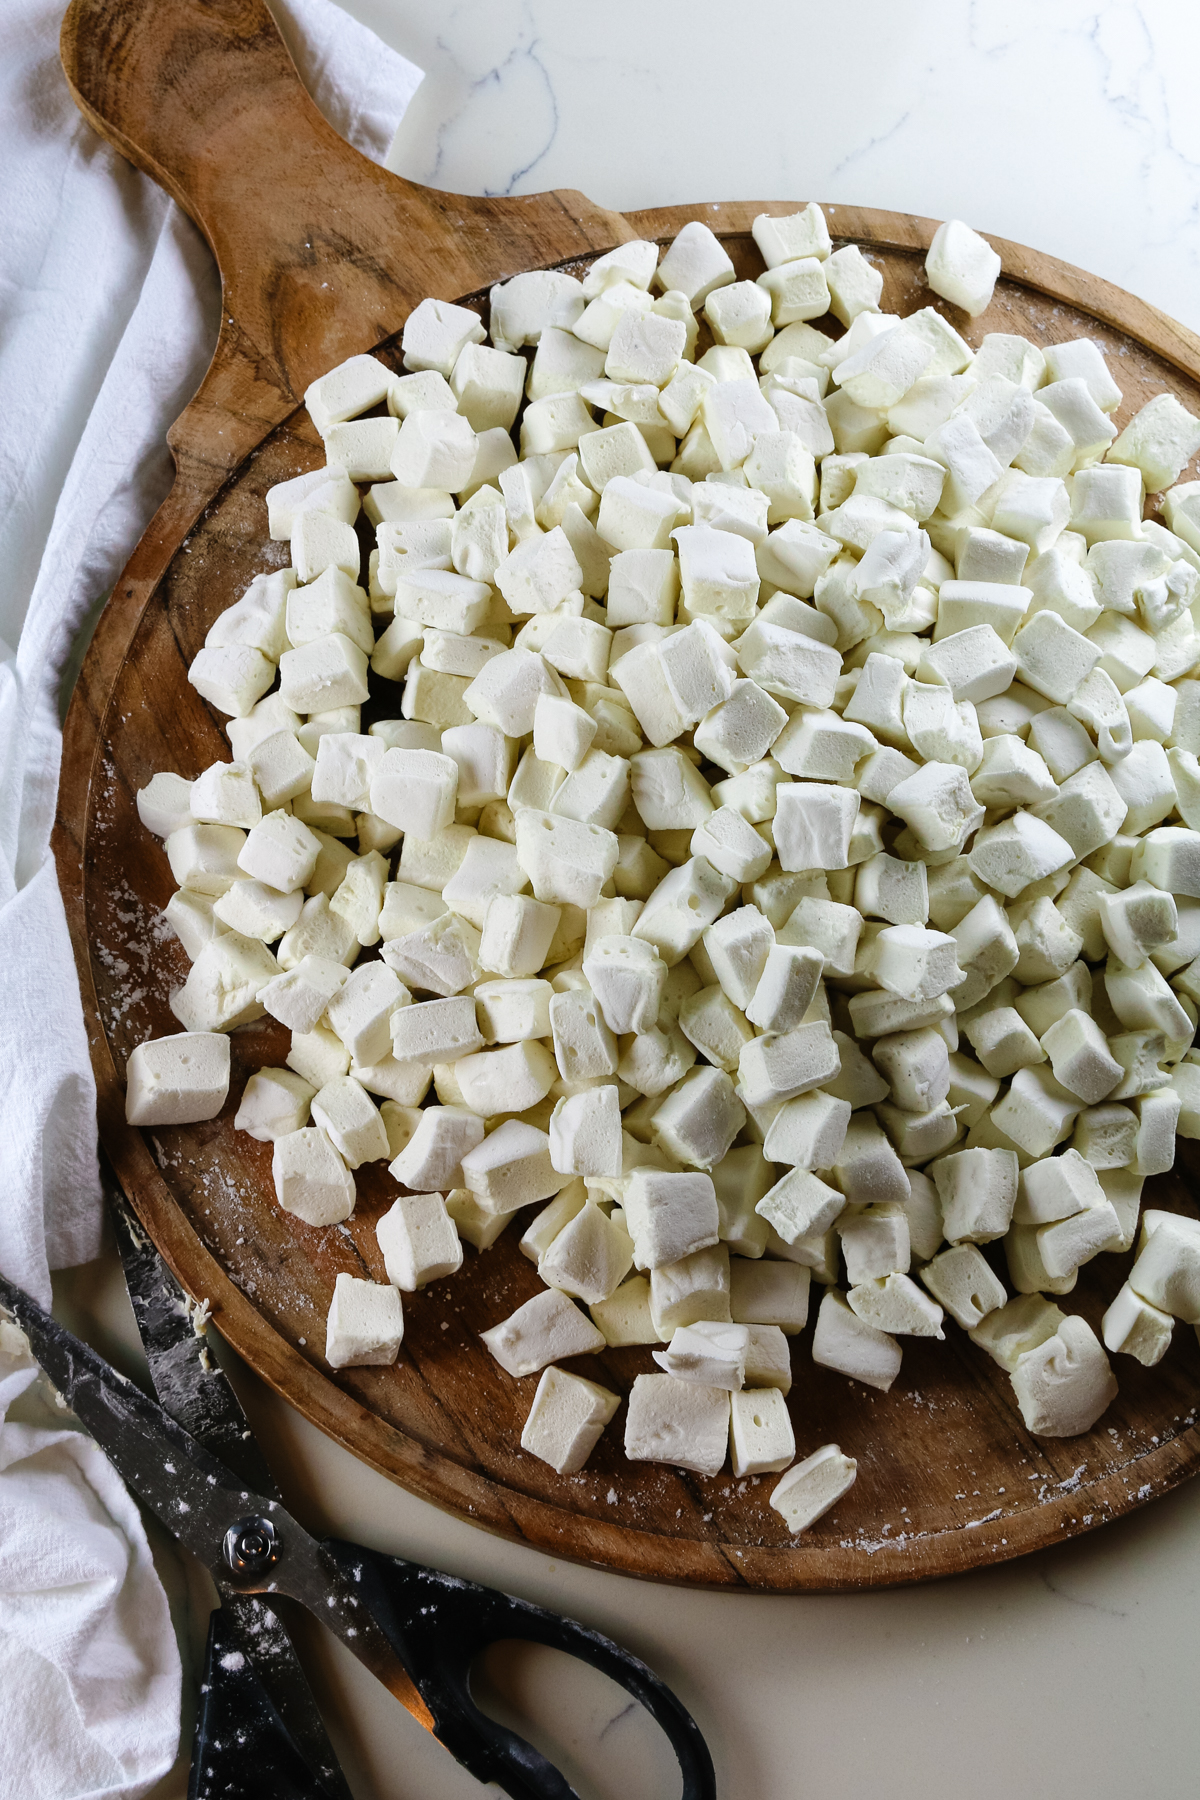
Step 6. Cut marshmallows
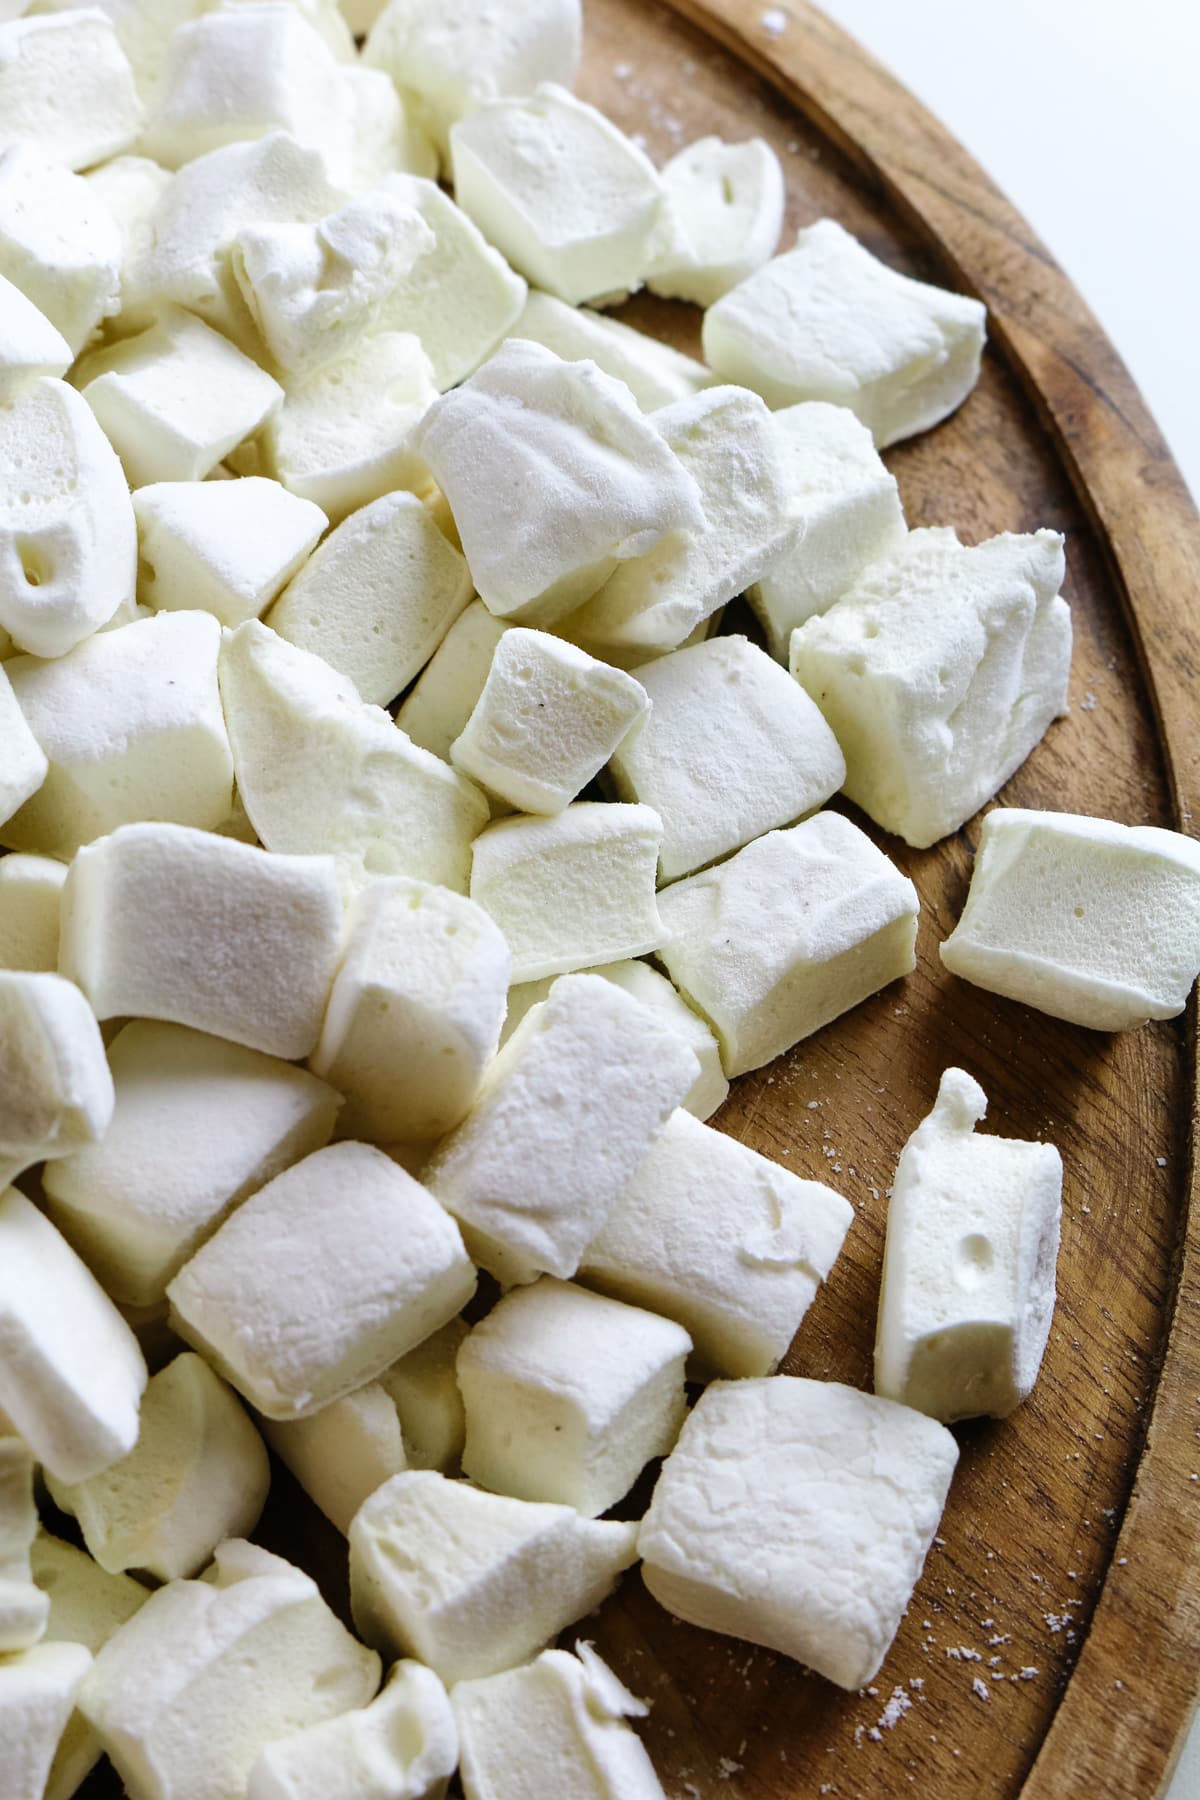
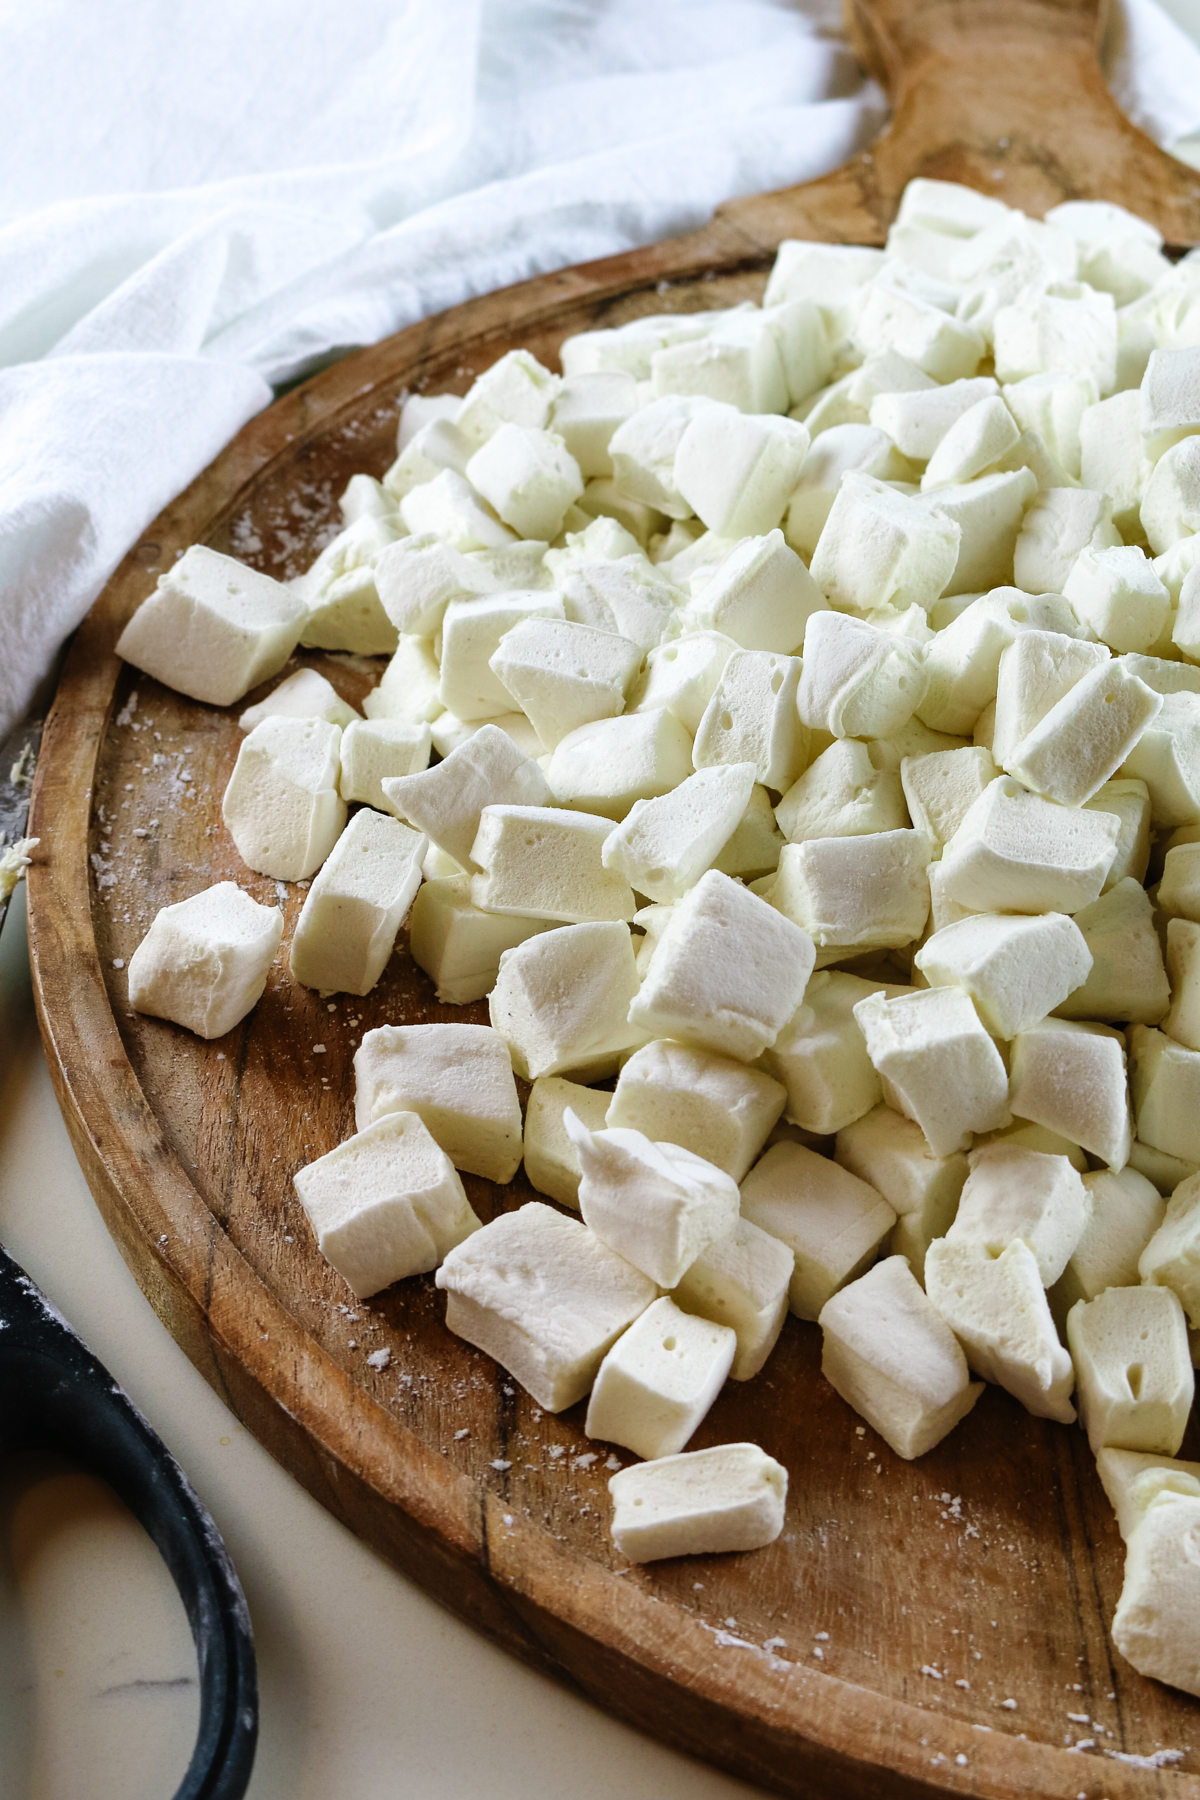
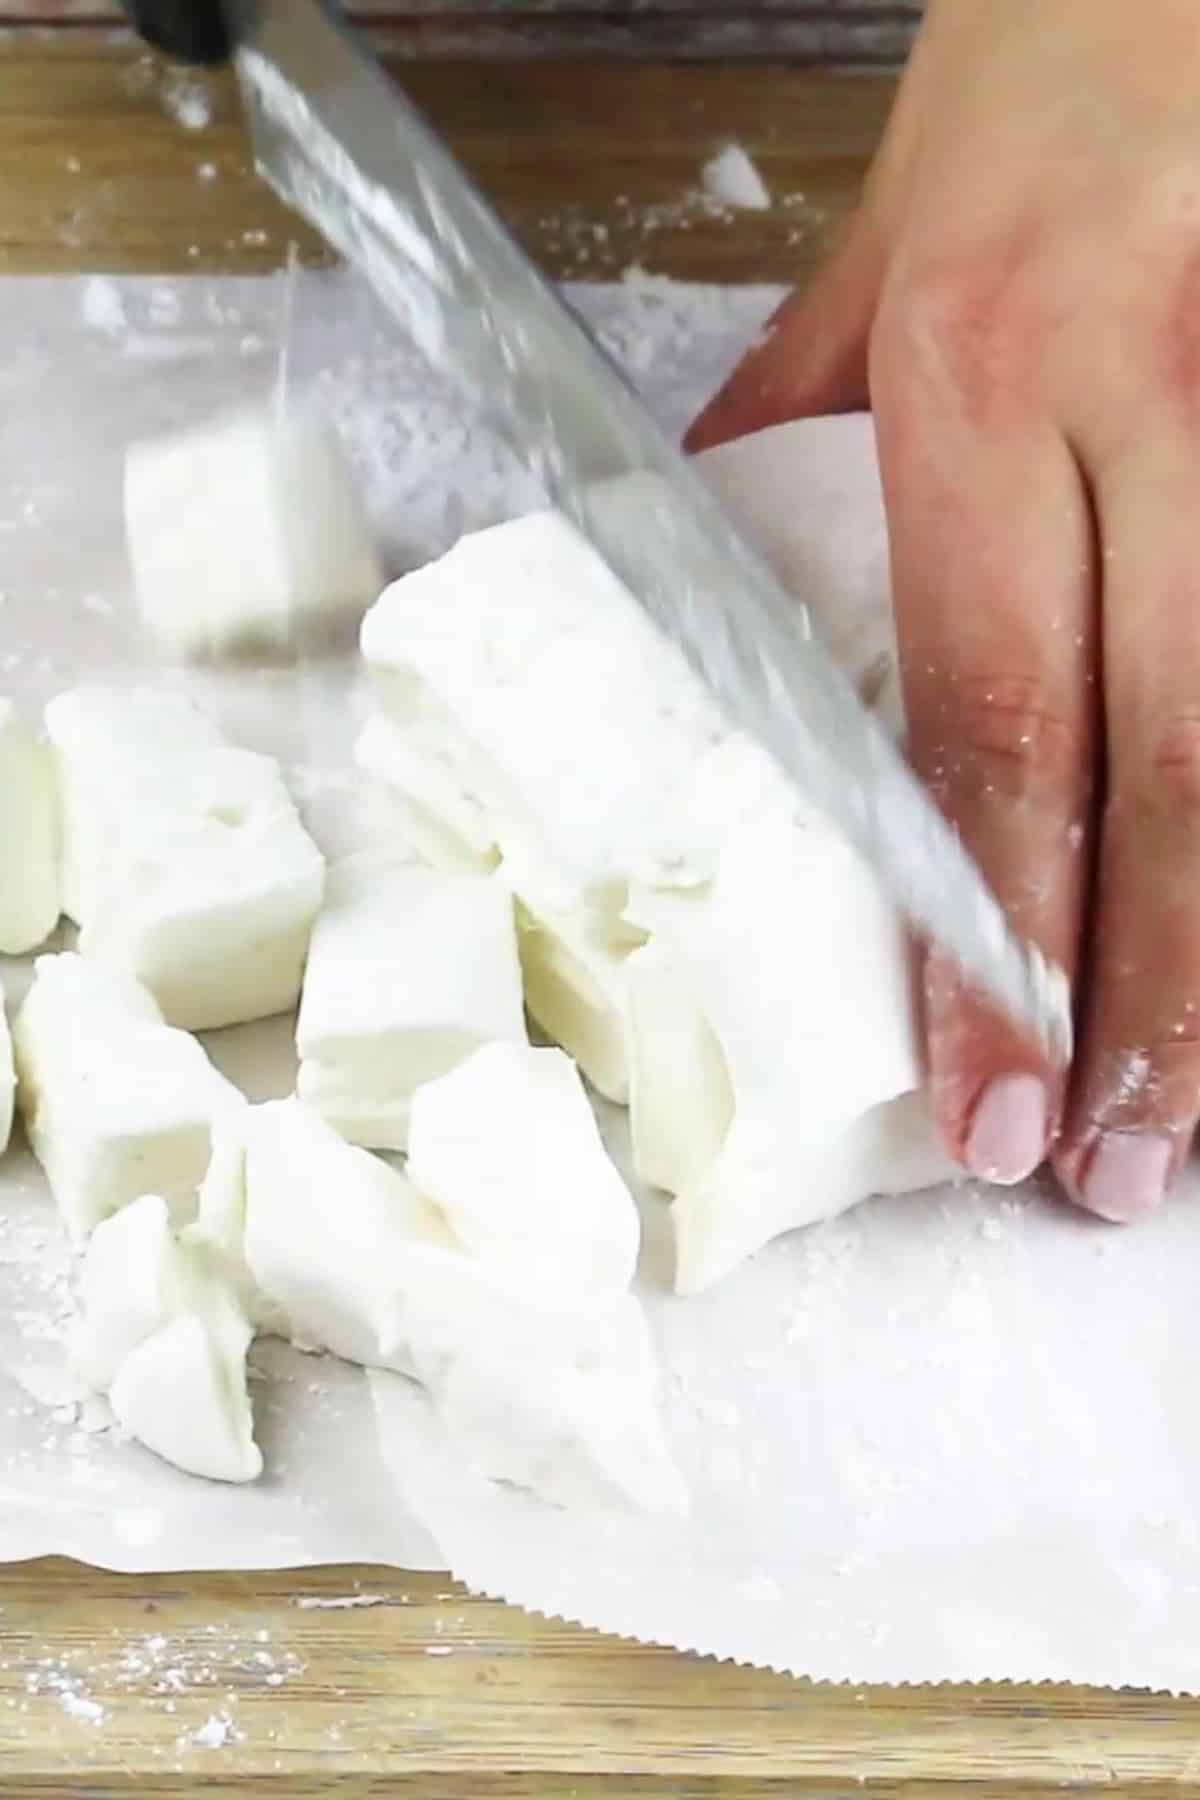
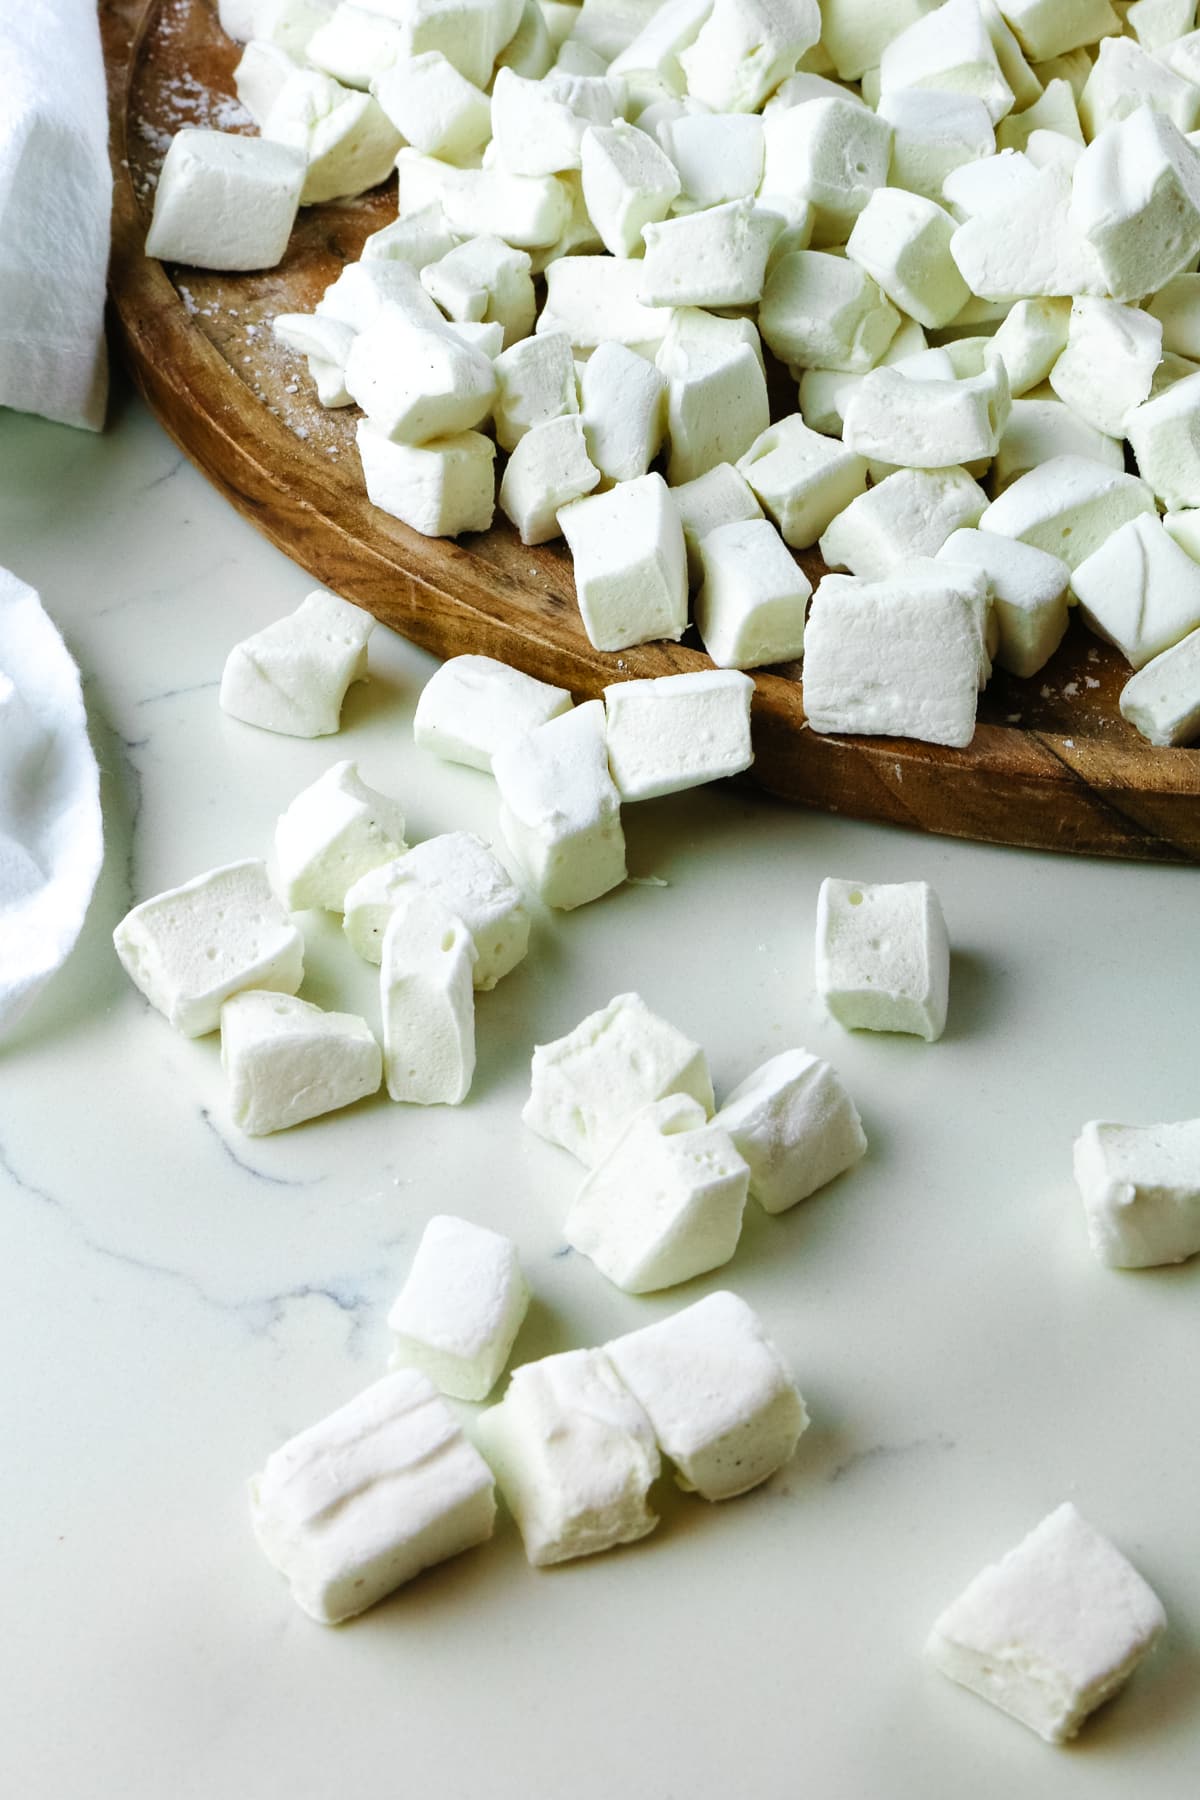
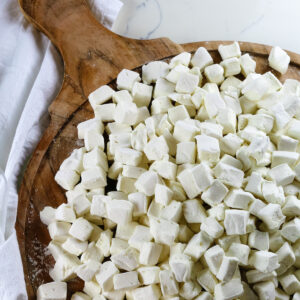
Remove the marshmallow from the pan by pulling on the parchment paper—dust with arrowroot powder, covering the entire exposed surface area. Cut in half crosswise making two large sheets. Then cut lengthwise to make 1" strips and then crosswise to create 1" cubes. Toss all marshmallow cubes with the starch and transfer to an airtight container.
Helpful Tips for Healthy Marshmallows
Use a candy thermometer - Marshmallows are candy, so it's fitting to use a candy thermometer and cook the honey mixture until it reaches 240°F. Or just be observant and follow the cues as mentioned in the recipe directions.
Grease the knife - You may want to grease your sharp knife or pizza cutter with a neutral oil like avocado oil to allow for easier cutting.
Make mini marshmallows - Use a baking sheet with a large surface area. Spread out the marshmallow fluff as evenly as you can. After marshmallow sets, cut into smaller pieces.
Extra sweetness - Add a bit of powdered sugar into the arrowroot powder for the dusting.
Coat with starch well - To ensure that all pieces are efficiently dusted with arrowroot starch, add them a ziplock bag with the starch, seal, and shake. Remove excess starch with a fine mesh strainer.
💭Meal Prep Suggestion: The amount listed in the recipe card will be enough to add to your favorite sweet potato casserole, s'mores, and a few mugs of hot chocolate. Feel free to double the recipe for double the sweetness.
Recommended Tools & Links
Below are some affiliate links that may be helpful to you as you make this healthy marshmallow recipe. You can find some of these items cheaper at your local store, but having a link helps you know what you're looking for.

Tools: Kitchen Aid stand mixer, hand mixer, large bowl, sheet pan

Ingredients: bovine gelatin, real honey
Serving Suggestions
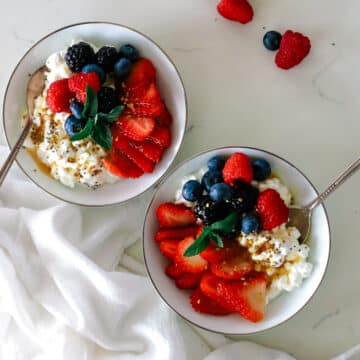
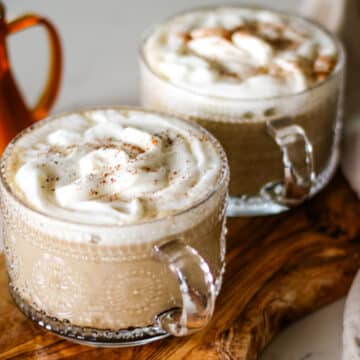
Serve healthy marshmallows as you would regular marshmallows from your local grocery store. They stand up to heat well, making them a perfect addition to gluten-free rice crispy treats, healthy hot chocolate, or just as a sweet treat during movie night.
Homemade marshmallow recipe pairing suggestions
Storage Instructions
How long do homemade healthy marshmallows last in the refrigerator?
To store: Store marshmallows in an airtight container at room temperature for a up to 4 days then transfer them to the refrigerator for up to 3 weeks.
Storage containers: These glass snap containers are perfect for storing leftover healthy marshmallows. You can also store them in wide-mouth mason jars.
Can you freeze marshmallows?
Yes, freezing marshmallows is a breeze. For longer storage you can freeze healthy marshmallows to extend their shelf life without changing the texture.
To freeze: Transfer them to a freezer-safe container with a tight-fitting lid or large freezer bag (ziplock bag works) and remove as much air as possible to avoid freezer burn and unpleasant odors seeping through. Freeze for up to 2-3 months.
To use, just pull a small amount of frozen marshmallows (they shouldn't stick) from the sealed bag or air-tight container and add them to your hot cocoa or just enjoy as a sweet treat. Seal the opened bag of marshmallows again and place in the freezer for next time.
The marshmallow ingredients in this homemade version are similar in consistency to the storebought version, allowing for perfect freezing!
Frequently Asked Questions
Technically, these healthy marshmallows are dairy-free as they do not have any dairy ingredients. They are not vegan though due to the main ingredient being gelatin, which is derived from animal collagen. You can seek out marshmallows made with agar agar if you want to make vegan marshmallows.
Traditional marshmallows may not always be gluten-free as some commercial marshmallow brands include ingredients that contain gluten or may be processed in facilities that handle gluten-containing products. That's why it's always a good idea to make homemade healthy marshmallows with marshmallow ingredients that you feel good about.
Typically, marshmallow ingredients are sugar, corn syrup, water, and gelatin. These ingredients are mixed together to create a sweet and fluffy marshmallow texture. This homemade marshmallow recipe takes those basic ingredients and bumps them up in nutrient value by using grass-fed gelatin and honey for sugar and corn syrup to make these truly healthy marshmallows.
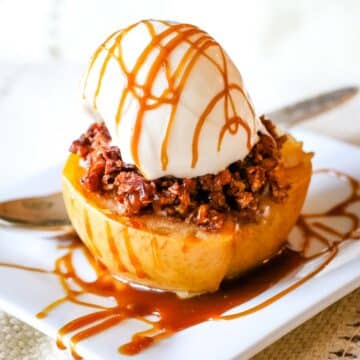
Looking for more related recipes? Here are some ideas:
Did you make this healthy marshmallows recipe? Please leave a ⭐ recipe rating in the recipe card below and leave a review in the comments. Thank you!💚
Printable Recipe
Homemade Healthy Marshmallows (no corn syrup!)
Ingredients
- 1 cup filtered water, divided
- 3 tablespoons grass-fed gelatin
- 1 cup light colored honey
- ¼ vanilla powder optional
- pinch of sea salt
- 2 tablespoons arrowroot powder
Instructions
- Bloom: Prepare a 9x13-inch pan by lining it with parchment paper both directions. Allow the sides to drape over for easy handling. Dust the bottom lightly with arrowroot powder. Set aside. In the bowl of a stand mixer, add ½ cup of filtered water and sprinkle gelatin over the water to "bloom". Whisk to combine and set aside.
- Heat: In a thick-bottom saucepan over high heat, heat remaining water (½ cup), honey, and salt together. Bring to a simmer and reduce heat to medium. Continue to simmer the honey mixture over medium-high heat for approximately 15 minutes or until a candy thermometer reaches soft ball stage of 240°F. Watch the honey mixture carefully so it doesn't boil over and is gently simmering. It must be simmering the entire time. Avoid stirring it. If you see the honey mixture rising up, slightly reduce heat, then gradually bring it up again so it's simmering again.
- Whisk: Assemble the stand mixer with a whisk attachment and position the bowl with bloomed gelatin. Turn the mixer on low setting, breaking up the gelatin. Gently and very slowly, pour the hot honey mixture in a thin stream, ensuring it pours down the sides of the bowl and not directly into the gelatin. Take your time here. It should take you about 90 seconds to pour out the entire honey mixture in a thin stream.
- Beat: Gradually turn mixer to high setting and continue whipping until mixture has increased in volume and is thick and glossy and stiff peaks form. (approx. 8 minutes) Add vanilla powder in the last minute, if using. Take care not to overwhip as it will be too tacky to transfer to the pan.
- Set: Transfer marshmallow fluff to the prepared pan and spread evenly across with spatula. Metal icing spatula works best. Set aside at room temperature for at least 4 hours but overnight is best.
- Cut: Dust the top of the marshmallows with arrowroot. Remove the marshmallow by lifting the parchment paper flaps on the sides and transfer to a large cutting board. Carefully, remove paper from marshmallow edges and coat the edges with more arrowroot for easier handling. It should release easily. Flip over the marshmallow and sprinkle the bottom side with arrowroot if necessary. Cut to the desired size. Gently toss all marshmallow pieces in loose arrowroot powder.
Video
Notes
- Use a candy thermometer - Marshmallows are candy, so it's fitting to use a candy thermometer and cook the honey mixture until it reaches 240°F. Or just be observant and follow the cues as mentioned in the recipe directions.
- Grease the knife - You may want to grease your sharp knife or pizza cutter with a neutral oil like avocado oil to allow for easier cutting.
- Make mini marshmallows - Use a baking sheet with a large surface area. Spread out the marshmallow fluff as evenly as you can. After marshmallow sets, cut into smaller pieces.
- Extra sweetness - Add a bit of powdered sugar into the arrowroot powder for the dusting.
- Coat with starch well - To ensure that all pieces are efficiently dusted with arrowroot starch, add them a ziplock bag with the starch, seal, and shake. Remove excess starch with a fine mesh strainer.

Teresa Barnard says
Have you used these marshmallows for rice Krispy treats?
Anya says
I've not but that would be a great idea! Let me know if you try it!
Darcie says
I know that smores aren't the healthiest treat,but has anyone used these to make them?
Tiffany says
This is my go to marshmallow recipe. It’s easy to tweak flavors and add items in. I love it. I haven’t bought store bought marshmallows in years because homemade are just so delish!
❤️❤️
Tiffany
Stacie Prikhodko says
Let me just start by saying that I never comment on blogs, but I just made your cassava crepes, and they were absolutely perfect! The only thing I did different was slightly reduce the amount of milk. In my opinion they taste even better than the usual blinchiki I make for my kids 😋 Thank you! I didn’t think cooking with alternatives flour was ever going to be comparable, but you convinced me it can be just as good or better!
thejellyfishbar says
It was awesome recipe.
Alyssa says
Sooooo mad… everything was going good until I put it in the pan. It was sticking to everything! It wouldn’t spread at all. It was almost like it was already settled and I was trying to squish the marshmallow fluff, trying to get it to stay down on the pan. It looks like chunky potato salad. I am soo upset. Everything was great until putting it in the pan. I don’t know what happened.
Anya says
Oh no Alyssa - I totally get your frustration. That happens sometimes with honey marshmallows. Here's a few tips to make the fluff more pourable and easy to spread:
- work quickly - have your pan ready before whippin than transfer immediately once it's thick and glossy
- don't overwhip - stop when soft peaks form - over-whipping can make it too firm
- mind the speed - start on low to combine the honey syrup with the gelatin, but then increase to high speed
Hope these help and you'll give this recipe another try.
Danielle says
I couldn’t find my regular recipe- this one was close. Marshmellows started forming before I could spread evenly- should have noticed comments were turned off on Pinterest- bad sign
Anya says
Hi Danielle! I never turnoff my comments whether on my site nor on Pinterest because I love feedback on my recipes (good and bad). And I just double checked - there's lots of comments and lots of great reviews on Pinterest for my marshmallows. Having said that, I'm sorry this recipe didn't work out for you. I retested my recipe again this week and it turned out great. But you could try to whip for less time until you achieve pourable consistency before it hits the pan. I recomment stopping when soft peaks form but you can stop whipping when it's still pourable so it spreads more easily. All the best!
Miranda Schragg says
Are you able to add marshmallow root extract to this recipe
Anya says
I have never tried with extract but I have steeped marshmallow root before and used that in lieu of water in this recipe.
Kristin says
How do you swap these out for marshmallows in recipes? By weight?
Anya says
Yep! That would be ideal.
Fendi says
Is there a video we can watch? I always find those so helpful. This recipe looks great!
Anya says
Hi Fendi! Yes - I have a video for this recipe: https://prepareandnourish.com/homemade-marshmallows-recipe/#recipe-video
Sarah says
Is there a specific brand of Vanilla powder you use? I've never used it before. Excited to try this recipe!
Anya says
Hi Sarah! I just look for organic vanilla bean powder and make sure the ingredients listed are just vanilla beans. This madagascar ground vanilla is great!
Sarah says
Thank you so much!