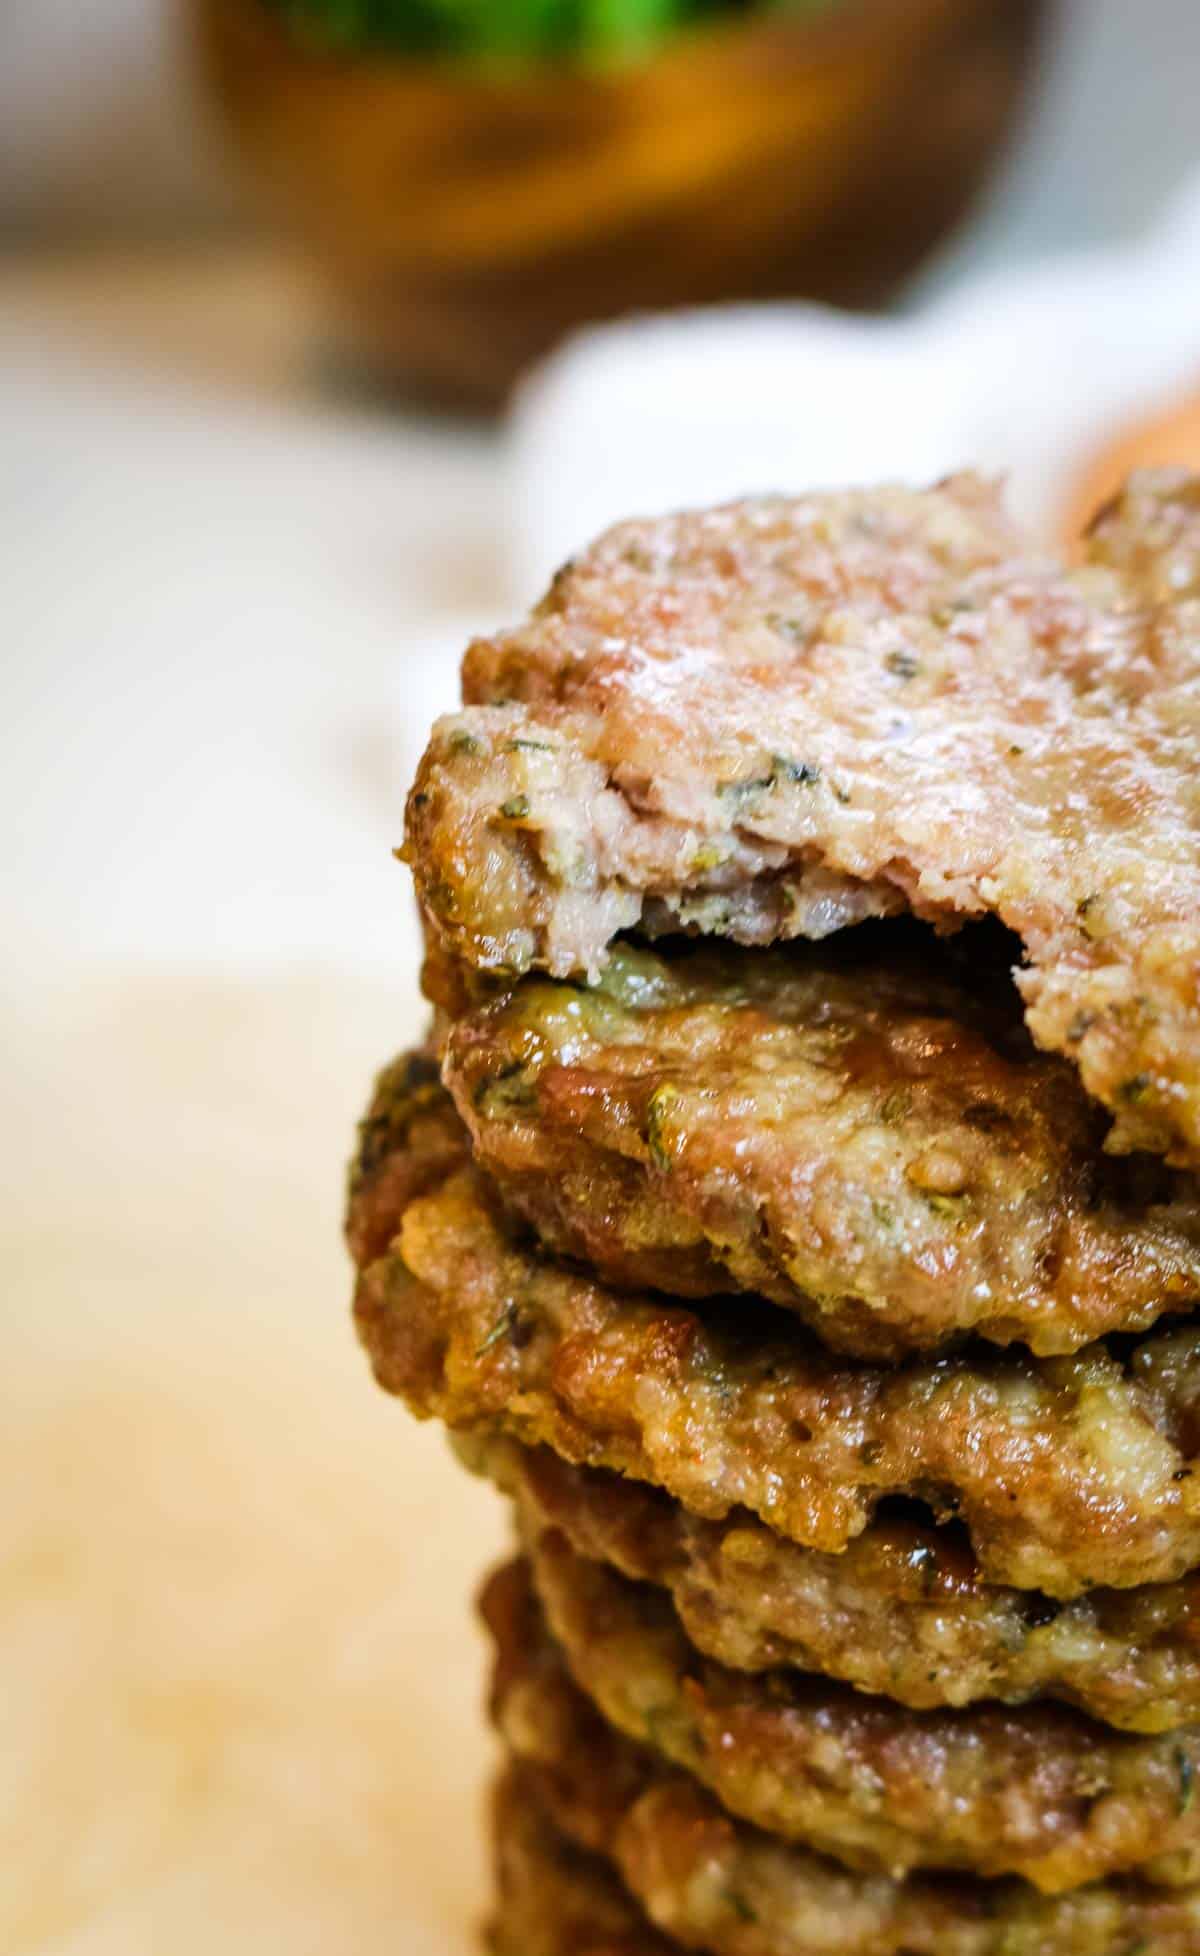
These Homemade Air Fryer Sausage Patties are herbaceous and full of flavor. It's an easy recipe that will be on repeat because they're great with a side of eggs or in a hearty breakfast sandwich.
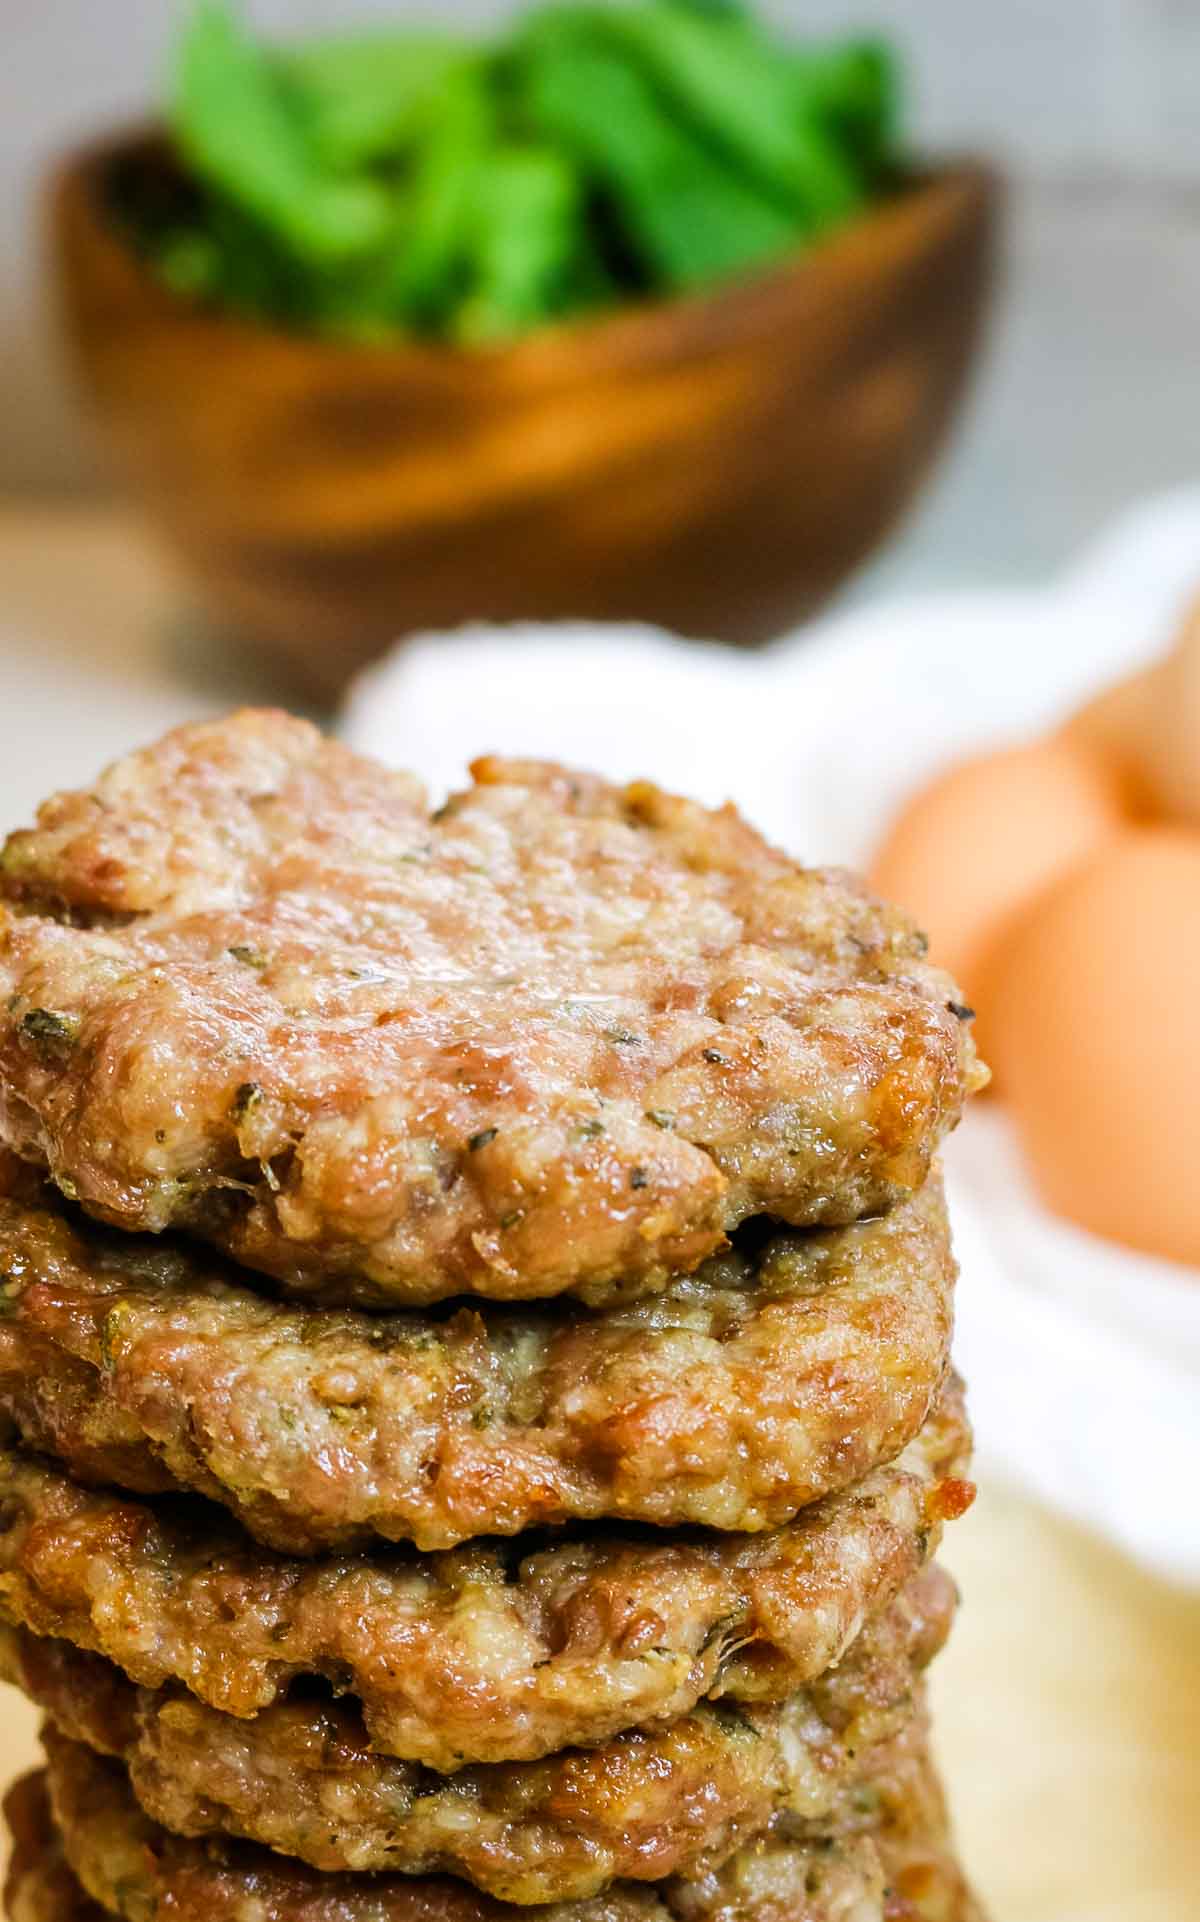
Homemade breakfast sausage patties are hard to beat. Snuggled between homemade sourdough English muffins with oozing warm cheese and savory eggs - it just hits differently when the patties are made from scratch.
[feast_advanced_jump_to]Why you'll love this recipe
- These sausage patties are packed with honest to goodness homey flavor.
- Great candidate for meal prep to make ahead to freeze and reheat as needed.
- Save $$$ - ground pork is much cheaper than ground sausage.
- Perfectly tender yet not cooked to death makes these patties outstanding in breakfast sandwiches for busy mornings.
- Using ground pork renders just enough fat to make them flavorful with no need of additional fat.
- No sugar or breadcrumbs - just real food ingredients you can feel good about.
- Versatile: use the raw sausage mixture to make air fryer sausage links instead of patties or use it in casseroles.
Ingredients
What I love about this recipe is how easy it is. The simple ingredients are readily available in most grocery stores. Which makes this already great breakfast an even better one.
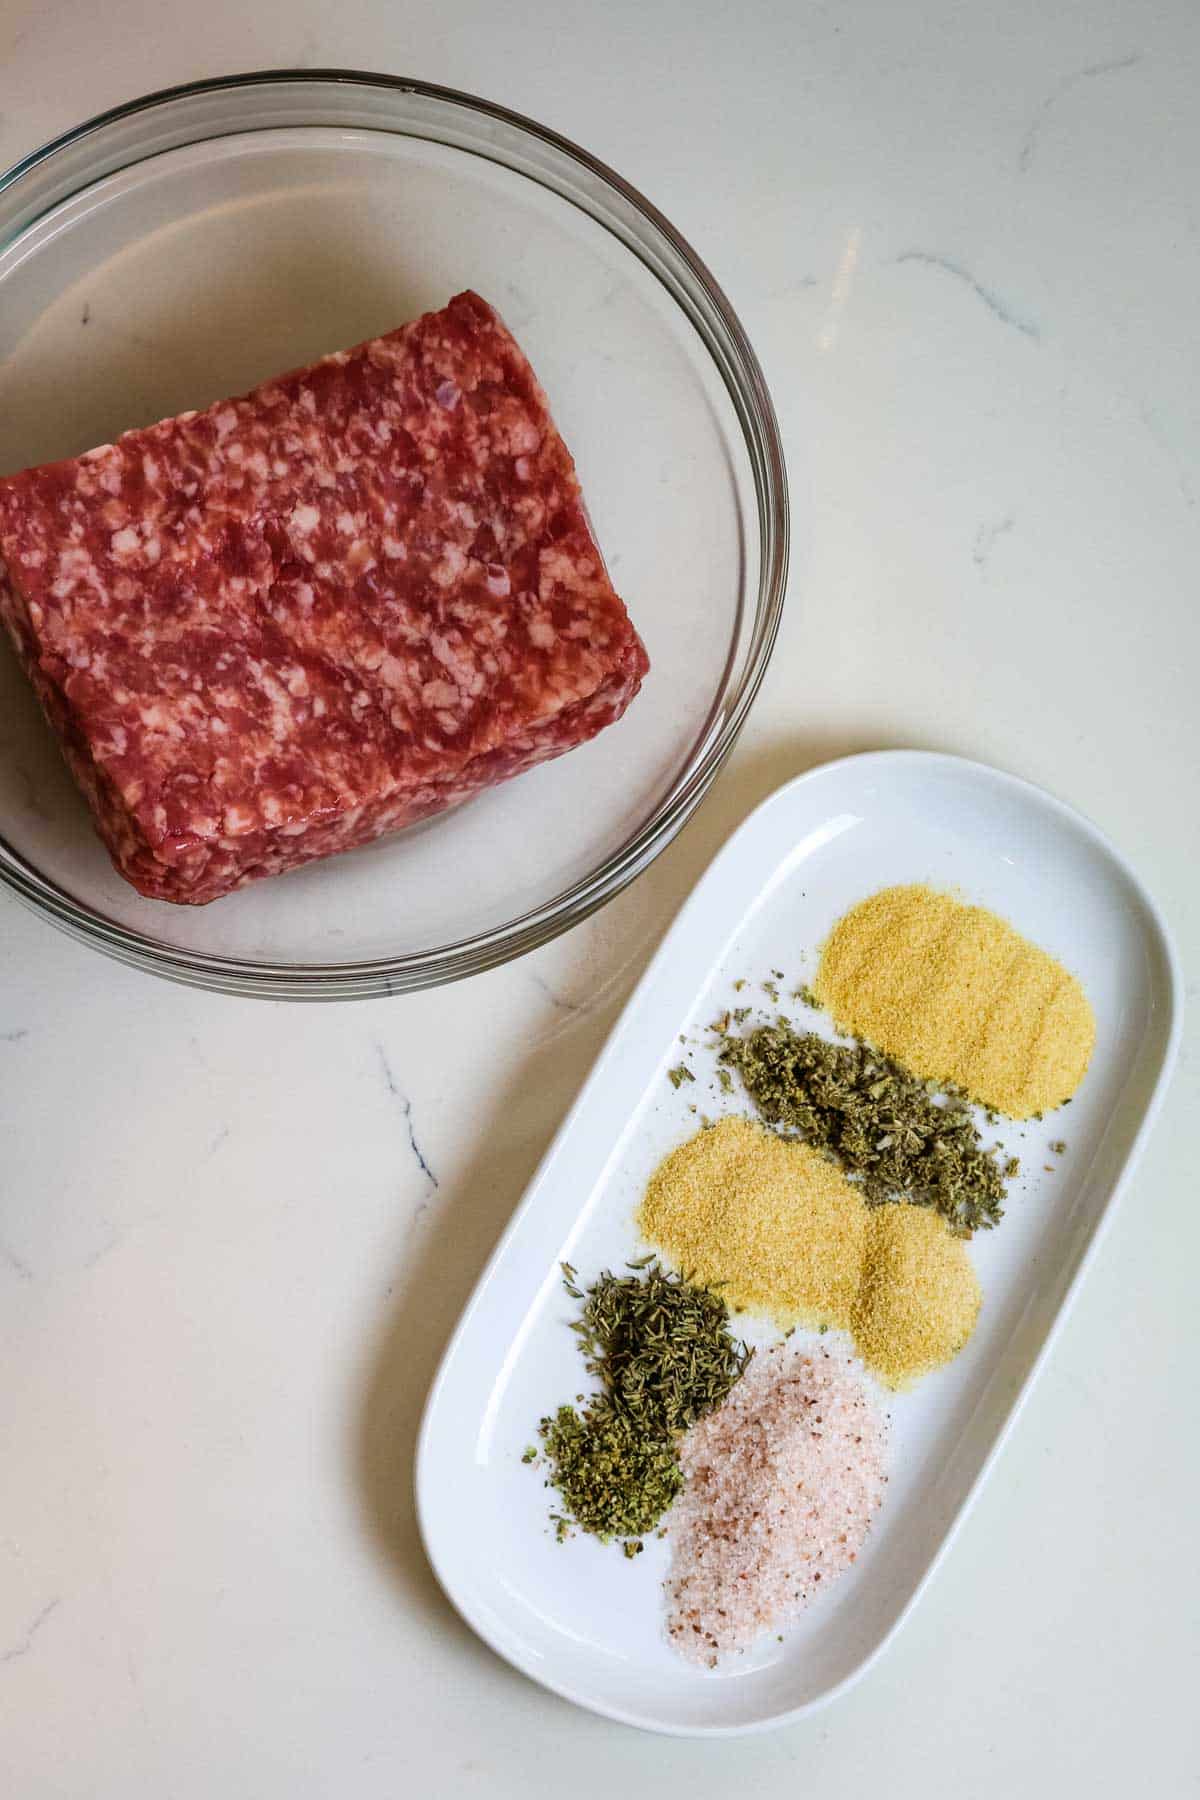
- ground pork: Good quality pork is key in making the best homemade sausage patties. Since pork is high in fat, look for pasture-raised pork. Local farmers will always be your best option but online meat subscriptions like Wild Pastures and ButcherBox are great too.
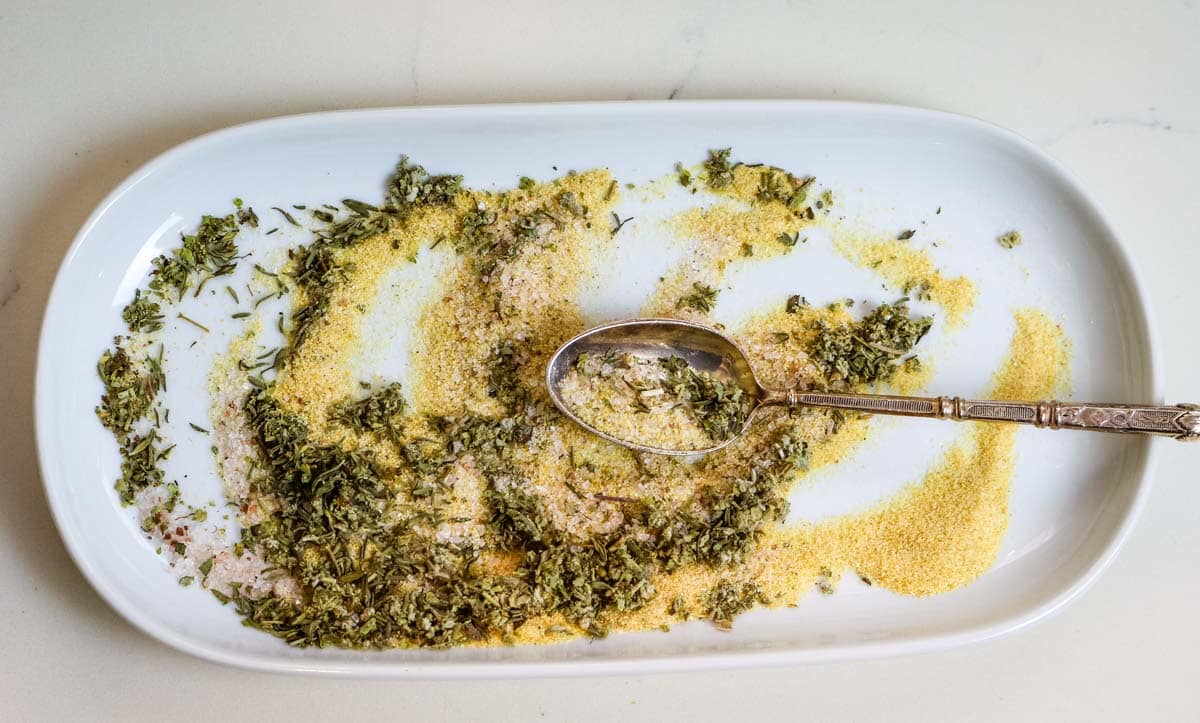
- seasonings: Dried sage (leaves are ideal but ground works too), garlic powder, onion powder, dried marjoram, dried thyme, and sea salt make for delicious fresh sausage patties
See recipe card for exact quantities and detailed instructions.
Substitutions and Variations
- Spicy - add chili pepper flakes and a dash of cayenne pepper for extra heat
- Fall vibes - finely chop an apple and add a touch of maple syrup to make apple sausages
- Italian - double up on the Italian seasoning for that extra flare
- Herbal - make it extra herbaceous by using fresh herbs like parsley, dill and basil.
Helpful Tips
- 🕐Time Saving Tip: consider quadrupling the seasoning blend and storing it in a small jar to add to ground pork for instant sausage
- 🗓Make-Ahead Tip: Double batch and freeze at any stage: either as ground sausage, raw patties, or cooked sausage patties.
- 🚫Food Safety: use an instant read meat thermometer to ensure doneness. Pork should register at 145 degrees Fahrenheit.
💭Make it Nutrient-Dense: Add a little chicken liver to the sausage mixture for added nutrients.
Step-by-Step Instructions
The complete printable recipe is below in the recipe card for your convenience.
These air fryer breakfast sausage patties recipe calls for these ingredients that you will need: ground pork, dried sage, garlic powder, onion powder, dried marjoram, dried thyme, and sea salt.
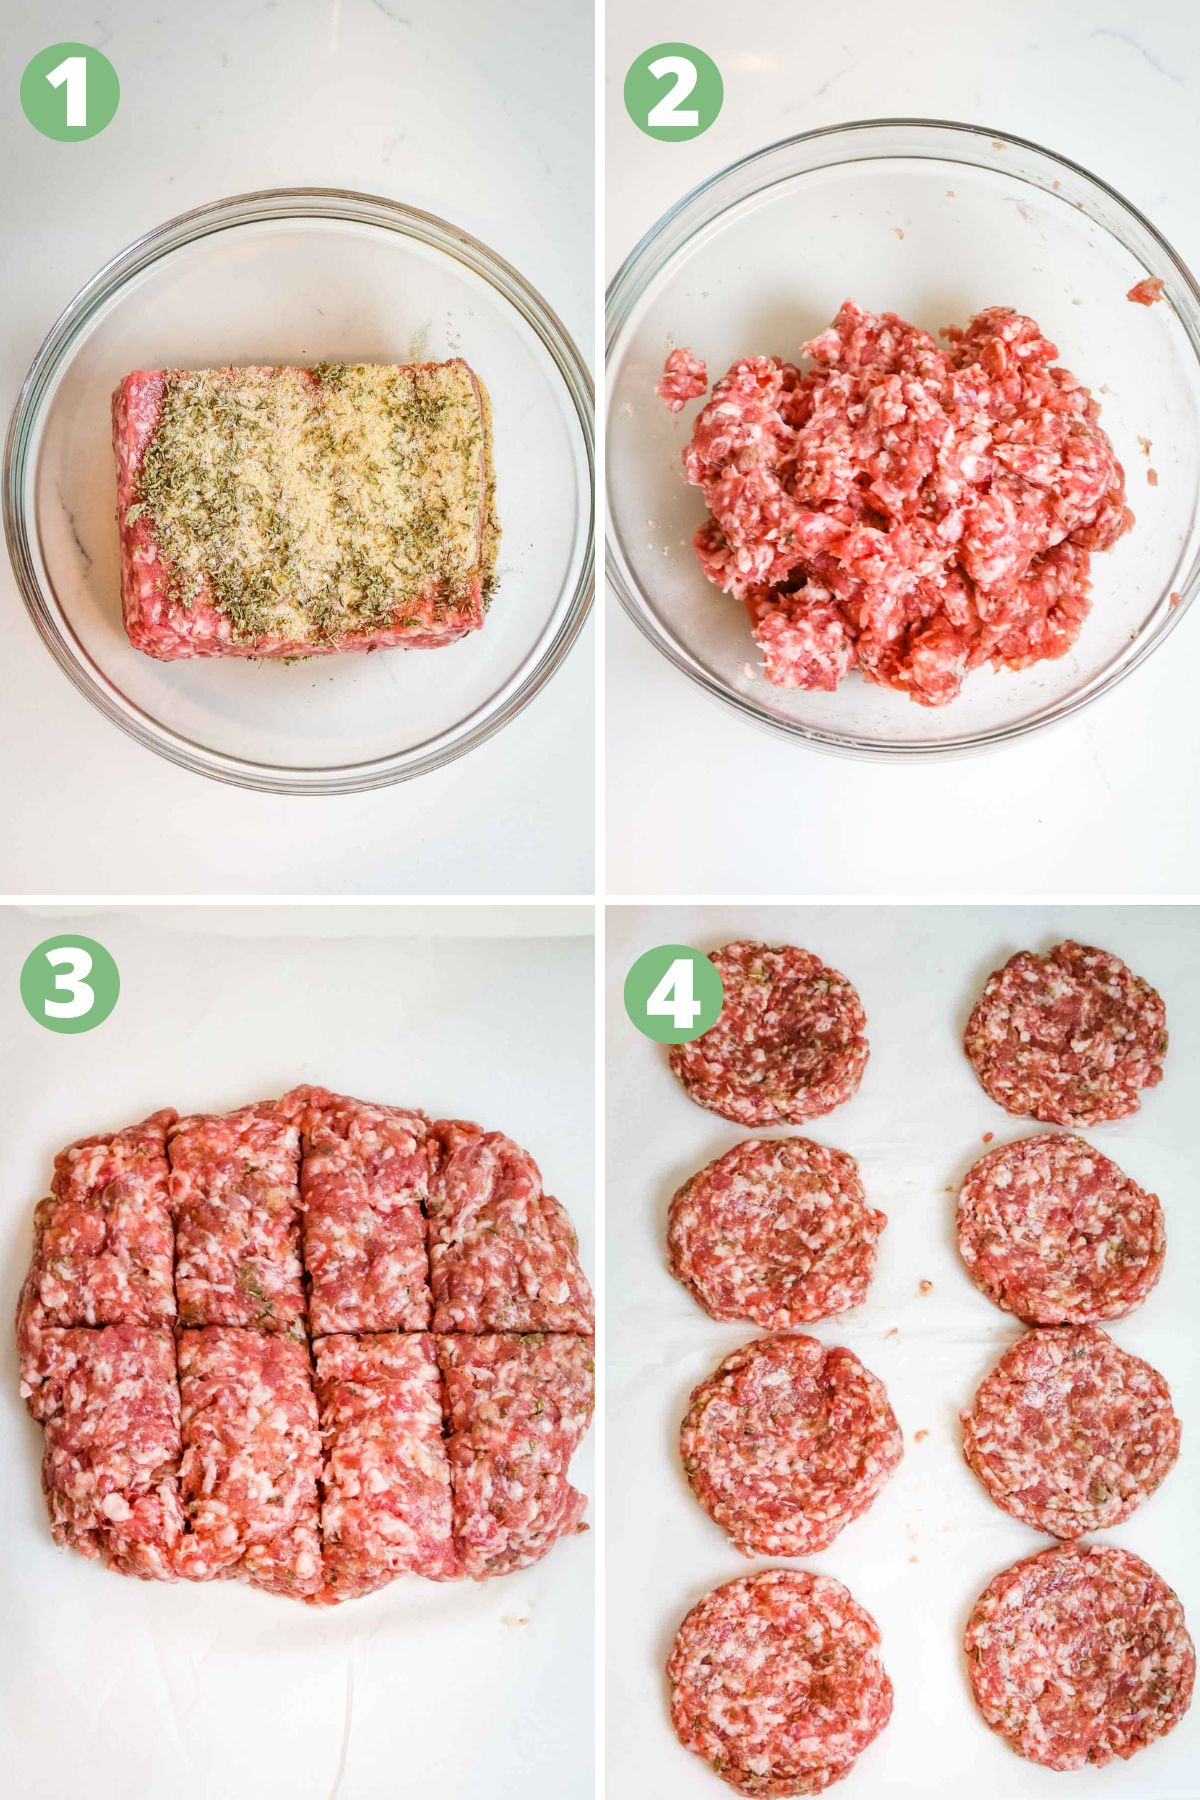
Step 1. Add to bowl
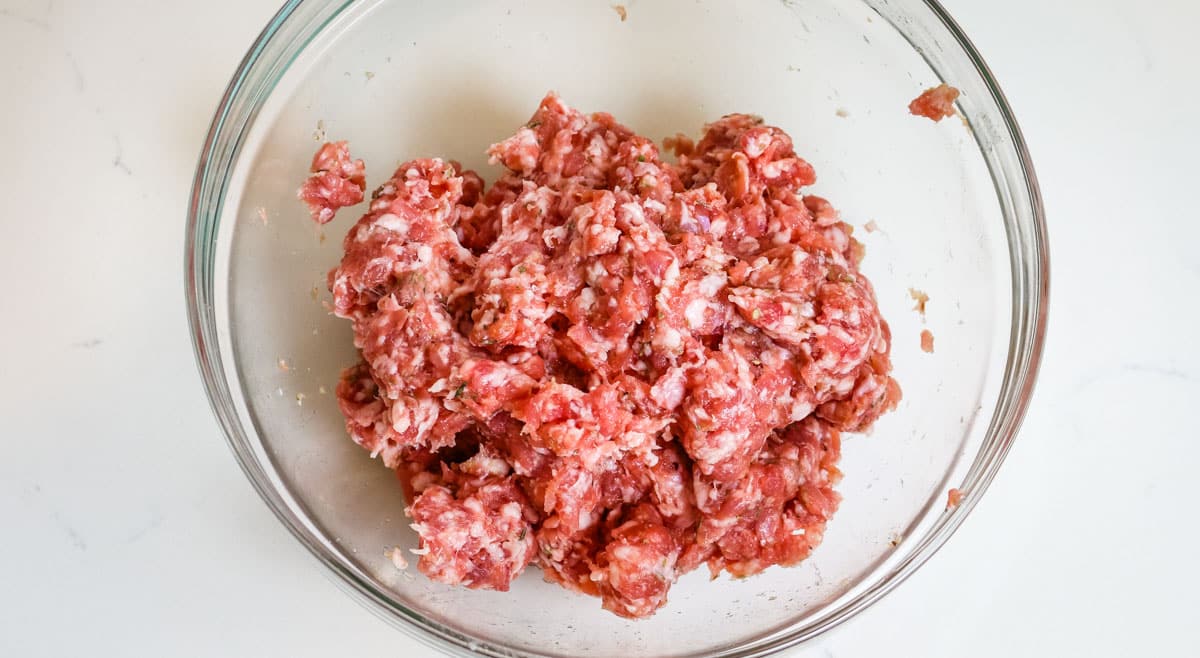
In a medium bowl, add ground pork and seasonings (dried sage, garlic powder, onion powder, dried marjoram, and sea salt).
Step 2. Combine
Mix all the ingredients together. For best results, be careful not to overmix as the meat will become dry and rubbery,
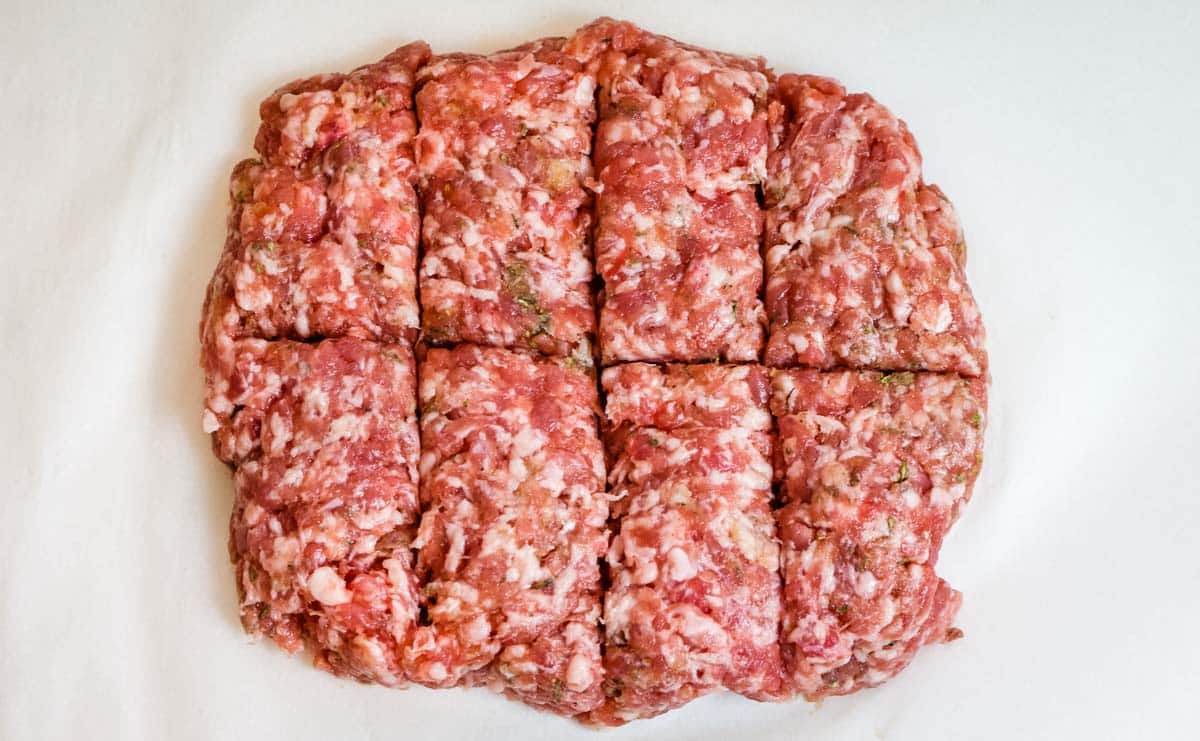
Step 3. Divide meat
Transfer the meat mixture into a flat surface and press firmly to create a big flat patty. Shape into a rectangle and divide the patty into 8 equal pieces.
💭Pro Tip: Here's an easy and reliable way to divvy up any ground meat into equal portions: shape into a square or rectangle (making a large patty on a flat surface) and make equal "cuts" with a butter knife according to how many sections you will need.
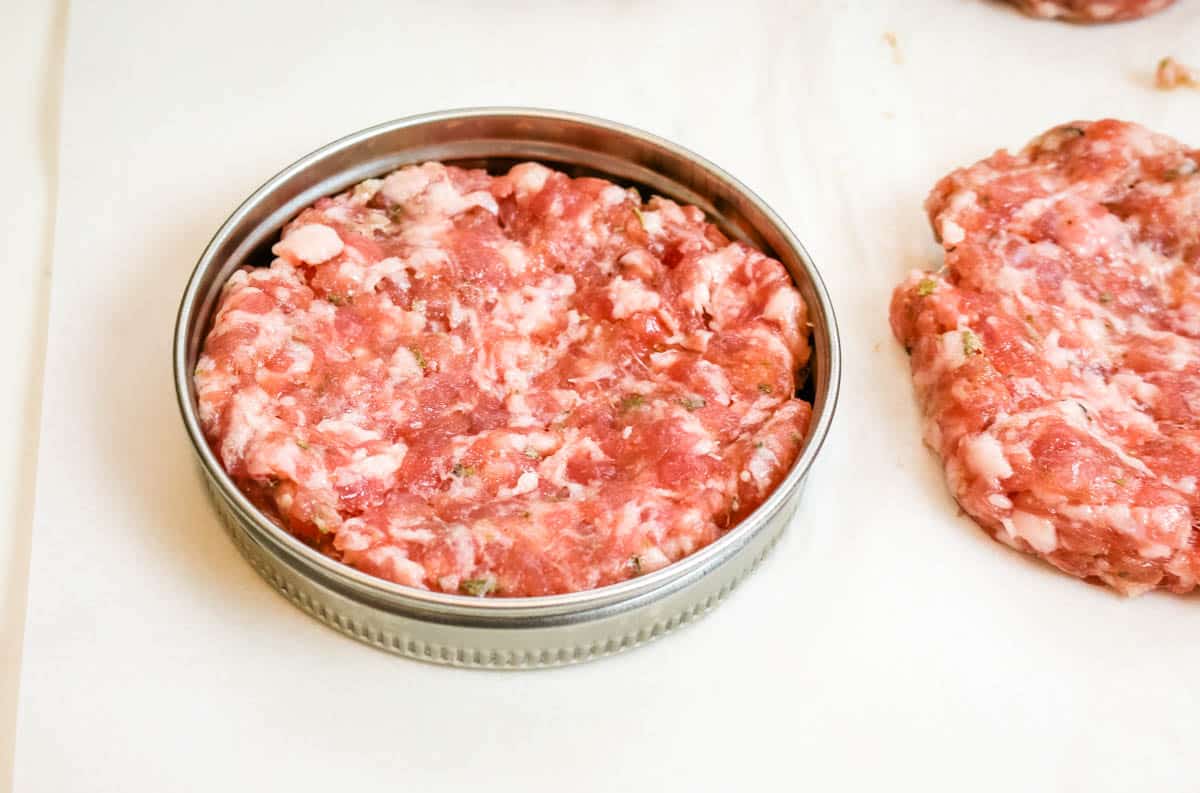
Step 4. Shape into patties
Shape into patties. The easiest way to do that evenly is to use a mason jar ring and spread the meat mixture evenly towards the edges of the ring.
Create a slight dent in the center of the raw sausage patties so the meat is thicker on the sides. This will make patties flat when cooked.
Gently invert the patties, removing the ring.
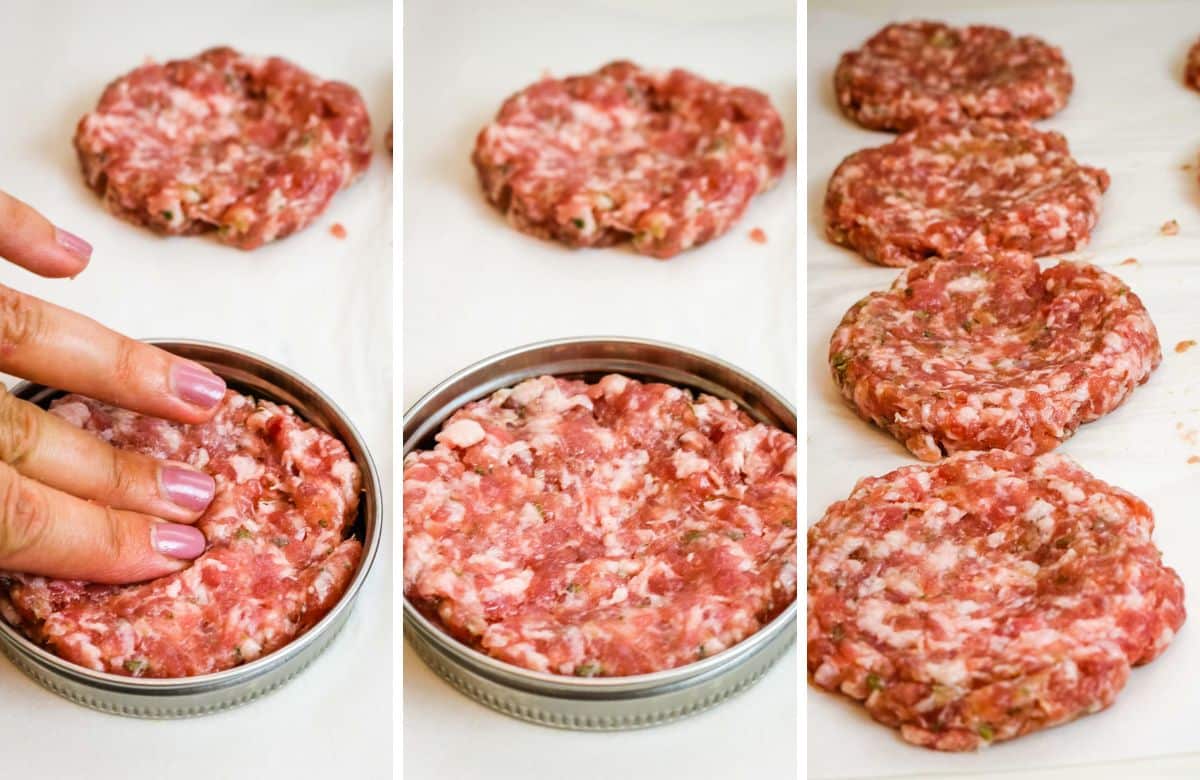
💭Pro Tip: Use a mason jar ring to shape the patties into perfect discs. Make a slight dent in the center. This will yield perfectly flat patties.
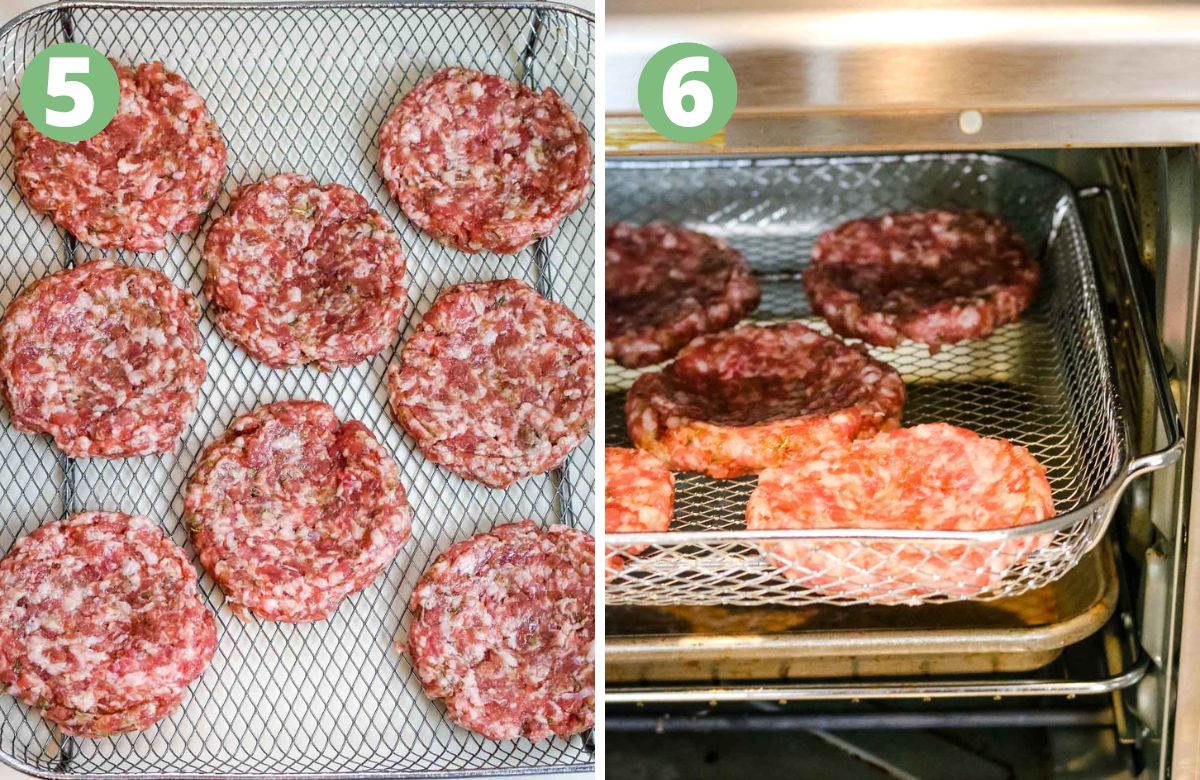
Step 5. Transfer patties
Transfer patties onto a crisper tray for a toaster oven air fryer. If using a basket style air fryer, transfer the patties into the basket in single layer. You may have to cook them in batches since the basket doesn't have a large capacity.
Step 6. Air fry sausage patties
Bake the sausage patties in a pre-heated air fryer at 400 degrees Fahrenheit for 10 minutes. For basket air fryers, start checking at the 8 minute mark so to not overcook the patties. Cook time will vary.
💭Good to know: If unsure if patties are done, check the temperature with an instant read thermometer. The internal temperature should register at 145 degrees Fahrenheit.
Helpful Tools & Links
Below are some affiliate links that may be helpful to you as you make this recipe. You can find some of these items cheaper at your local store but it helps to have a link so you know what you're looking for.
- Tools: large mixing bowl, extra-large air fryer, instant read meat thermometer
- Ingredients: dried sage, garlic powder, onion powder, real salt, dried marjoram, dried thyme,
- Storage Supplies: glass snap containers, parchment paper
Serving Suggestions
These easy air fryer sausage patties are great with your morning eggs. But I love nestling a sausage patty between a pair of homemade sourdough English muffins with an egg and a slice of raw cheddar.
Or you can choose something from one of these tasty air fryer breakfast recipes. There will be something for everyone to come up with a well-rounded meal to start the day.
Storage and Reheating Instructions
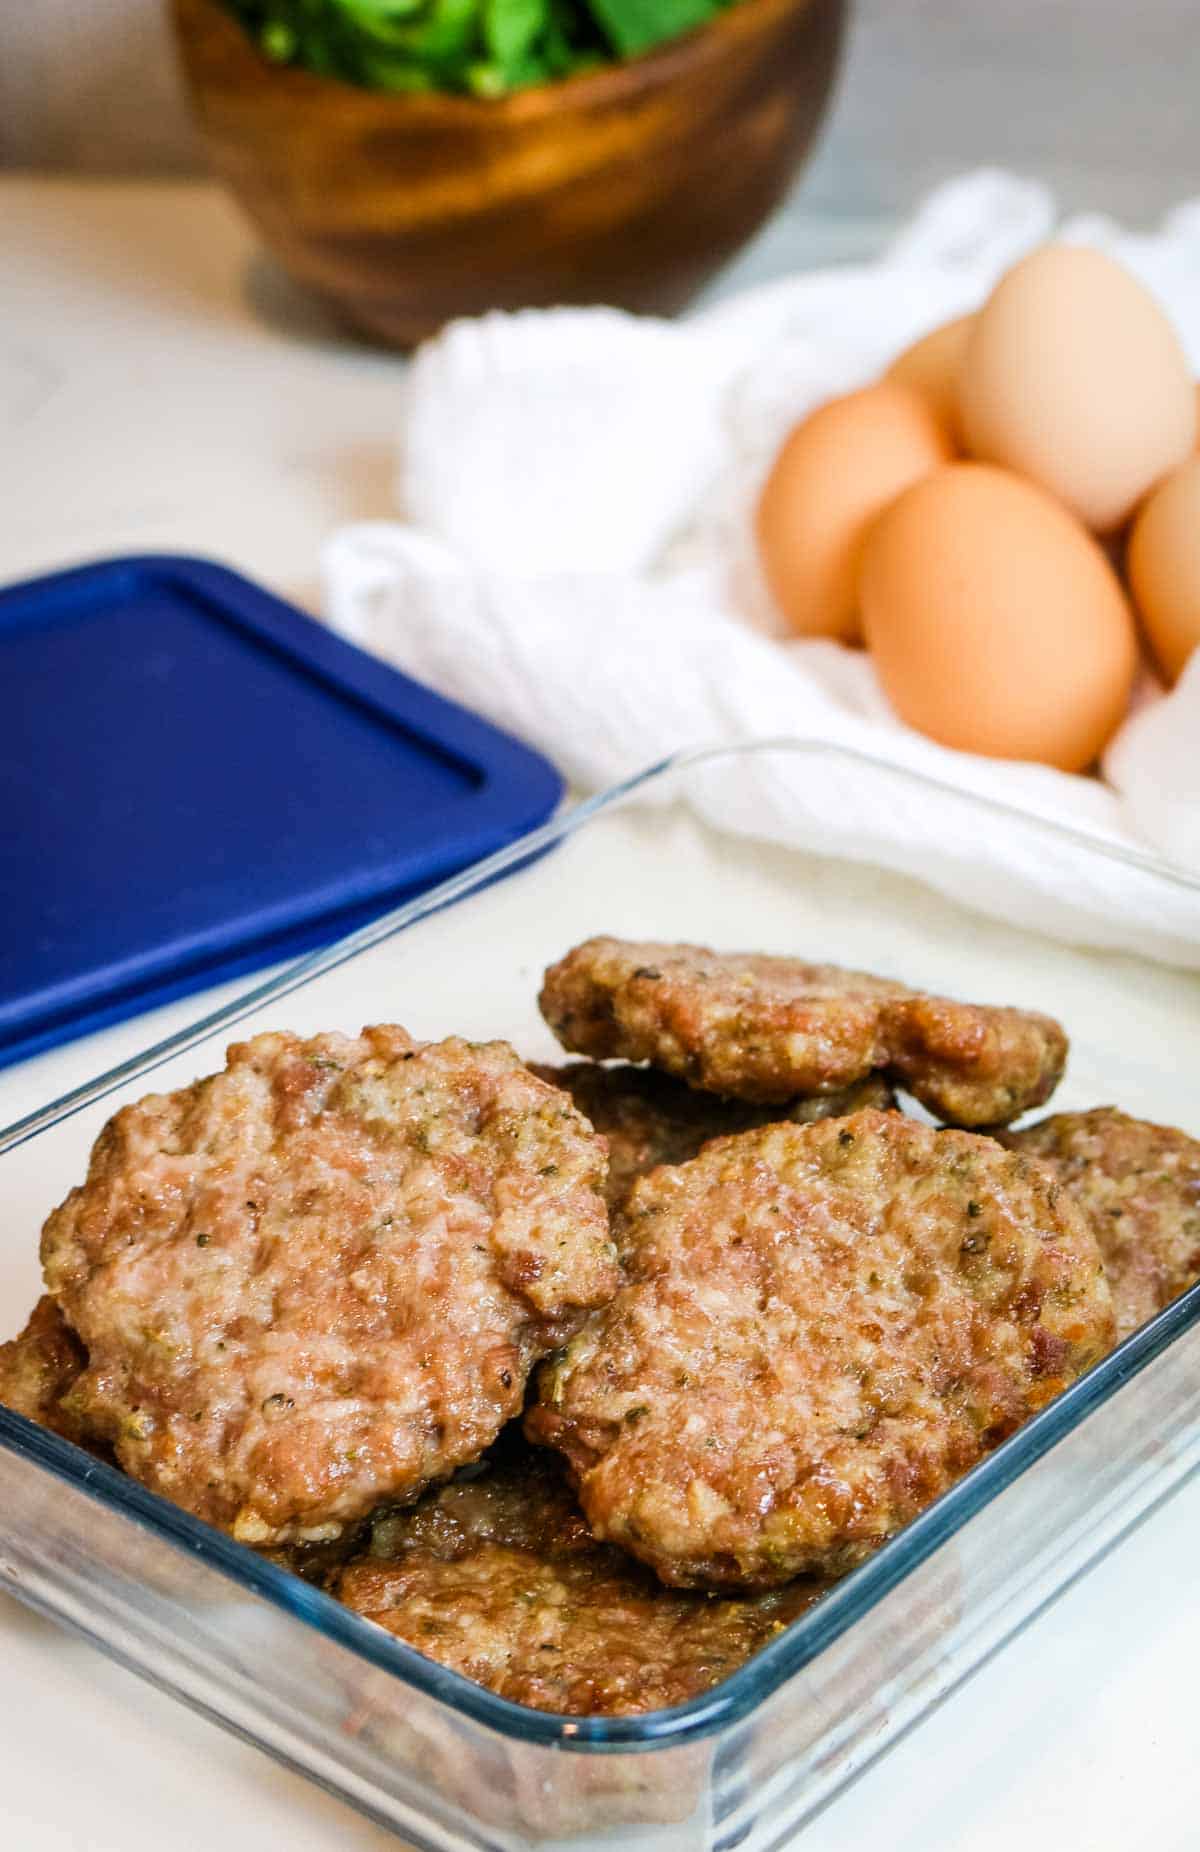
To store: These breakfast patties will store well in an airtight container in the refrigerator for up to 3 days.
To freeze: Transfer the patties to a freezer safe container, laying flat and separating the layers with a piece of parchment paper. Close the lid and pop in the freezer. The parchment paper should assist in releasing the patty. Do not freeze the patties without the parchment - they will just stick together. Patties can be frozen for up to 4 months.
To reheat: Remove patties from refrigerator and reheat in a non-preheated air fryer for 3 minutes at 400 degrees Fahrenheit. If frozen, use the same method but reheat the frozen breakfast sausage patties for 8 minutes.
💭Good to know: The beauty of cooking these breakfast sausage patties in the air fryer is that you can eliminate the need for that extra fat. But read below for instructions on stove top cooking method.
FAQs
Yes but results will be vastly different. Pork has a high fat content (this is healthy fat if pork is from healthy heritage pastured pigs) and this fat gives great flavor. If you opt with another meat like chicken, turkey, or beef, - you will have to add additional fat like bacon to compensate for the juiciness and flavor.
Yes, these patties can be cooked in a cast iron skillet but you will need additional fat to add to the pan. Cook the patties in a hot skillet with a little oil for 3-4 minutes on each side. You may need to dab the patties with a paper towel to absorb the extra grease.
These patties freeze beautifully making for a seamless breakfast. To cook frozen patties, pop however many patties (cooking time is the same) you need in a non-preheated air fryer at 400 degrees Fahrenheit and reheat for 4 minutes or until warmed through.
Looking for more healthy basics? Here are some ideas:


Did you make this? Please leave a ⭐ recipe rating in the recipe card below and leave a review in the comments. Thank you!💚
Printable Recipe

Air Fryer Breakfast Sausage Patties
Ingredients
- 1 pound ground pork
- 1 teaspoon dried sage leaves are best but ground works too
- 1 teaspoon garlic powder
- 1 teaspoon onion powder
- 1 ½ teaspoon sea salt
- ½ teaspoon dried thyme
- ¼ teaspoon dried marjoram
Instructions
- Preheat air fryer to 400 degrees Fahrenheit. Mix all the seasonings together.

- Add seasonings to the ground pork and combine well until mixed well. Using hands to thoroughly mix everything is helpful.

- To shape the patties, divide the sausage mixture into 8 equal portions, about 2 ounces each.

- Shape the portions into balls, then press firmly to create discs, making a subtle dent in the center. To get uniform size patties, use a mason jar ring and gently spread the meat towards the edges of the ring. Then carefully invert to remove the sausage patty.

- Place the sausage patties on a crisper tray or air fryer basket and air fry for 10 minutes or until instant read thermometer reads 160 degrees Fahrenheit.

- Serve with eggs or in breakfast sausages.


Notes
- Sausage patties will shrink when cooked. To retain that flat patty-like shape, slightly depress the center of the patty to move the meat towards the sides.
- To freeze sausage patties: transfer them to a freezer safe container with parchment paper between the patties.
- To reheat sausage patties: pop frozen patties in a non preheated air fryer at 350 degrees Fahrenheit for 5 minutes to reheat.
- If using a basket-type air fryer, start checking on the patties at the 8 minute mark to avoid over cooking them.
- Recipe makes 8 patties. Serving size is 2 patties.