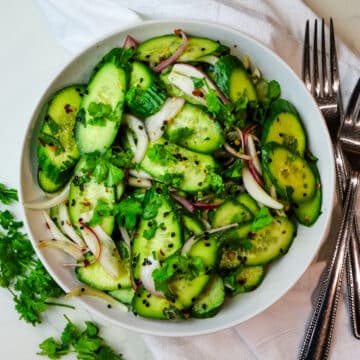
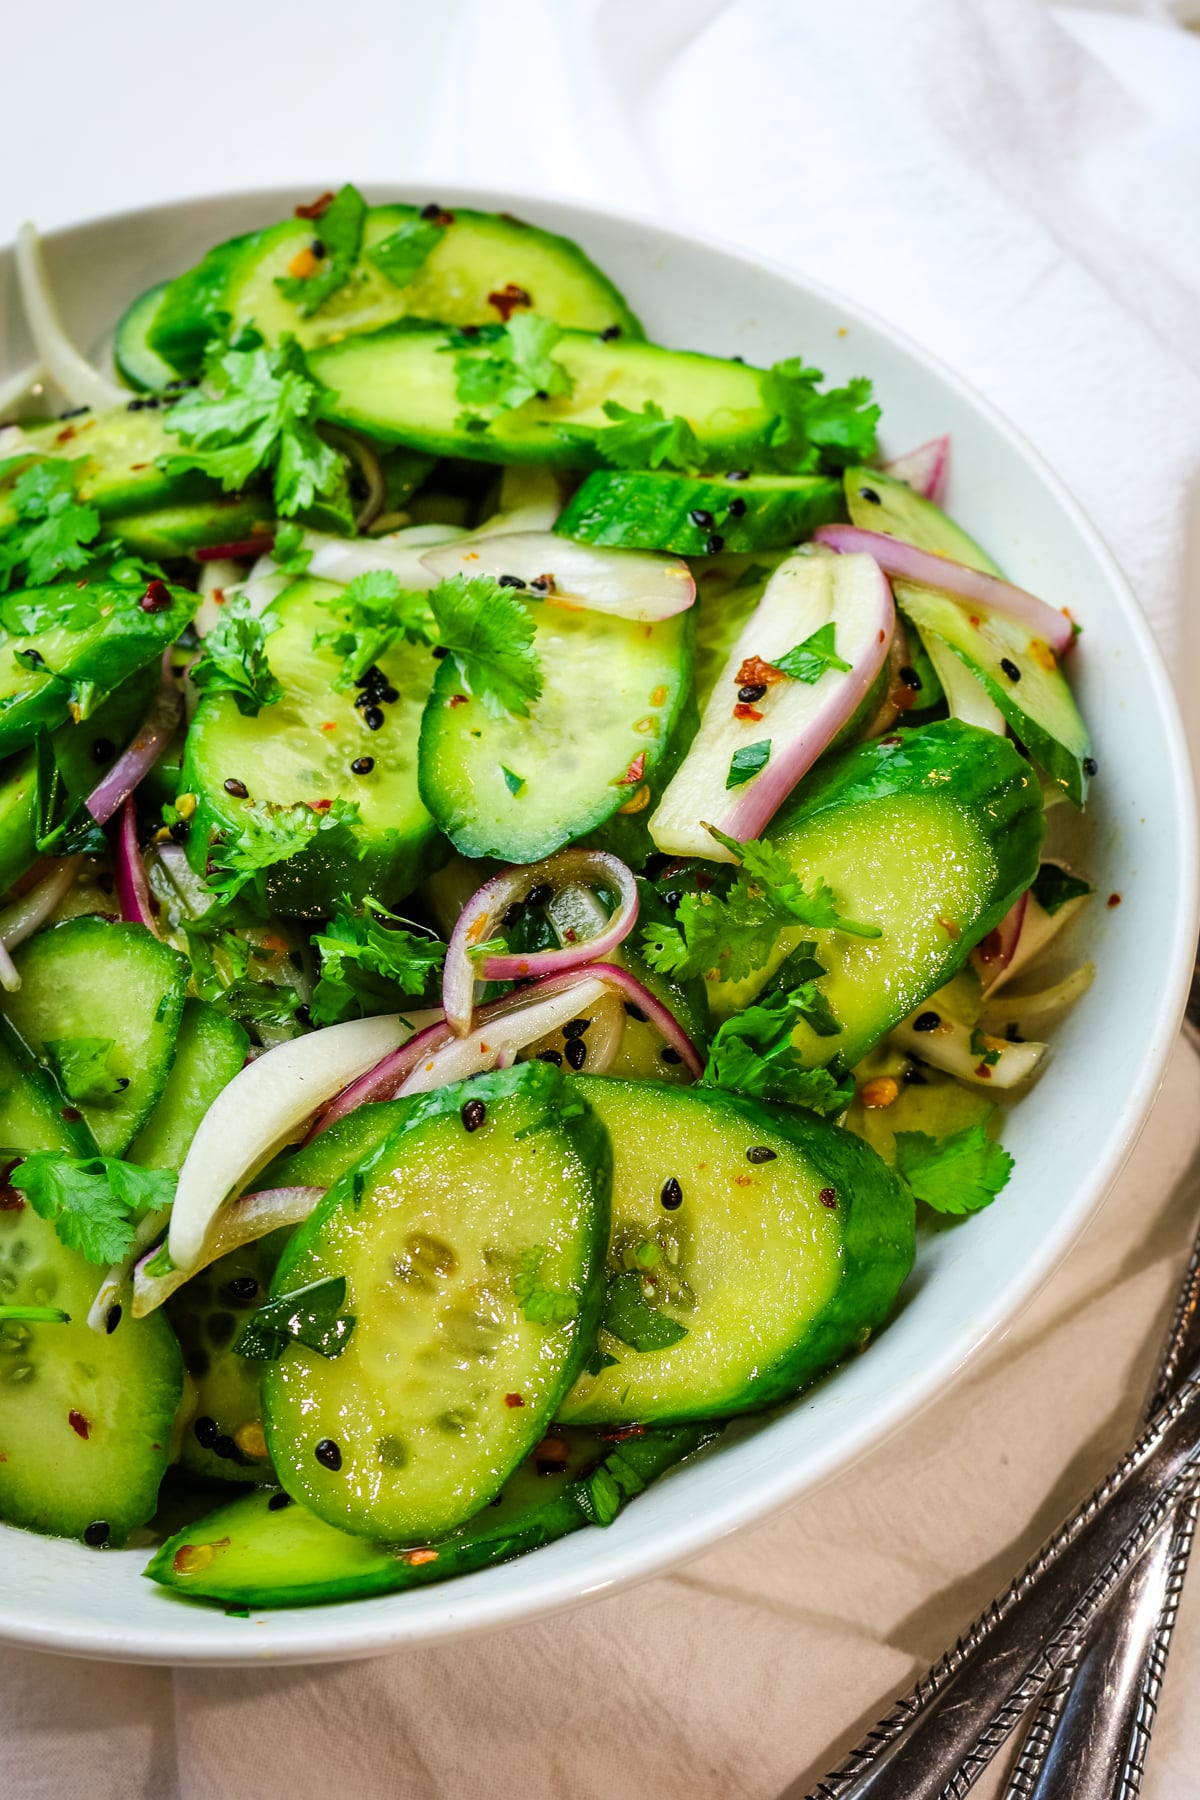
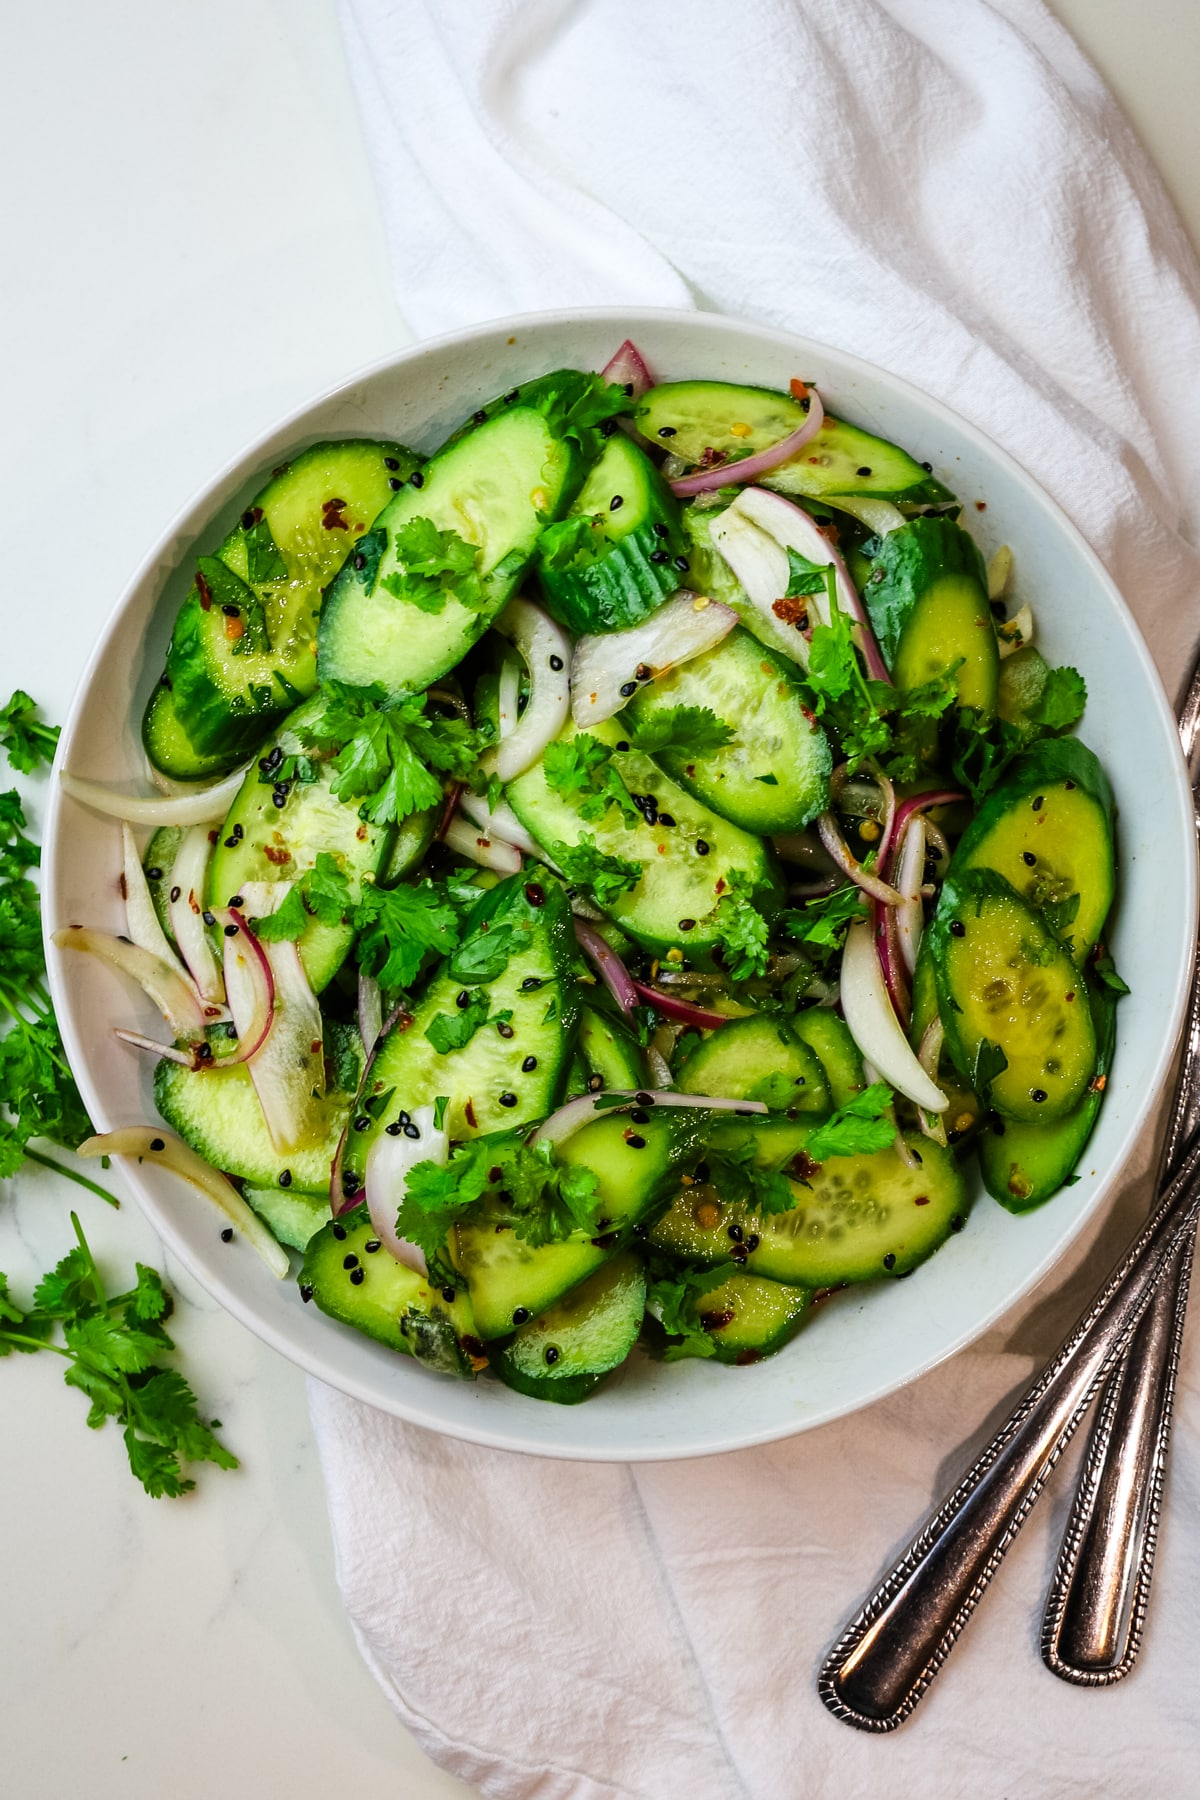
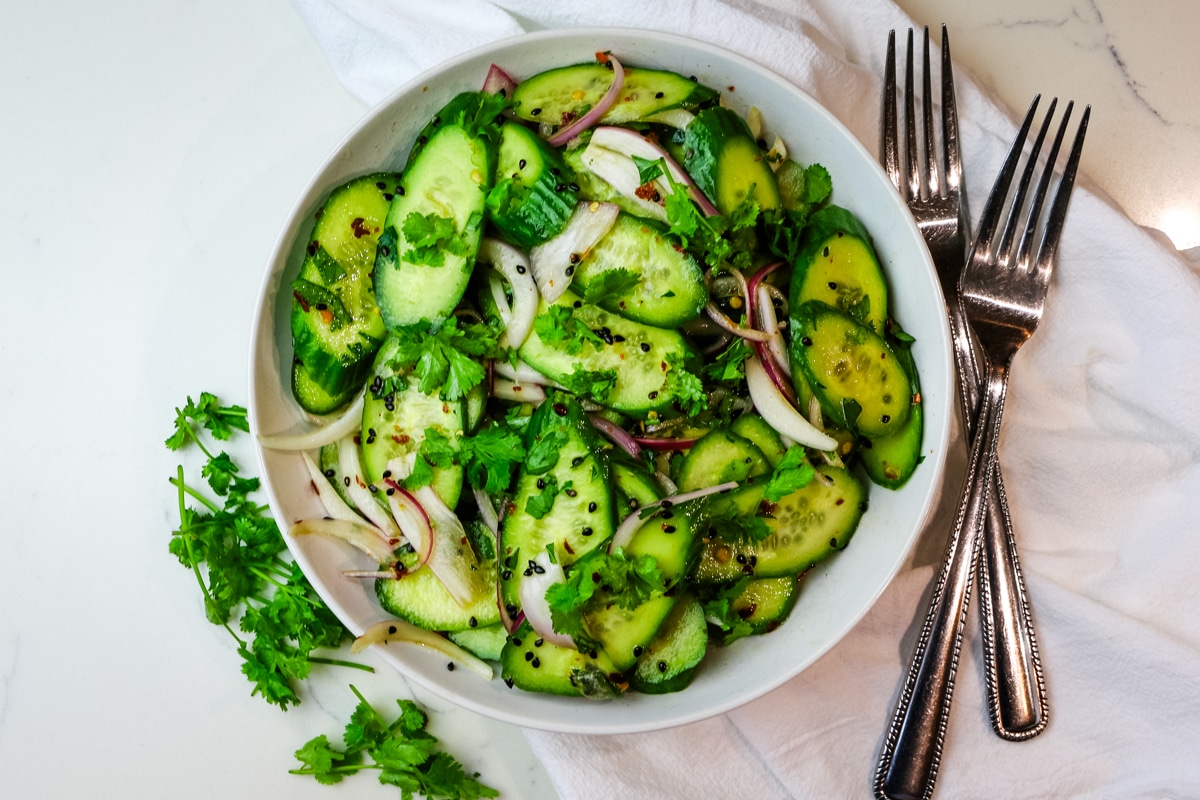
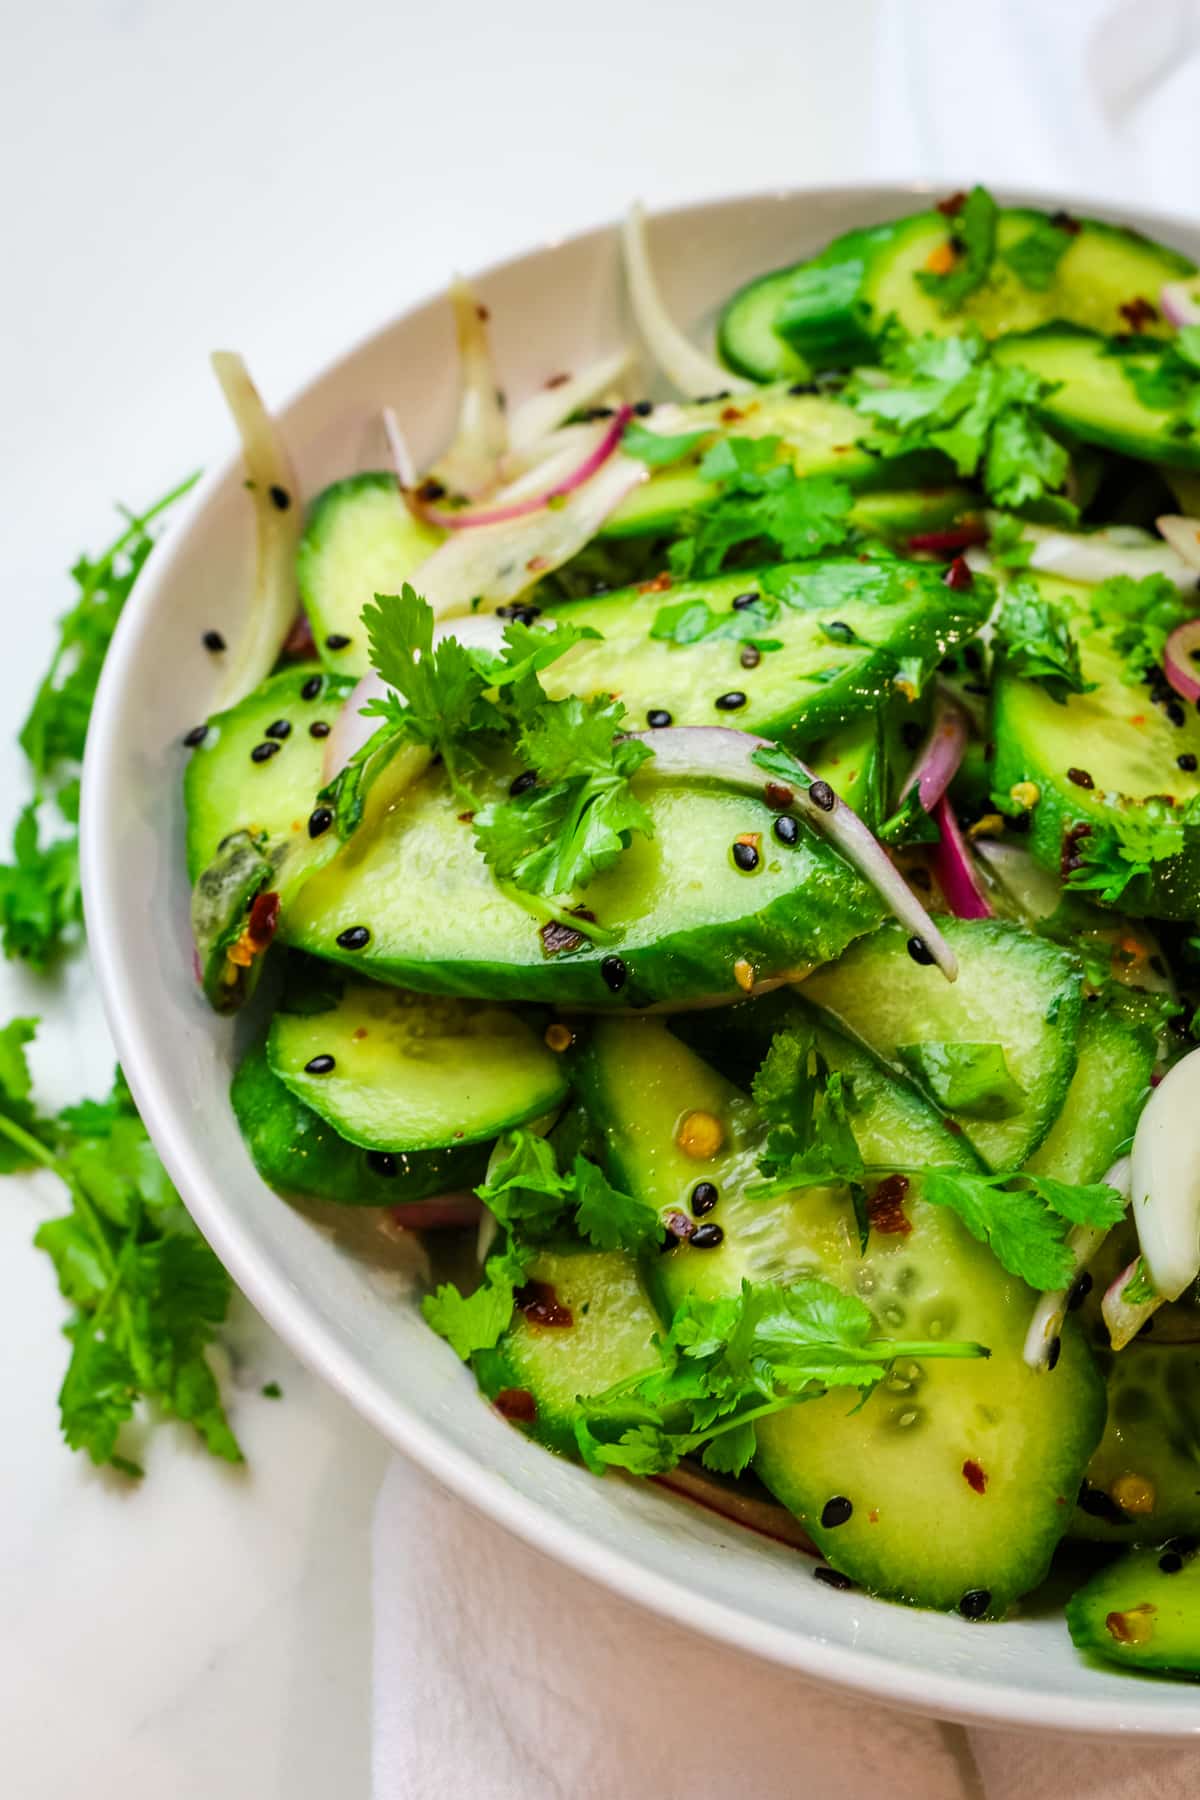
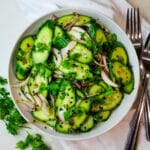
This Spicy Asian Cucumber Salad is made with refreshing cucumbers, crunchy red onions, fragrant cilantro, and a simple roasted sesame dressing. It's a healthy salad to accompany all your Asian dishes and it comes together quickly in under 15 minutes! Plus, this easy recipe is an excellent way to use up your surplus of cucumbers.
Embrace the summer heat with this refreshing Asian Cucumber Salad recipe. It is the queen of all salads and for good reason.
Thinly sliced cucumbers and crispy red onions tossed in a delicious medley of roasted sesame dressing, tangy rice vinegar, and savory coconut aminos - this salad perfectly captures the essence of summer in every bite.
Add in some fresh cilantro, a touch of spiciness, and a black sesame seeds for good measure, and it's a perfect accompaniment to your outdoor gatherings, picnics, or an easy side to a weeknight dinner.
Pair it with your favorite chicken recipe or stir-fry to make it a complete meal.
[feast_advanced_jump_to]Why you'll love this recipe
Use up excess cucumbers - If you have a surplus of cucumbers from your garden or a generous supply from a farmer's market, this salad recipe is for you!
Easy to make - With only 3 fresh ingredients and a handful of pantry staples, this Asian cucumber salad comes together quickly and effortlessly.
Perfect for meal prep - This salad can be made ahead of time and stored in the refrigerator, allowing the flavors to develop. Make over the weekend to enjoy on busy weeknights.
Great accompaniment to Asian meals - Its versatile flavors make it an excellent pairing to various Asian cuisines. Whether it's Korean, Japanese, Chinese, or Thai - you can switch things up to make it work for your dinner tonight.
💭Fun Fact: Cucumber salads are popular across various Asian cuisines and are appreciated not only for their refreshing taste but also for their cooling properties as they have a practical purpose to help people stay cool during hot weather.
Ingredients
Learn how to make Spicy Cucumber Salad with 3 fresh ingredients plus the simple salad dressing. This easy recipe takes only 15 minutes from start to finish.
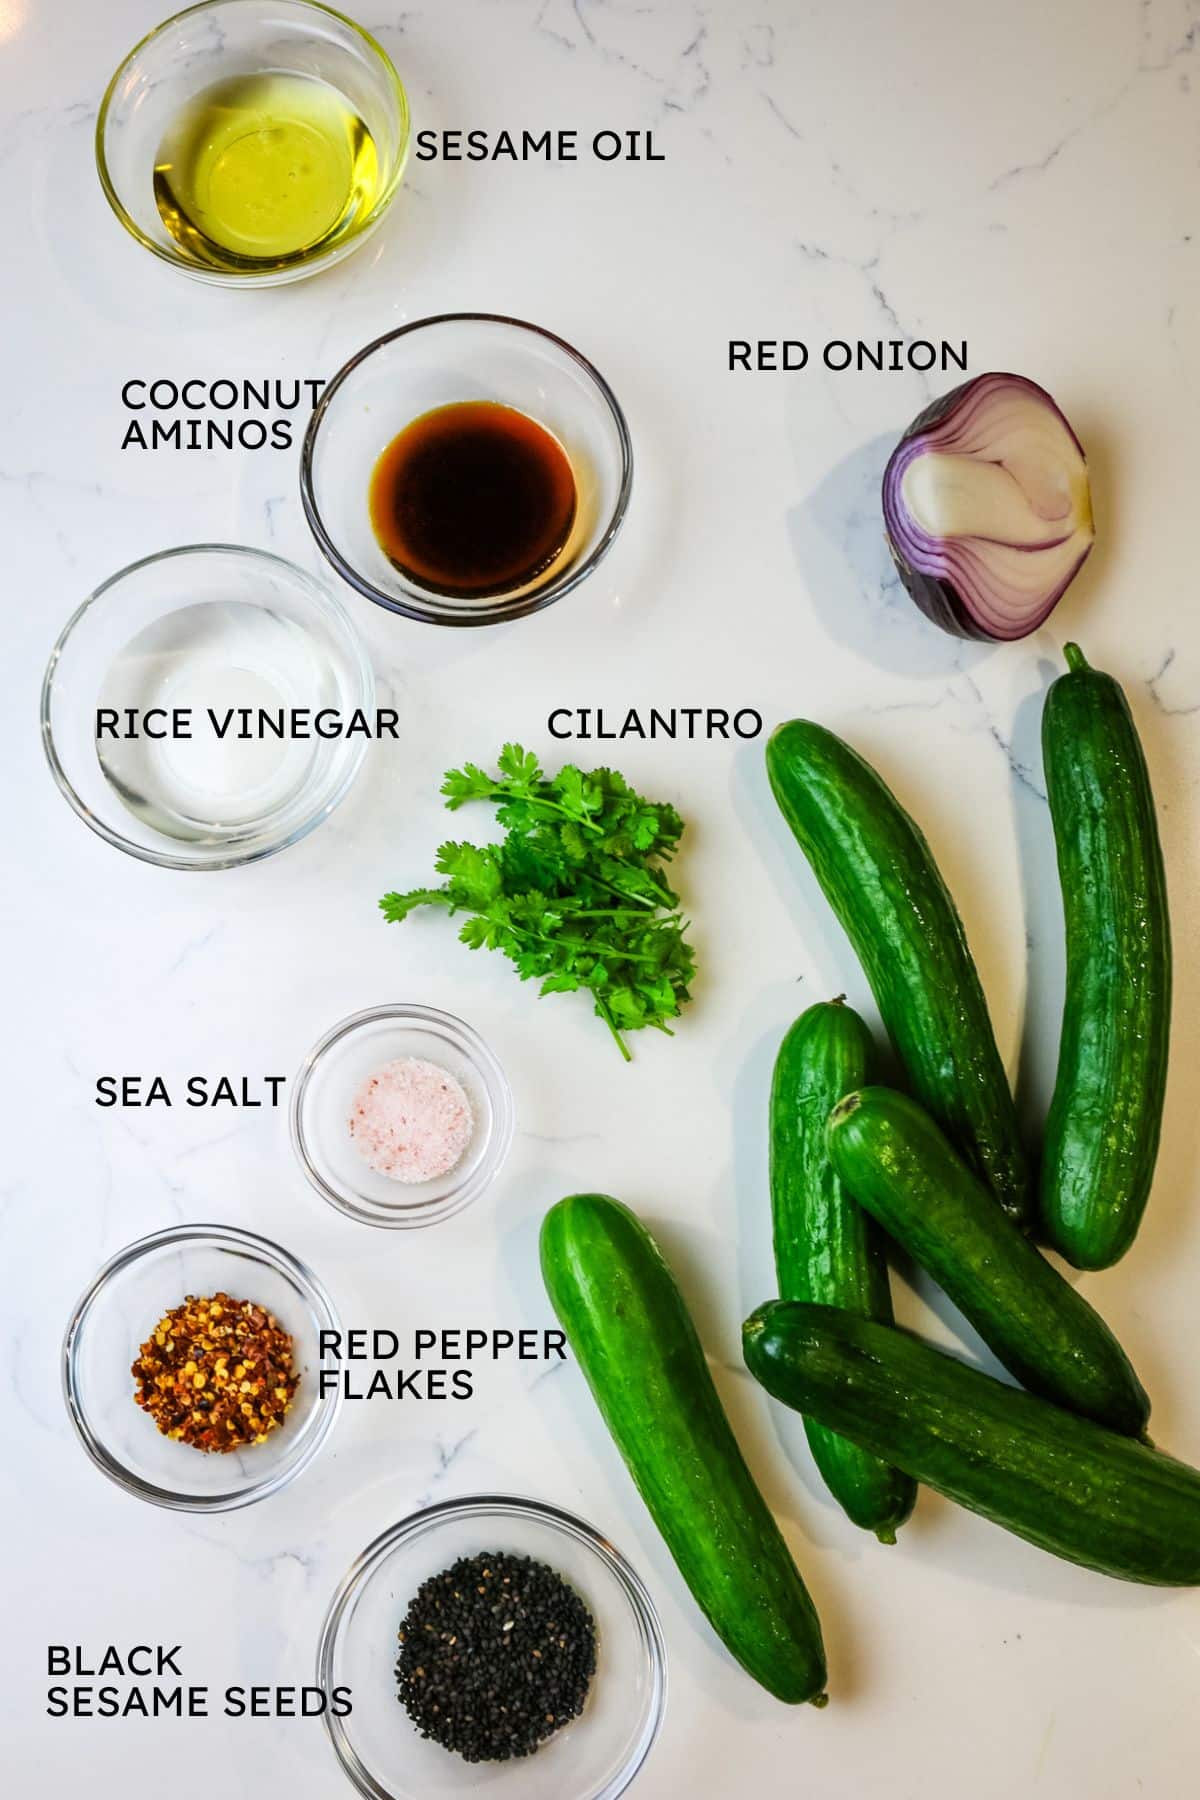
- Cucumbers: Use thin-skinned seedless cucumbers such as Persian cucumbers or English cucumbers. This provides a crisp, refreshing, and crunchy base for the salad. Mini cucumbers would make a fun visual twist.
- Red onion: Adds a hint of sharpness and color to the salad. You can use shallots or a white onion in a pinch.
- Fresh cilantro: Provides a bright and herbaceous note to the salad and complements the rest of the ingredients well.
- Dressing: A simple blend of toasted sesame oil, rice vinegar, coconut aminos, crushed red pepper, black sesame seeds, and unrefined sea salt completes this easy Asian cucumber salad.
See the recipe card for exact quantities.
Substitutions and Variations
- Paleo/Whole30 Cucumber Salad - All the ingredients are naturally Whole30 and paleo compliant but if unsure about the rice vinegar, switch that out with apple cider vinegar.
- Low Carb and Keto Cucumber Salad - Most of the ingredients are naturally low carb and there is no sweetener of any kind in this salad recipe. Swap out the rice vinegar with apple cider vinegar to reduce the carb count further. Given that there is very little fat in this dish, it's not technically keto.
Use this simple Asian Cucumber Salad recipe as a general base to add more unique flavor. Here are some great ideas:
- Chinese Cucumber Salad - Add one minced garlic clove and a touch of ginger for a zesty kick. Drizzle some honey for a hint of sweetness and swap coconut aminos with soy sauce. Add some chili oil for a fiery kick.
- Japanese Cucumber Salad - Use Japanese cucumbers (Kyuri) instead of Persian cucumbers. Add white sesame seeds along with black. Substitute coconut aminos with ponzu sauce and sub rice vinegar with mirin (sweet rice wine vinegar). Top with seaweed flakes or furikake.
- Korean Cucumber Salad - Add Gochujang (fermented chili paste) or Korean red pepper flakes called Gochugaru (which is a staple ingredient in Kimchi recipe) for a savory and spicy kick. Replace red onions with finely chopped scallions or green onions.
Make it Nutrient Dense
Staying true to the heart of what Prepare and Nourish is all about, there are ways to ensure you get the maximum nutrition in this easy cucumber salad recipe. Even though it's an incredibly simple recipe, you can take purposeful steps to turn this into a nutrient-dense meal.
Make this seasonally. Cucumbers and cilantro are abundant during the warm summer months, which is a good thing they can cool you down. Make this refreshing cucumber salad regularly during hot weather, and source the cukes from your local farmer's markets for the best flavor.
Use quality ingredients. Aside from the freshest cucumbers, use the best quality ingredients. That often likely means organic oil, vinegars, unrefined sea salt, and other seasonings. Initially, that may seem expensive but these pantry staples will last you a long time.
Add in a ferment. Toss this with homemade Kimchi for the ultimate side dish. Or add a little spicy sauerkraut (made with ginger and garlic!) to spice things up.
Helpful Tips
Adjust spice level - If you prefer a milder salad, reduce the red pepper flakes or omit them altogether. Alternatively, if you enjoy a spicier salad, increase the amount to suit your taste.
Toasted sesame seeds - Toasting the sesame seeds in a dry pan over medium heat for a few minutes can enhance their nutty flavor. Be careful not to burn them though!
Make-ahead tip - This salad is great to make ahead. In fact, it tastes better as it ages. But at the very least, you want the flavors to meld together and intensify for at least 30 minutes in the fridge.
💭Pro-tip: For easy cleanup, add the dressing ingredients directly into the salad bowl to avoid extra dishes to wash.
Step-by-Step Instructions
The complete printable recipe is below in the recipe card for your convenience.
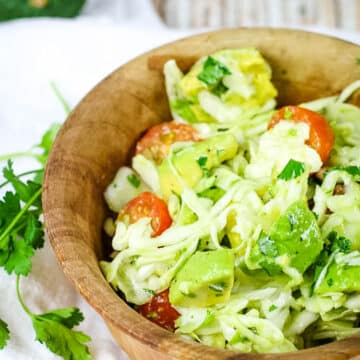
The recipe for Asian cucumber salad is very straightforward. Thinly sliced refreshing veggies are tossed in a tangy roasted sesame dressing for a salad that is out of this world delicious!

Step 1. Slice
Thinly slice cucumbers and red onions and place them into a medium bowl. Add finely chopped cilantro.
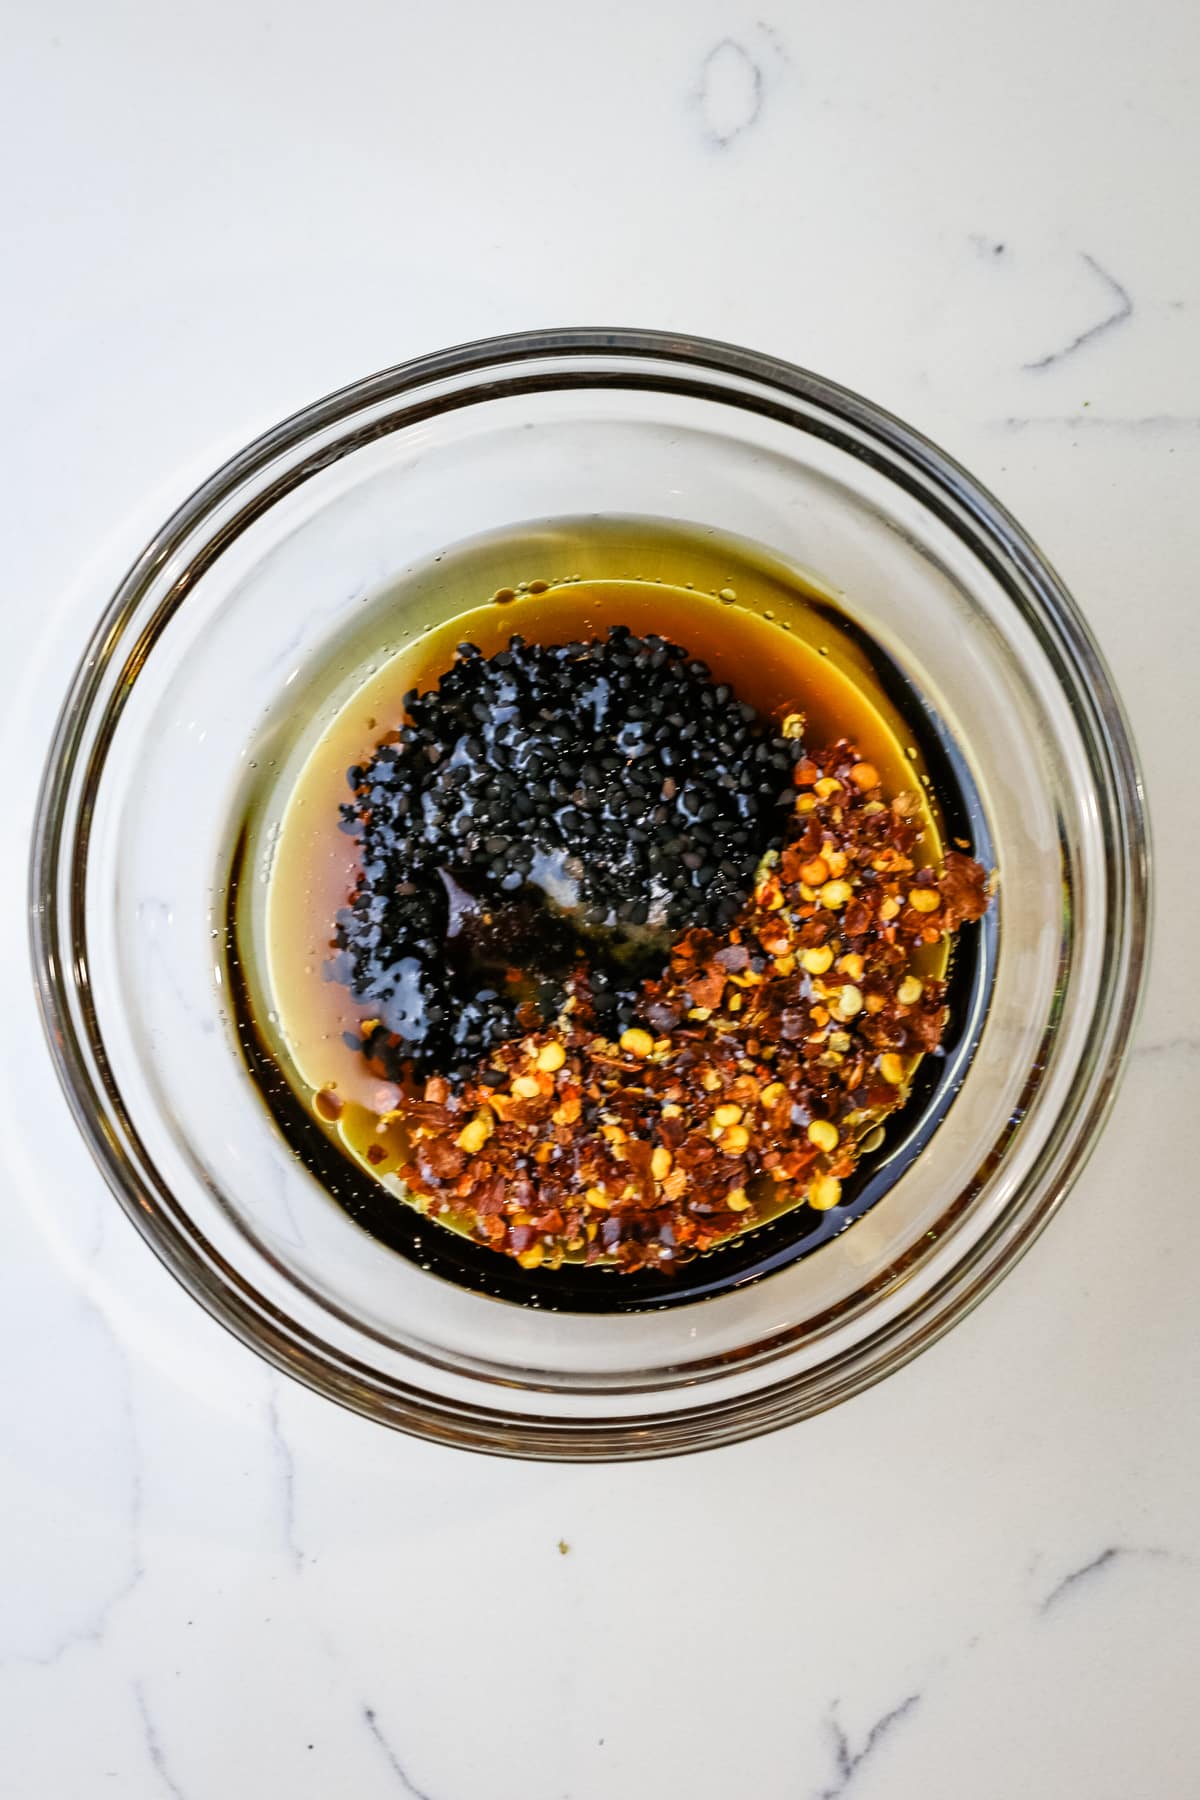
Step 2. Whisk
In a small bowl, whisk together the sesame oil, vinegar, coconut aminos, salt, sesame seeds, and pepper flakes.
💭Pro tip: Use a mandoline slicer to achieve thin and uniform slices of cucumbers and red onions.
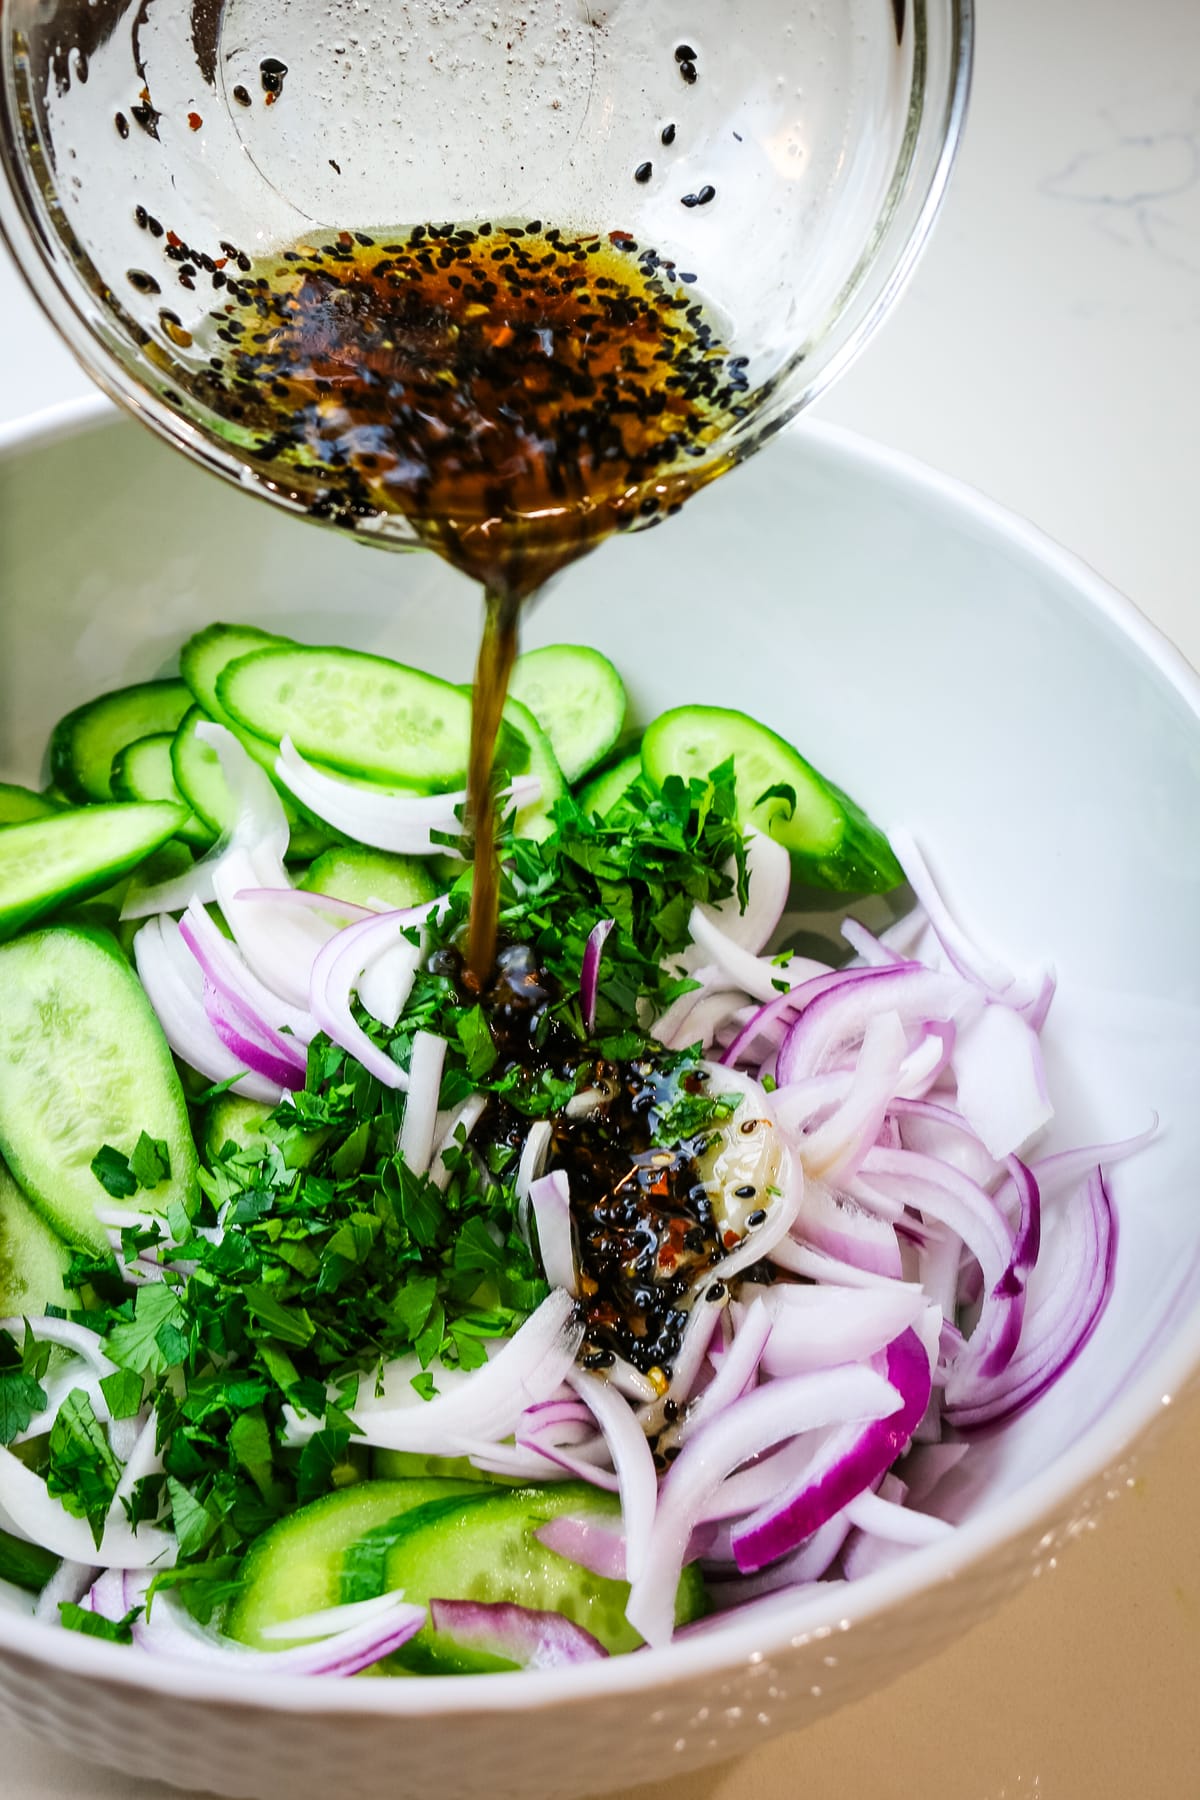
Step 3. Toss
Pour the roasted sesame dressing over the cucumbers and red onions and toss to coat evenly.
Step 4. Chill
Serve immediately or place in the refrigerator for up to a week for a more pickled taste.
💭Pro tip: If refrigerating, freshen the cucumber salad up by garnishing with freshly chopped cilantro and sesame seeds.
Helpful Tools & Links
Below are some affiliate links that may be helpful to you as you make this recipe. You can find some of these items cheaper at your local store, but having a link helps you know what you're looking for.
- Tools: chef knife, cutting board, large mixing bowl, mandoline slicer
- Ingredients: sea salt, black sesame seeds, red pepper flakes, toasted sesame oil, rice vinegar, coconut aminos
- Storage Supplies: wide-mouth mason jars for leftovers, glass snap containers
Serving Suggestions
Serve this paleo cucumber salad as a side dish alongside other Asian main courses such as stir-fries, grilled meats or fish, sushi bowls, or noodles. Pairing it with this Thai chicken larb sounds delicious.
The crispness and vibrant flavors of the salad will complement the main dish well.
Spicy Asian Cucumber Salad pairing suggestions

Storage Instructions
To store: Leftover spicy Asian cucumber salad can be stored in an airtight container in the refrigerator for up to 7 days.
Storage containers: These glass snap containers are perfect for leftovers but if you want to save them as Asian cucumber pickles, consider storing them in a wide-mouth mason jar.
FAQs
Yes! You can use regular cucumbers to make Asian cucumber salad. However, seedless cucumbers are preferred for their crisp texture and minimal seeds (and consequently moisture), which contribute to a better salad consistency.
Cucumbers in general have a higher moisture content. But to prevent the cucumber salad from becoming too watery, here are a few tips:
1. Salt and rest: after slicing the cucumbers, season them lightly with salt and let them rest for 15 minutes. Afterwards, rinse the cucumbers and pat dry with paper towels to remove excess moisture.
2. Remove seeds: if using cucumbers with large or watery seeds, scoop them out with a spoon before slicing.
3. Drain: After dressing the salad, allow it to sit for a few minutes to let any excess moisture accumulate at the bottom of the bowl. Then scoop out the salad with a slotted spoon, leaving the moisture in the bowl.
Absolutely! You can easily scale this recipe to make a larger batch for a crowd or party. Simply adjust the servings needed and follow the recipe. Keep in mind, that a party typically has several sides and therefore the serving amount may change per person. Also, tasting and adjusting the seasonings before serving is a good idea to ensure your desired flavor.
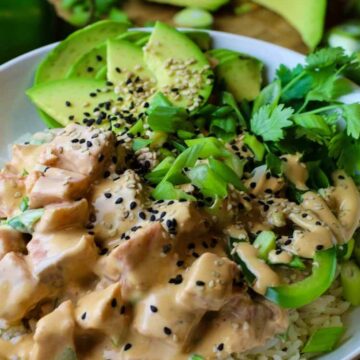
Looking for more cucumber recipes? Here are some ideas:

Did you make this? Please leave a ⭐ recipe rating in the recipe card below and leave a review in the comments. Thank you!💚
Printable Recipe
Asian Cucumber Salad
Equipment
Ingredients
- 6 seedless cucumbers approximately 1½ pounds
- ¼ red onion
- 2 tablespoons toasted sesame oil
- 1 tablespoon rice vinegar
- 1 tablespoon coconut aminos
- 2 tablespoons fresh cilantro, finely chopped
- 2 teaspoons black sesame seeds
- ½ teaspoon sea salt
- ½ teaspoon red pepper flakes
Instructions
- Slice: Thinly slice cucumbers using a mandoline or sharp knife and place in medium size bowl. Thinly slice the red onions and chop cilantro and add to the cucumbers.
- Whisk: In a small bowl or jar, combine sesame seed oil, vinegar, coconut aminos, sesame seeds, salt and pepper flakes.
- Toss: Pour the roasted sesame dressing over the cucumbers and red onion and toss to coat evenly.
- Chill: Serve immediately or place in the refrigerator for up to a week for a more pickled taste.


 Your Favorite Greens
 Any meal of the day!


 My Picks & Suggestions: