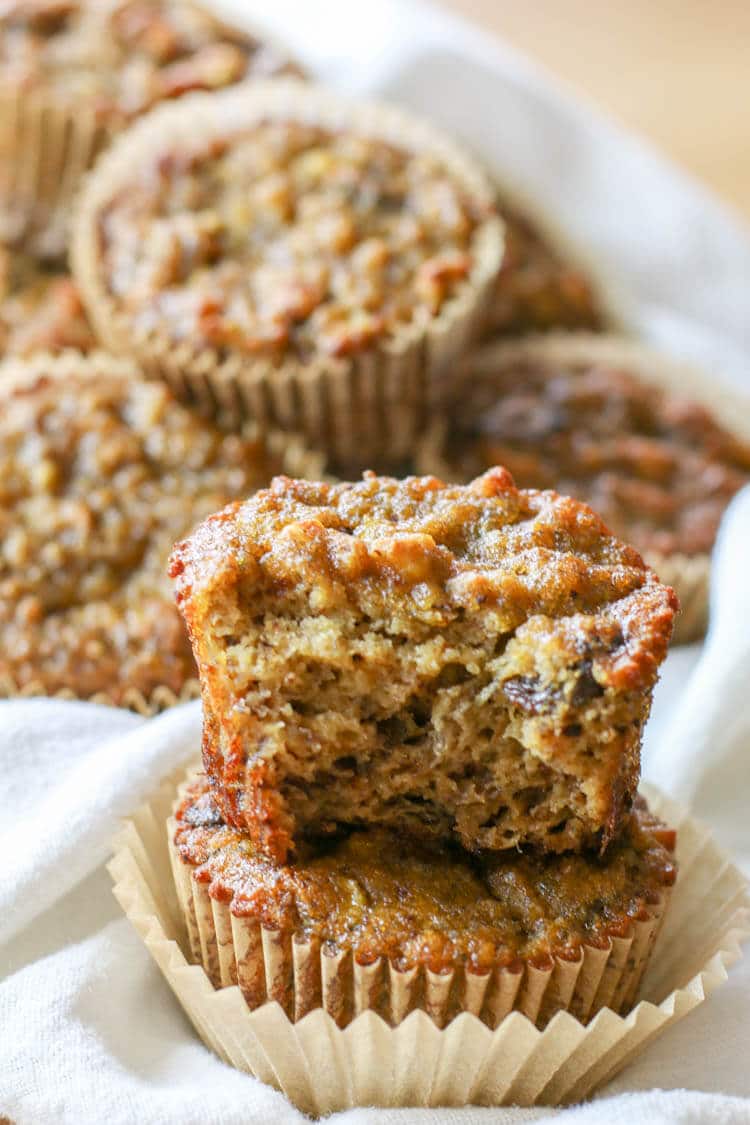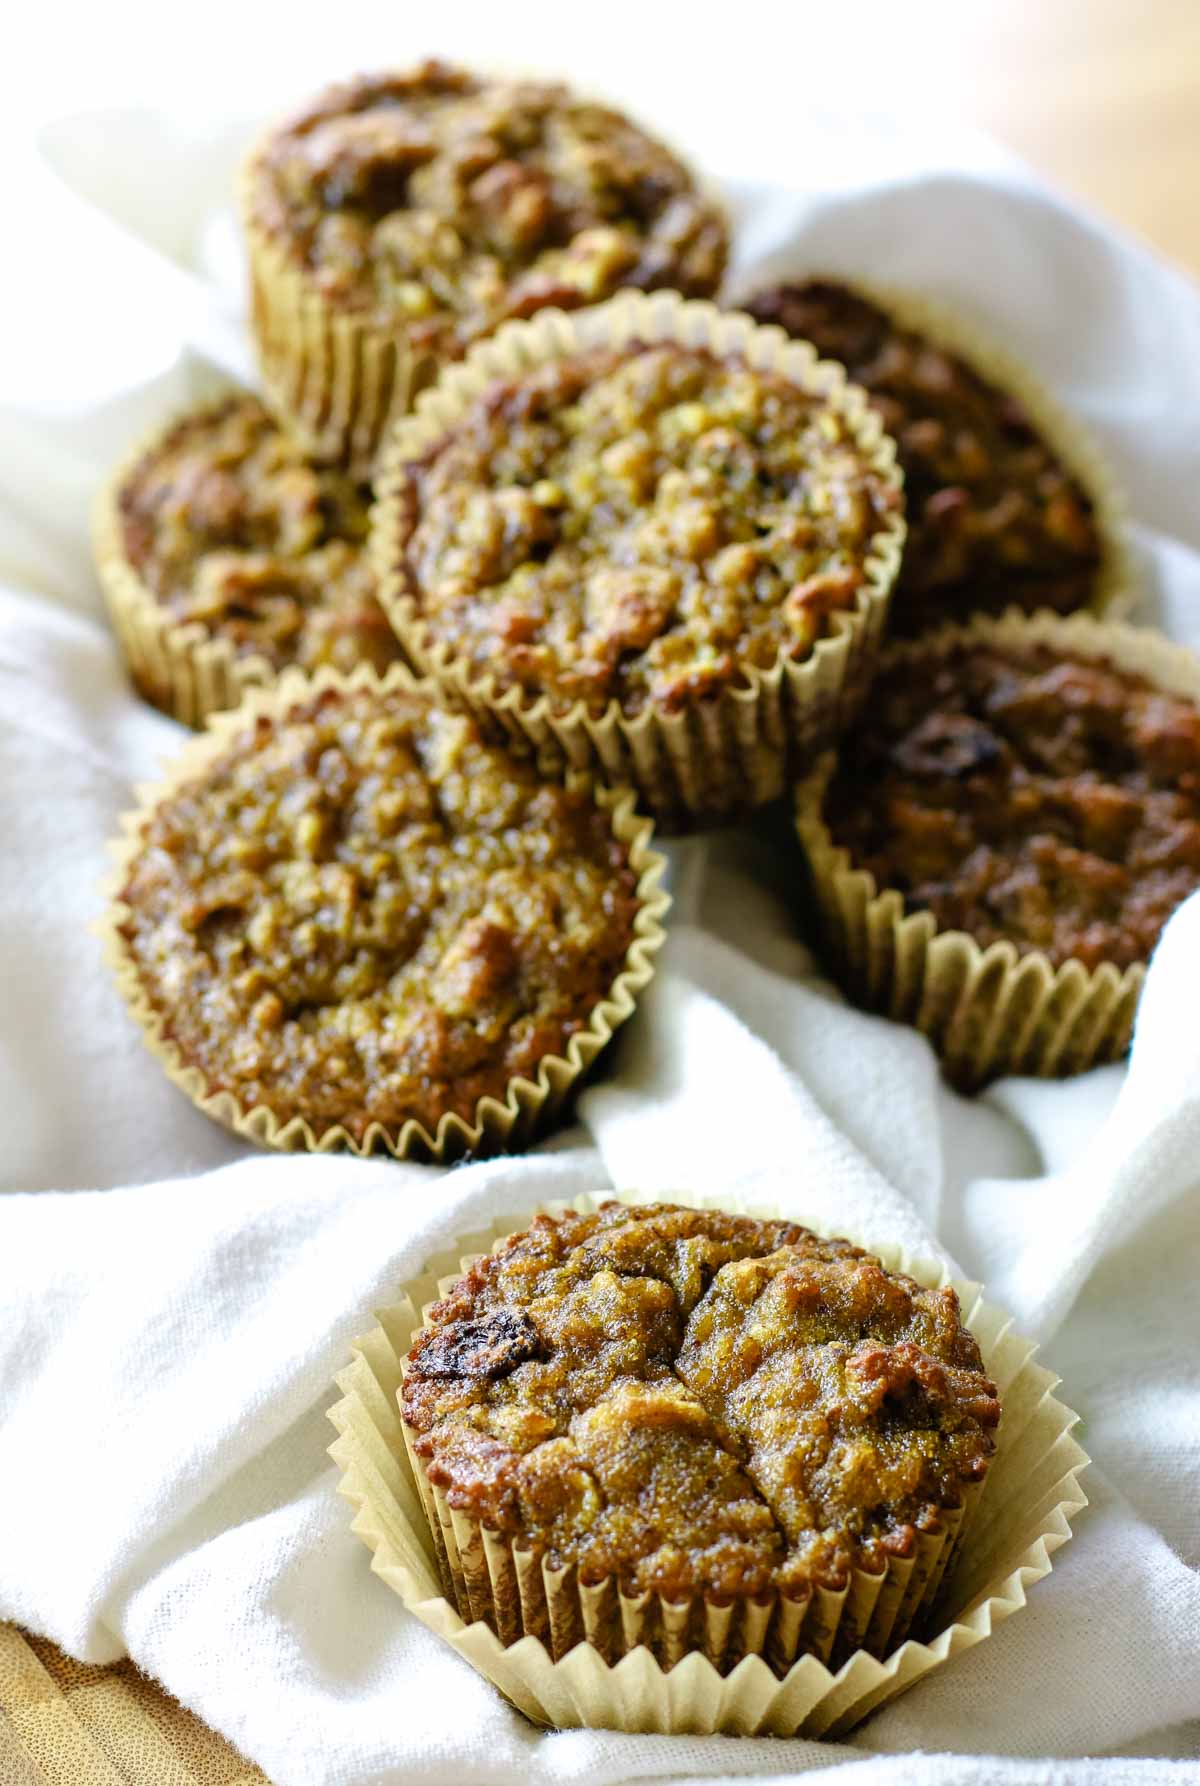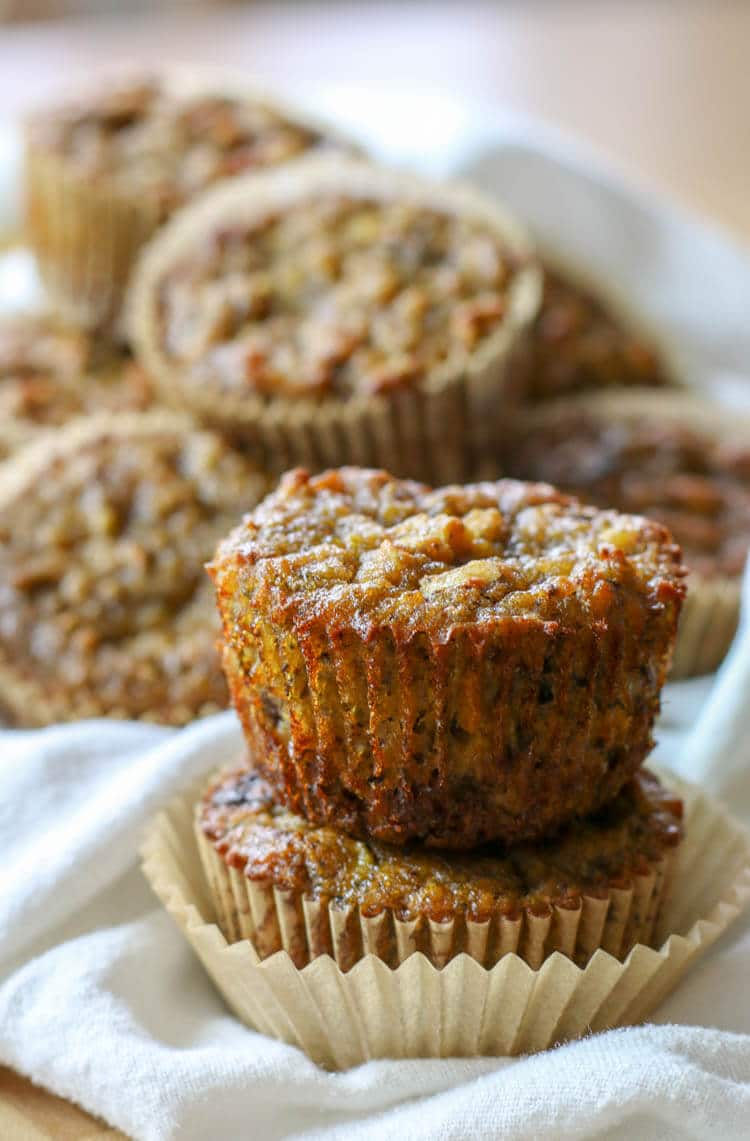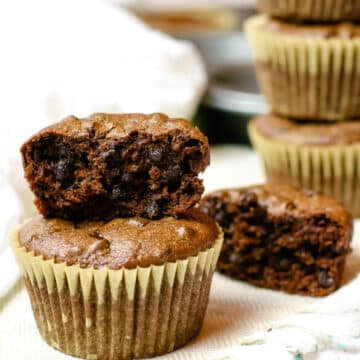
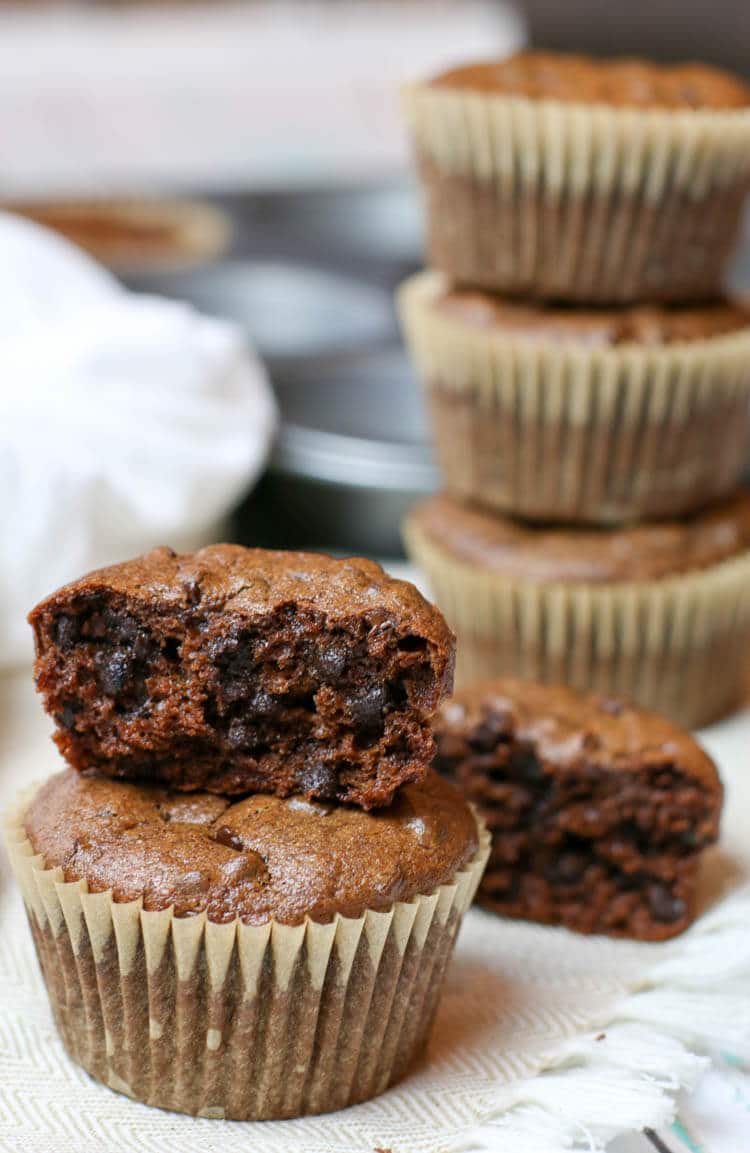
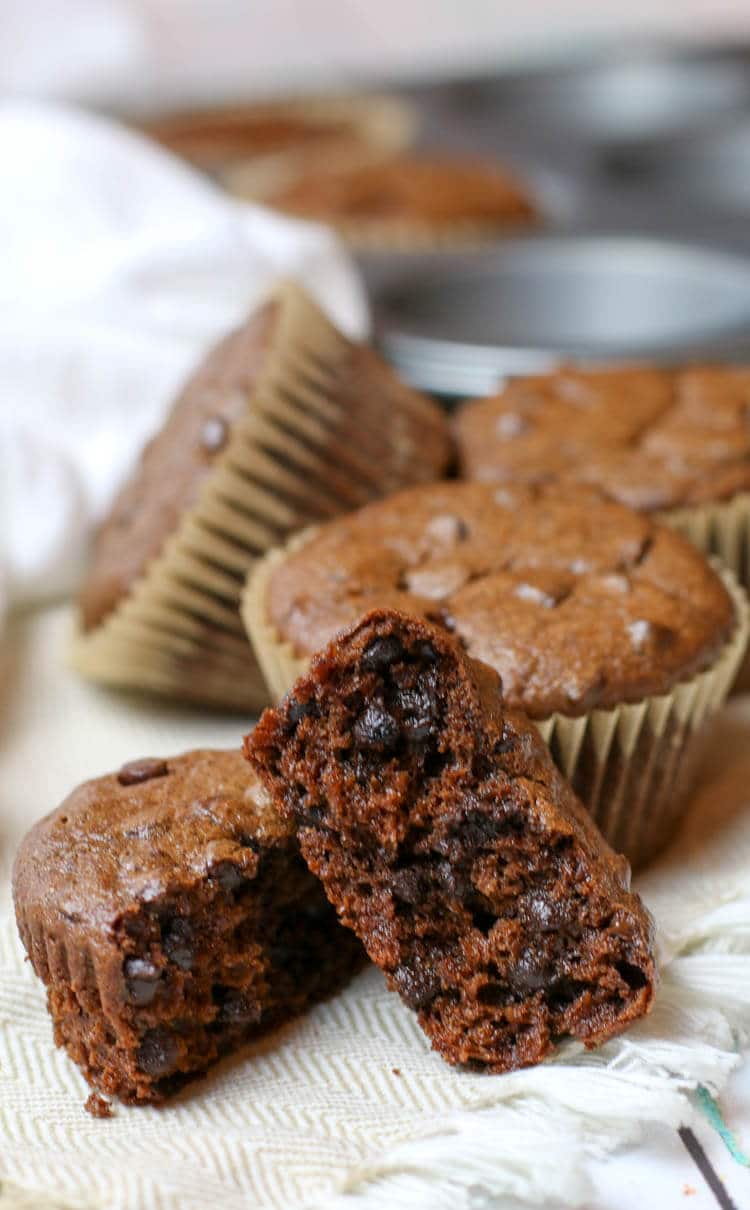
Rich in chocolate and naturally sweetened with honey and banana, these Healthy Chocolate Muffins are completely flour-less and made in the blender with only 6 main ingredients.
Healthy Chocolate Muffins
These Chocolate Muffins are made with simple ingredients that you most likely already have at home.
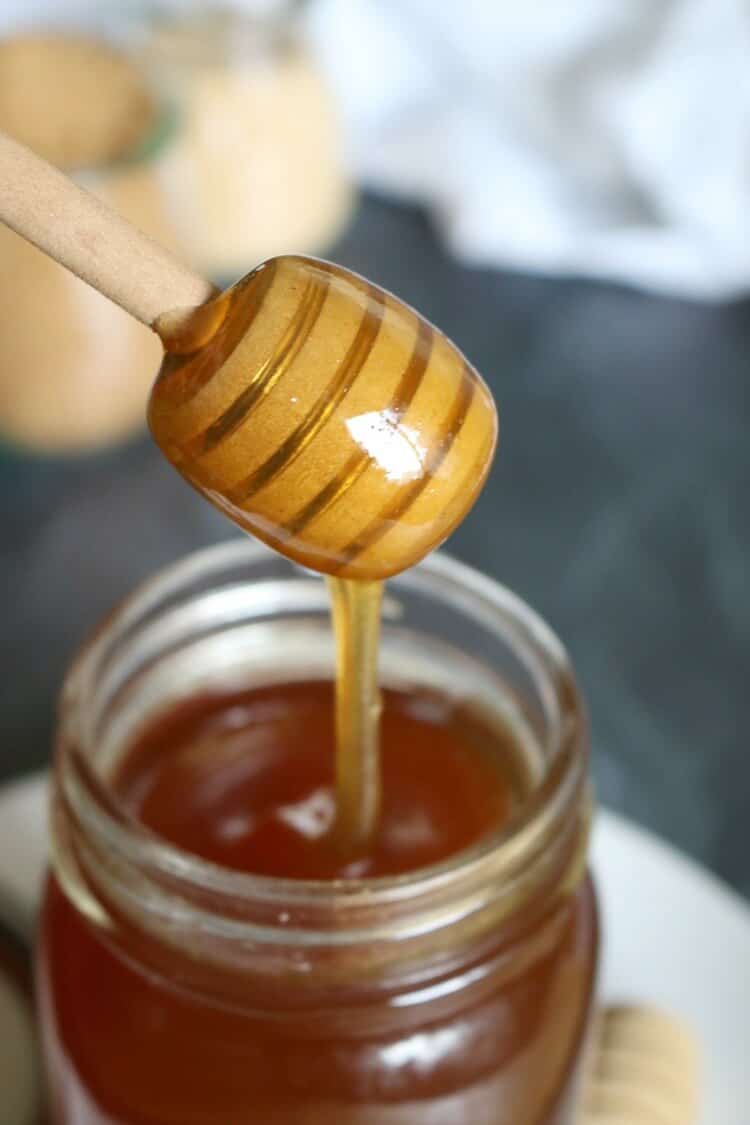
Most importantly, they are all clean ingredients that you will feel good about serving your family. Naturally sweetened with only banana and a bit of honey, these muffins aren't overly too sweet but if you need more sweetness, I recommend adding a few drops of stevia extract so as to not alter the texture.
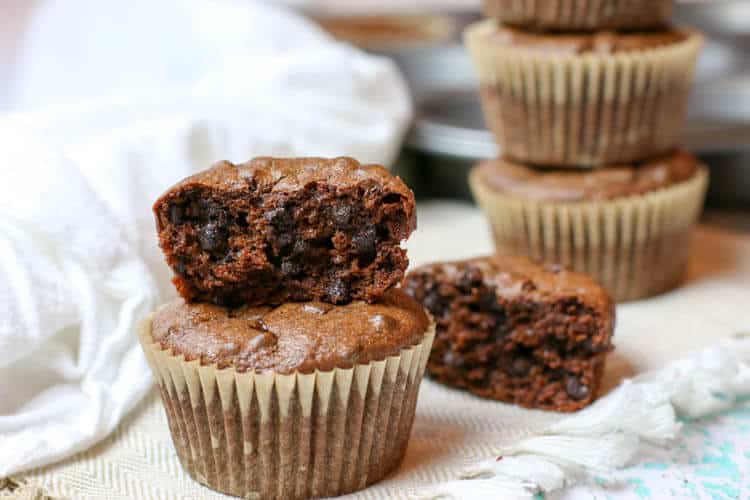
They are perfectly moist, rich in chocolate and decadent texture -- these easy blender muffins are ideal for a sweet treat after a meal.
With 5 grams of protein in one serving, these muffins have a good macro ratio, which is always great at keeping those blood sugars stable.
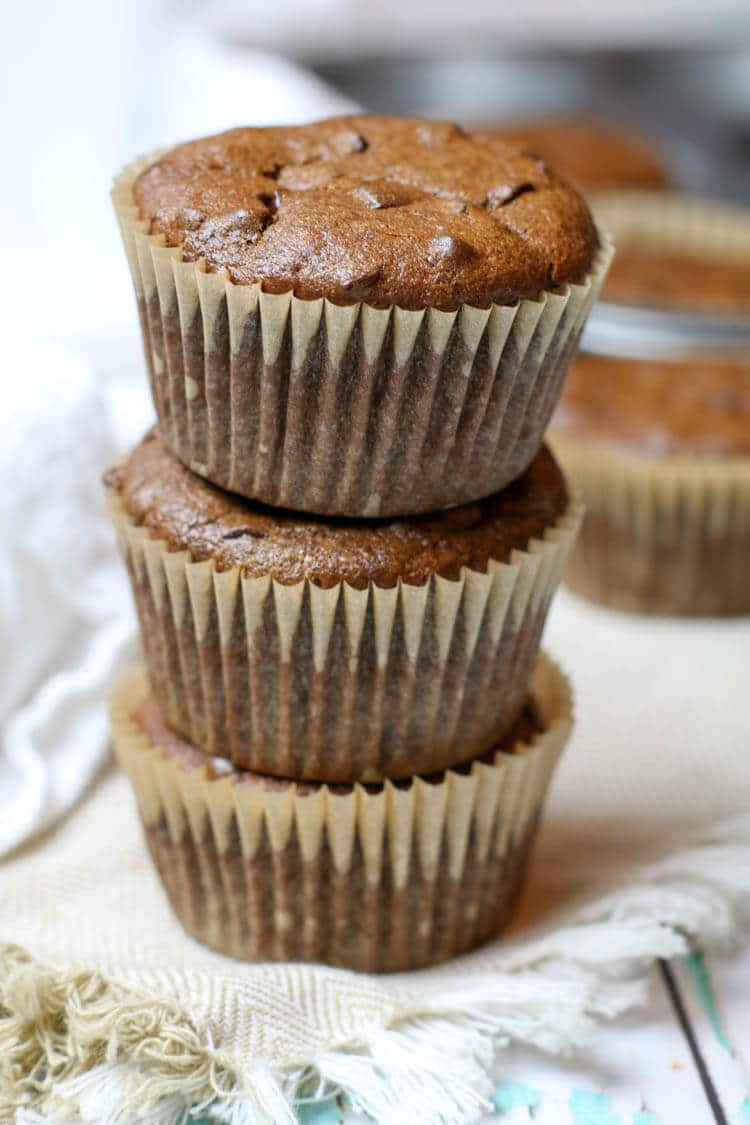
The best part is that these Healthy Chocolate Muffins are easily made in a blender and they freeze well making them perfect for school lunches.
Why you should make these Healthy Chocolate Muffins
I know that there are a myriad of "healthy" chocolate muffins on the internet. In fact, healthy is such a subjective term that what would be considered healthy for one person may not be so for another.
What makes these muffins stand out from the rest is that they are entirely flour-less and intentionally full of nourishing ingredients. Even though I don't ascribe to vegan recipes, this recipe in particular is naturally dairy free but without sacrificing healthy fats and nutrients that can only be found in animal products.
Flour-less Chocolate Muffins
The more I learn about food sensitivities and health in general, the more I realize that it's not so much about omitting foods that wreak havoc on your body but it's just as important to include nutrient dense foods as much as possible.
Even though I can probably do without - kids are naturally drawn to sweets and treats. And I'm fine with that provided that these treats are made with wholesome ingredients and as healthy as can be.
These Healthy Chocolate Muffins are not only gluten-free but they are entirely flour-less. No wheat flour. Not even gluten-free flour. No almond flour or coconut flour. None. And yet, the texture is still perfectly moist, crumbly, and delicious.
The ingredients that bind these chocolate muffins together are the egg and almond butter and it yields the most perfectly flavored chocolate muffins. Using nut butter will yield rich and soft muffins.
High Protein Chocolate Muffins
These chocolate muffins are surprisingly full of protein. They are naturally sweetened with banana and honey and the almond butter is rather satiating for a sweet treat.
Want to up the protein? You may also add additional collagen peptides for a boost. (Use discount code PREPARE10 for 10% off my favorite 3rd party tested hydrolyzed collagen). Having those complimentary macros in a balance will help keep the blood sugar stable.
A serving of one muffin has 5 grams of protein, if adding the collagen. You can double that without sacrificing texture for twice more protein.

Double Chocolate Muffins
Want more chocolate with your chocolate muffins?
Add some chocolate chips to make them Chocolate Chip Muffins. Just be sure to use fair trade chocolate. We love Lily's because it's sugar-free and low carb and even though these chocolate chip muffins aren't necessarily low-carb, I always appreciate cutting sugars whenever I can.
Healthy Chocolate Muffins with Banana
I love using overripe bananas to naturally sweeten baked treats to avoid using additional sugar.
If you don't care for the banana flavor, don't worry. Between all that chocolate, you won't even taste the banana in these healthy chocolate muffins.
But an easy way to mask the banana flavor is to add vanilla bean powder. This powder is 100% pure ground vanilla bean powder and is more potent than the extract. Just ⅛ teaspoon of dried vanilla beans will do the trick.
What nut butter can I use in flour-less muffins?
The best nut butter to use in chocolate muffins is the one that your family enjoys.
My default is almond butter. I find it's relatively inexpensive and the organic version is widely available in my town. Cashew butter would be great too but it's pretty pricey if baking with it.
Peanut butter in particular would be a fantastic swap in these healthy chocolate muffins since peanut butter and chocolate pair so well together.
As always and with every packaged food, be careful to read the ingredient label to be sure to avoid nasty additives. Most nut butters should only have the nuts and possibly sea salt but check to make sure it's not rancid.
Lastly, it's important to note that these muffins, although healthy, are still a treat, meant to be enjoyed sporadically and after a full meal. Nuts in excess can be hard to digest if not properly prepared so as with everything else, it's best consumed in moderation and with a nourishing diet.
Frequently Asked Questions & Tips
Yes, these muffins freeze beautifully. Simply transfer the fully cooled muffins into a freezer-safe and airtight container and close the lid. May be kept in the freezer for up to 4 months. To enjoy, just thaw at room temperature for a few hours-overnight or reheat in convection oven for 6 minutes.
Sometimes good quality chocolate chips are hard to come by. You can use a chocolate bar in a pinch. Just coarsely chop it before adding it into the muffin mixture. Semi-sweet chocolate chips are best for this recipe and I used this brand.
Cacao Powder is allowed in the later stages of the GAPS protocol. To make these muffins GAPS compliant, you'll need to put a little more effort at sourcing the clean(er) chocolate. This Pure7 brand is honey sweetened and is free from junk. Or you can skip the chocolate and instead use fermented cacao nibs instead for more bold muffins. If you would like to cut down the sugar content, I love using Lily's baking chips.
To additionally help support the balance of carbs, fats, and proteins, it's great to enjoy these muffins with a healthy drink. My kids love these blender muffins with a tall glass of raw milk for a nutritious after school treat.
Read why we LOVE raw milk HERE.
How to Make Healthy Chocolate Muffins
The complete printable recipe is below in the recipe card for your convenience.
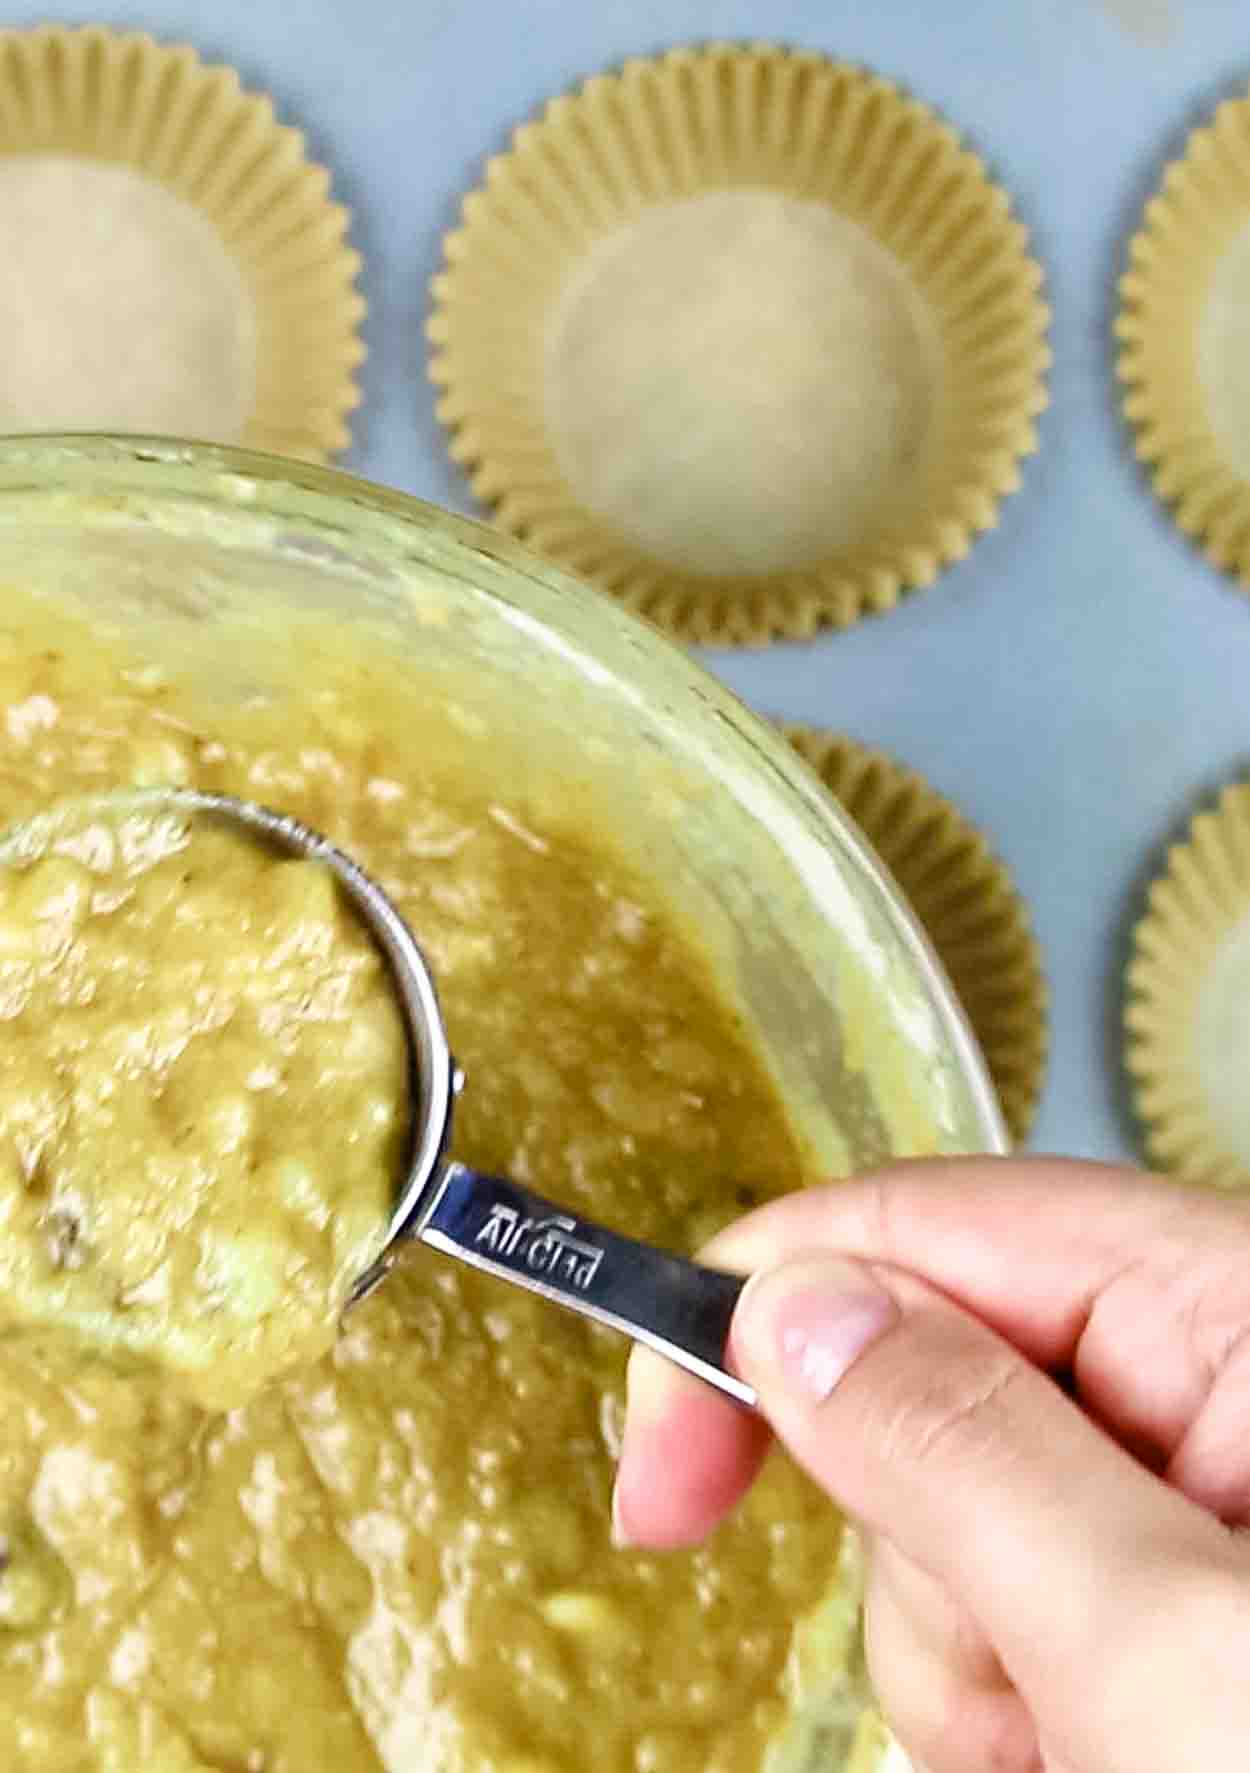
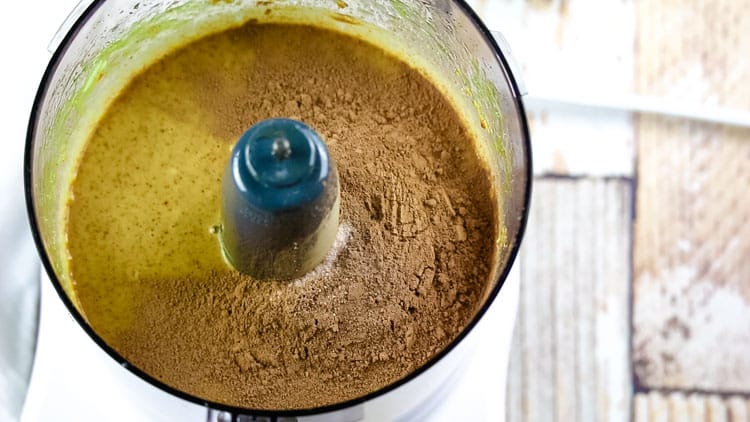
These chocolate muffins are crazy easy and can be easily whipped up in a blender or food processor. It has egg, banana, nut butter, cocoa powder, honey, collagen peptides, vanilla, baking soda, sea salt, and chocolate chips.
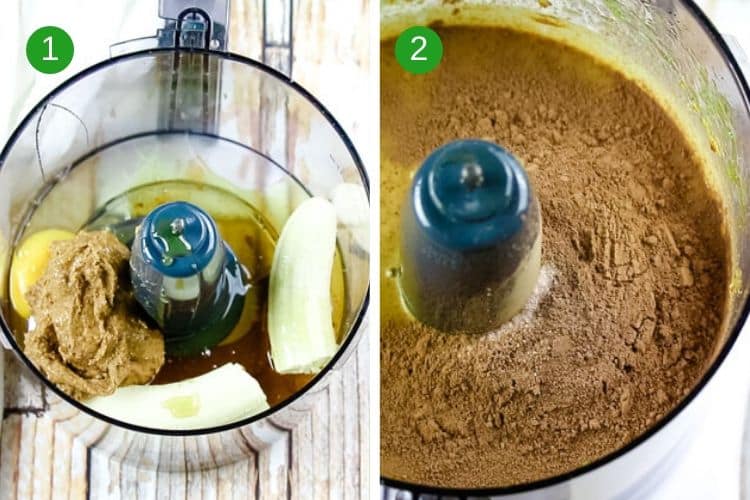
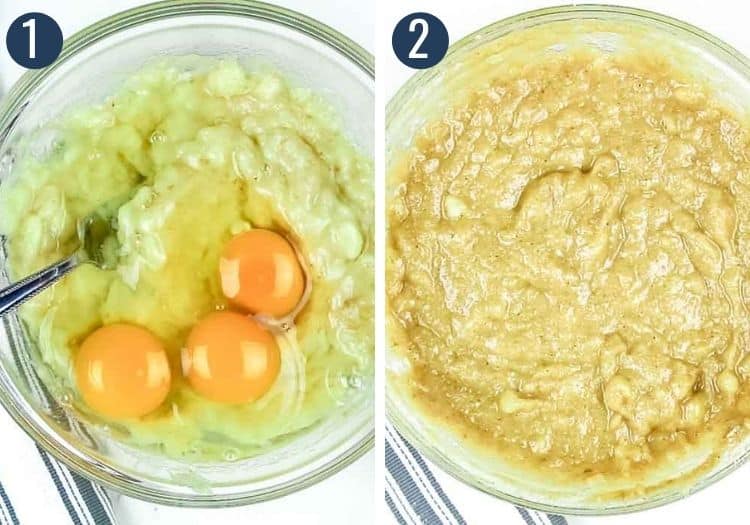
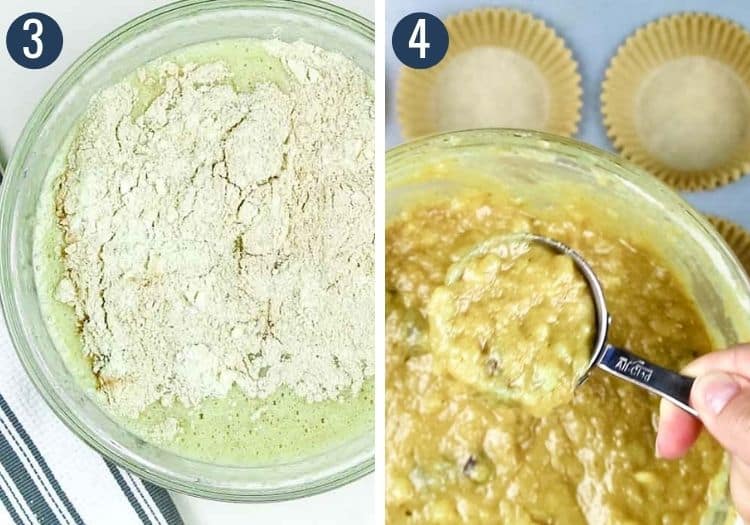
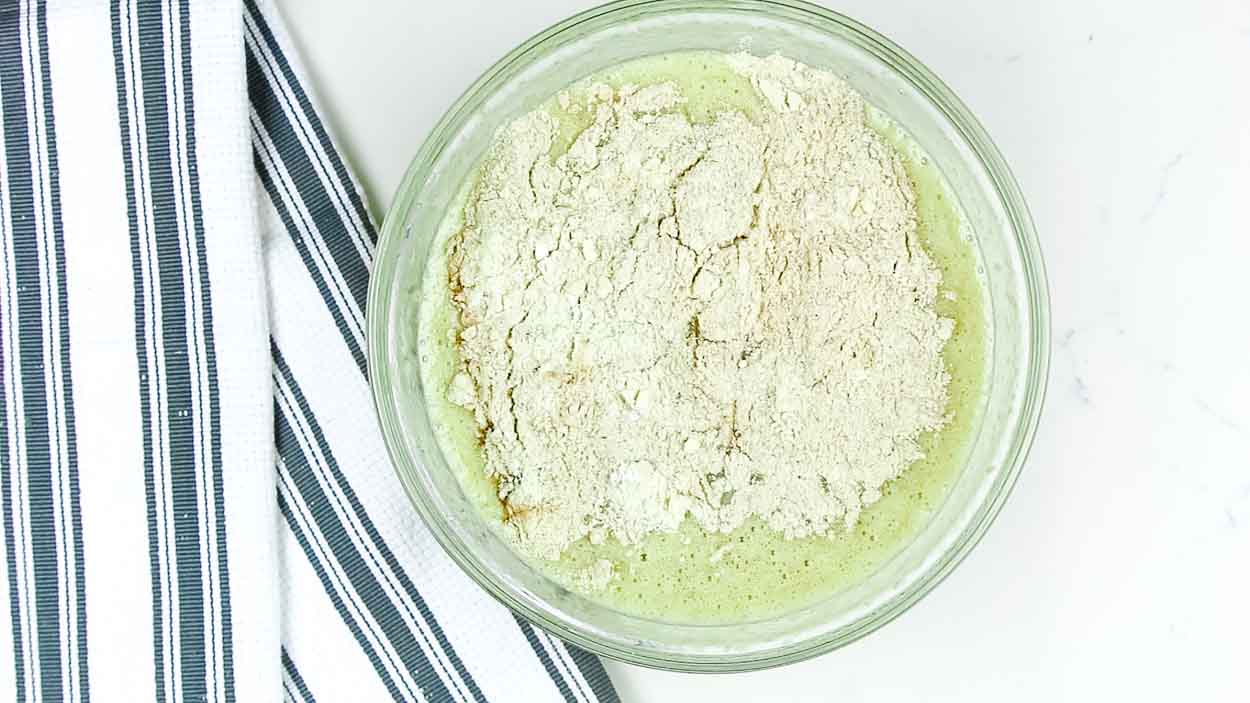
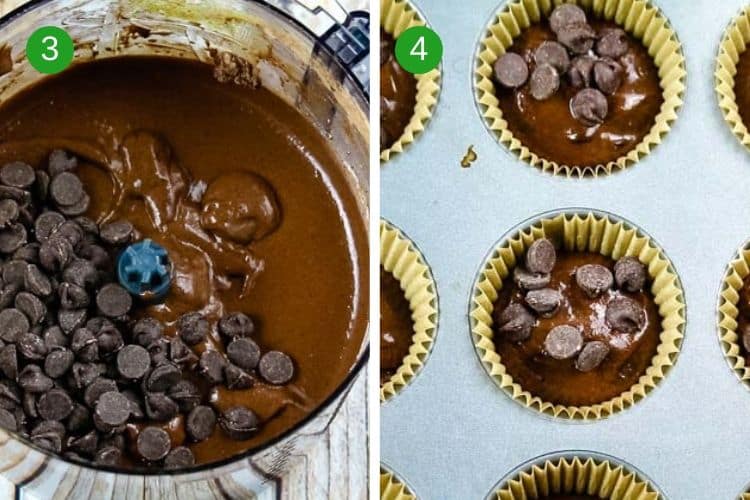
Blend egg, banana, and almond butter in a processor. Add cacao powder, salt, and vanilla and blend for another 30 seconds.
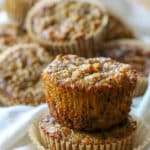
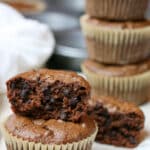
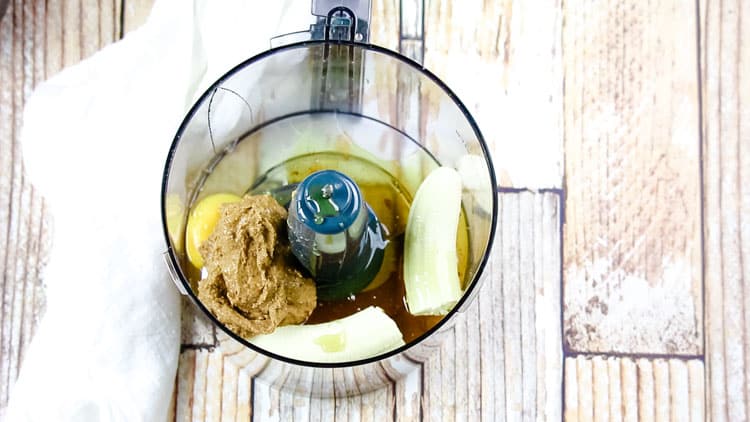
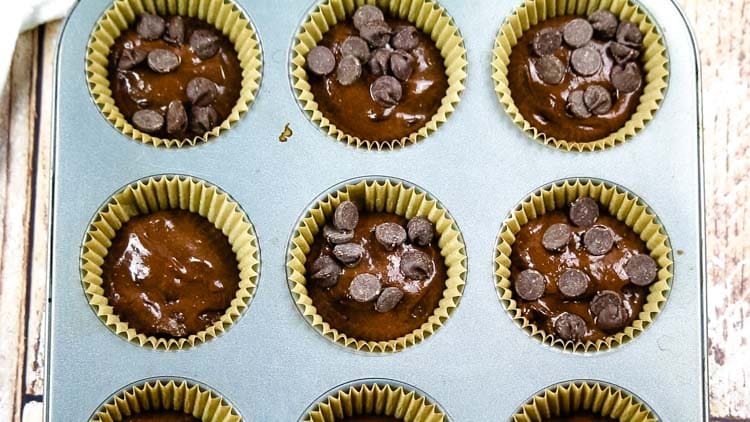
Add baking soda and pulse just enough to combine. Don't overmix. Stir in chocolate chips and scoop approximately ½ cup of batter into each muffin.
Bake until toothpick comes out clean. Once baked, transfer the muffins from the pan onto a cooling rack and allow to rest for 15 minutes. You can dig in right away but be careful with the melted chocolate!
Store these muffins at room temperature for up to 4 days. If wanting to store them longer, stick them into the refrigerator or freeze them for longer.
Helpful Tools & Links
- Food Processor OR Blender: These muffins come together rather quickly and effortlessly with a blender.
- Chocolate Chips: I use these mini semi-sweet chips. Use your favorite clean brand. You can also use a honey-sweetened chocolate bar.
- Stainless Steel Muffin Pan: These stainless steel pans are perfect for all your muffins, cupcakes and egg cup needs.
- Muffin Liners: I love these unbleached baking cups. I typically buy the 3 pack and am always ready for when my muffin craving hits. 😉
Want more healthy baked treats?
- Paleo Coconut Flour Banana Bread Muffins
- Flourless Chocolate Chip Pumpkin Bars
- Almond Orange Cookies
- Gluten-Free Snickerdoodles
Did you make this? Please leave a ⭐ recipe rating in the recipe card below and leave a review in the comments. Thank you!💚
Printable Recipe
Healthy Chocolate Muffins
Ingredients
- 1 over-ripe banana
- 1 egg
- ½ cup almond butter
- ⅓ cup honey
- ¼ cup cacao powder
- 2 tablespoons collagen peptides optional
- 1 teaspoon vanilla extract
- ½ teaspoon baking soda
- ¼ teaspoon sea salt
- ½ - 1 cup semi-sweet chocolate chips
Instructions
- Preheat oven to 350 degrees Fahrenheit. Line muffin pan with liners or grease well with coconut oil. In a food processor or blender, combine banana, egg, honey and almond butter until smooth and consistent.

- Add cacao powder, sea salt, vanilla extract and blend for 30 more seconds.
- Add baking soda and pulse just enough to combine into the mixture but don't overmix. Stir in chocolate chips.
- Pour batter into prepared muffin pan. Bake for 13-16 minutes or until toothpick comes out clean.
- Keep muffins in an airtight container for up to 5 days at room temperature or refrigerator.


Video
Notes
- To reduce the flavor of banana, look for one with less brown spots.
- You may use sugar free chocolate chips such as Lily's to keep the carb count lower.
- For additional boost of protein, add collagen peptides to the batter before baking.
Nutrition
This post was originally published January 2018 but has since been updated to include helpful information.