• Skip to primary navigation
  • Skip to main content
  • Skip to primary sidebar
  • Home
  • About
  • Contact
  • Privacy Policy
  • START HERE
  • Nav Social Menu

    • Facebook
    • Instagram
    • Pinterest
    • YouTube
Prepare + Nourish logo
  • Recipes
  • Shop
  • Subscribe
menu icon
go to homepage
subscribe
search icon
Homepage link
  • Home
  • Recipes
  • Shop
  • Dinner, Decoded
  • About
  • Contact
  • Privacy Policy
  • First Time? Start Here
    • Facebook
    • Instagram
    • Pinterest
    • YouTube
  • ×
    Home » Recent Recipes

    Buffalo Chicken Salad Recipe

    Healthy Buffalo Chicken Salad with Blue Cheese Dressing

    This Buffalo Chicken Salad Recipe is a healthy and simple alternative to the classic appetizer. Tender buffalo chicken bites on a bed of veggies and lettuces, tossed with homemade 4-ingredient Blue Cheese Dressing.

    Healthy Buffalo Chicken Salad with Blue Cheese Dressing

    Buffalo Chicken Salad Recipe

    This Buffalo Chicken Salad is loaded with flavor and will become one of your favorite recipes.

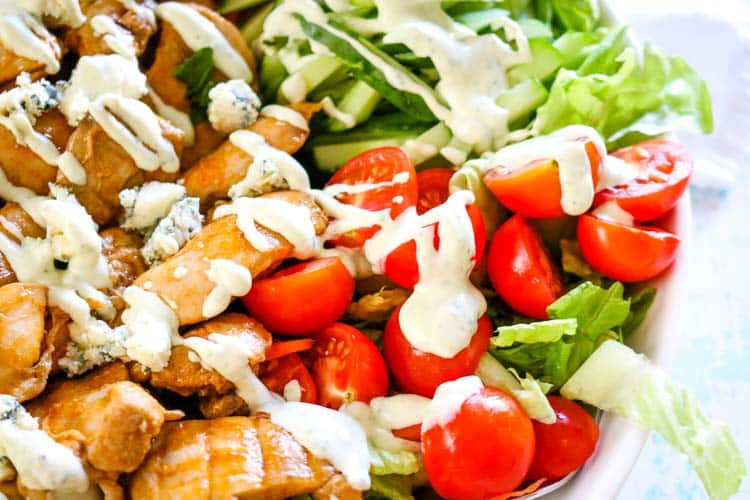
    A bed of leafy greens starts off as the base for this meal. Next, seasonal vegetables add great color, texture, and flavor and compliment the chicken perfectly. Baked chicken bites smothered in buffalo sauce are then added to the salad.

    Finally, complete the salad with a truly nourishing homemade blue cheese dressing and you have an easy and healthy meal.

    Is Buffalo Chicken Salad healthy?

    Originally, buffalo chicken was made using chicken wings which is the fattiest cut. Over the years, that has evolved to include other parts of the chicken like breast and thighs.

    The cut of chicken is really a matter of personal preference. If you want the traditional chicken wing experience, go with drumette or flats. If you are looking for a cleaner experience, which is especially appreciated in a salad, go with a cut like breast or thigh.

    Adding your favorite buffalo chicken to a bed of vegetables is a healthier way to enjoy this hot and spicy appetizer.

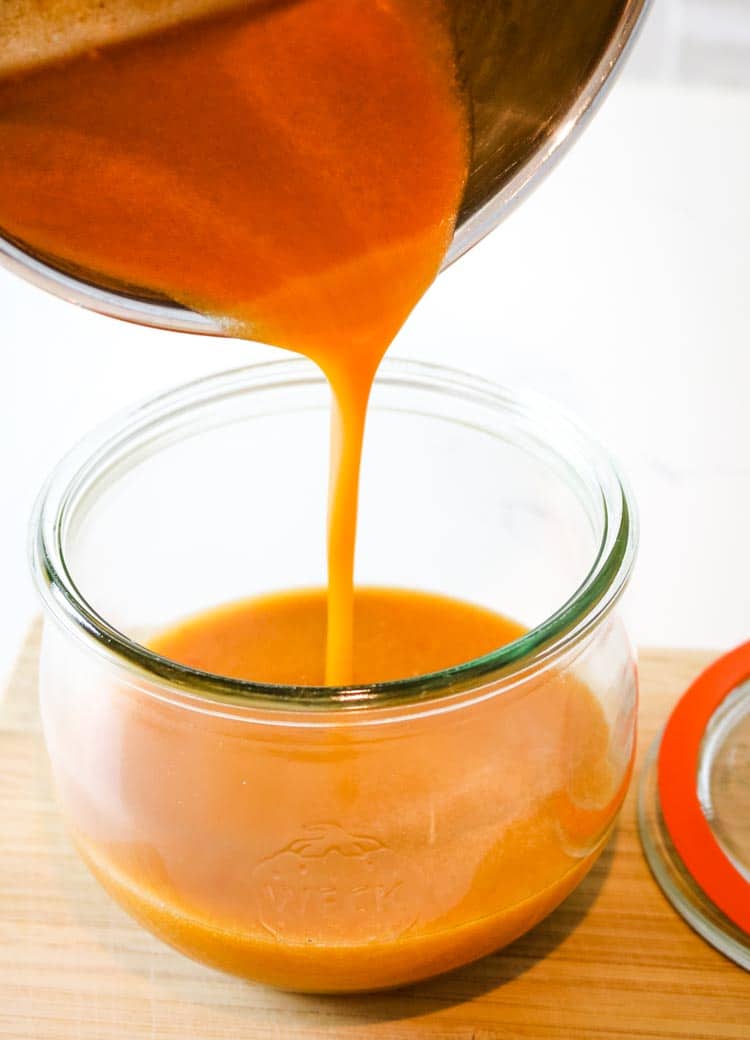
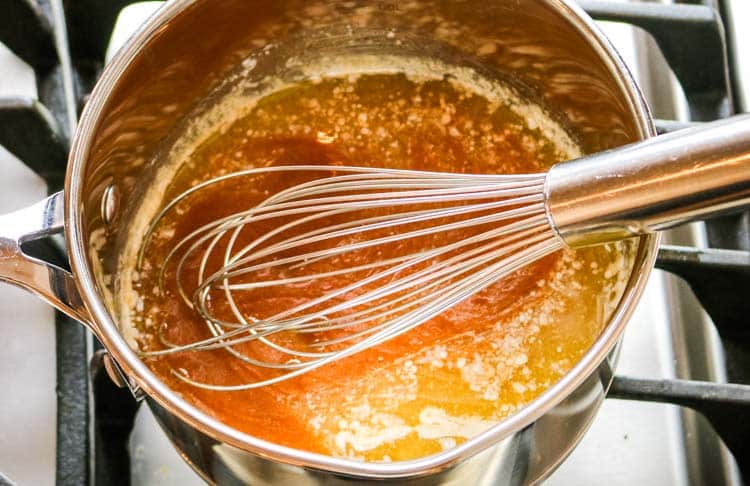
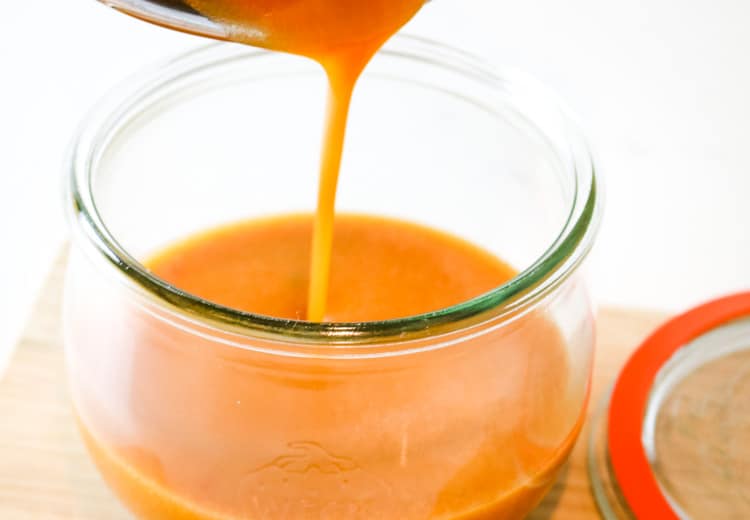
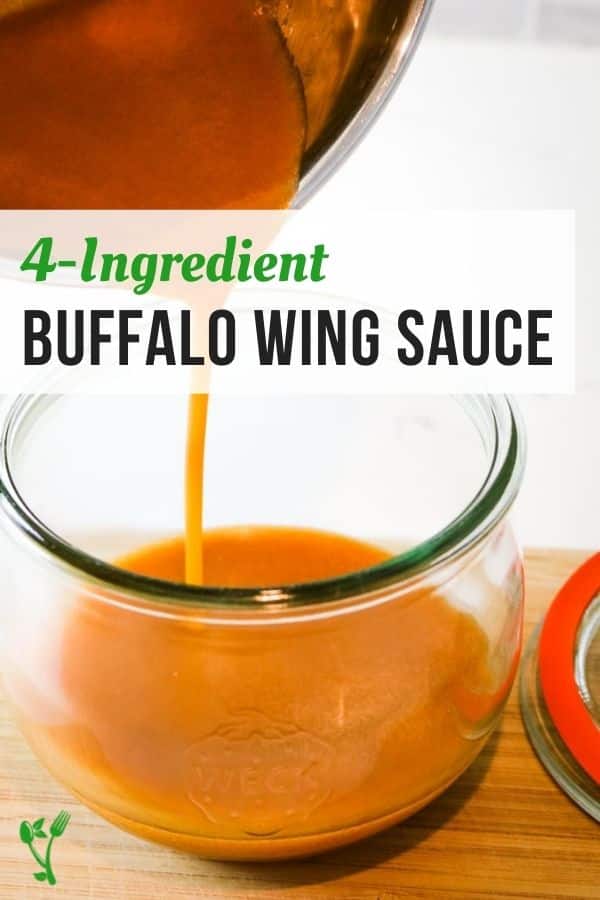
    And there is nothing comparable to homemade Buffalo Wing Sauce and Blue Cheese Dressing. That in itself already makes it healthier because it gives you total control over the ingredients used.

    Most buffalo wing sauces on the market are made using thickeners, fillers, and rancid oils. Homemade Buffalo Wing Sauce, on the other hand, calls for only 4 simple ingredients. Check out this easy Buffalo Wing Sauce recipe here.

    Buffalo Chicken Salad with Blue Cheese Dressing

    What are the ingredients in Buffalo Chicken Salad?

    • Lettuces: The bulk of the salad are the lettuces. I used romaine and butter lettuces but feel free to use whatever you have on hand.
    • Vegetables: carrots, celery, tomatoes, bell peppers, crispy tomatoes, and the green onions all add nice crunch and flavor
    • Buffalo Wing Sauce: my favorite is the one that is free from thickeners, additives, and rancid oils. Here's an easy 4-ingredient, 5 minute recipe.
    • Chicken: my favorite cut of chicken are the chicken thighs but breasts are also a great option.
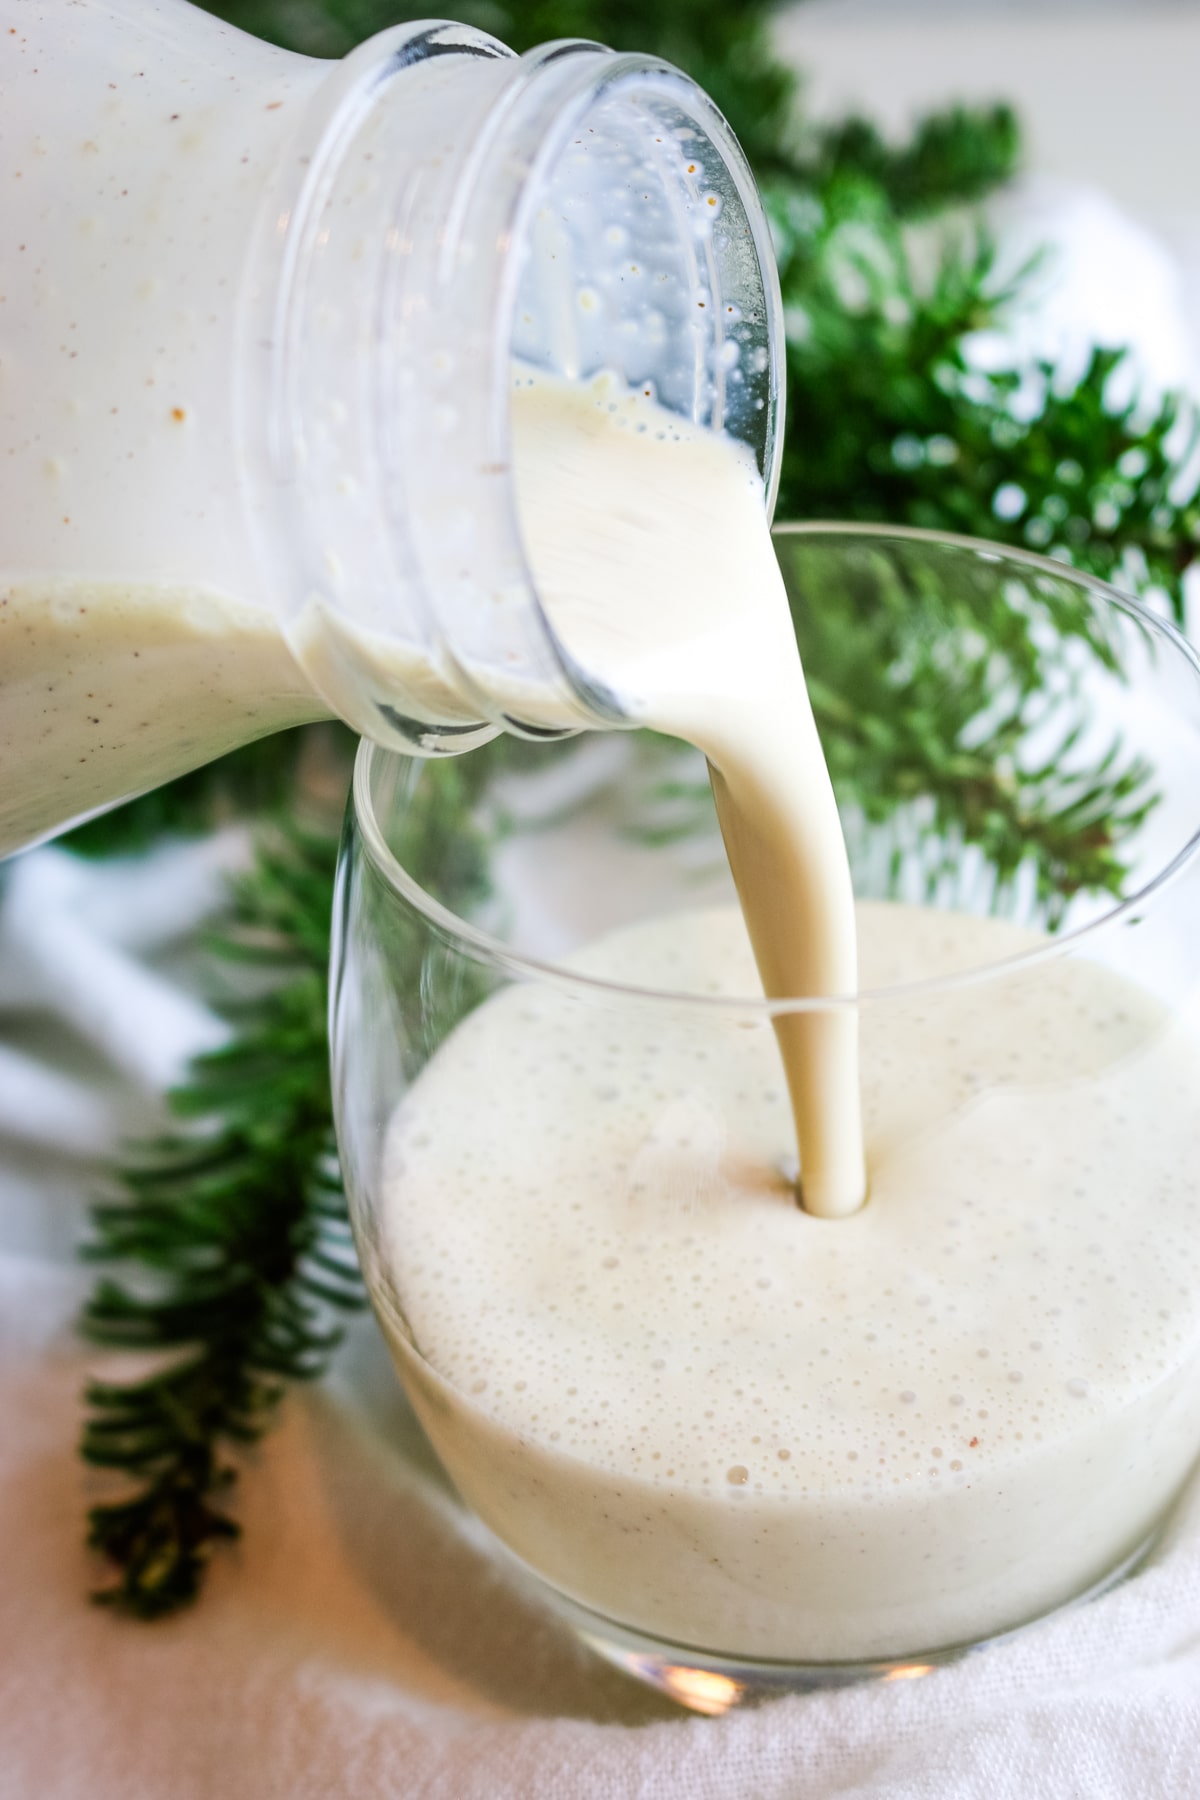
    • Blue Cheese Dressing: as with Buffalo Wing Sauce, homemade is ideal and takes very little effort and time to make

    How to Make Buffalo Chicken Salad

    Step 1. Chicken - it's best to marinade the chicken in the Buffalo Wing Sauce for 2 hours or overnight. If short on time, you can skip the marinading part and cook in a skillet over medium-high heat instead. If baking in the oven, after marinading the chicken, spread it out on a baking sheet and bake until cooked through.

    Making buffalo chicken bites for healthy salad

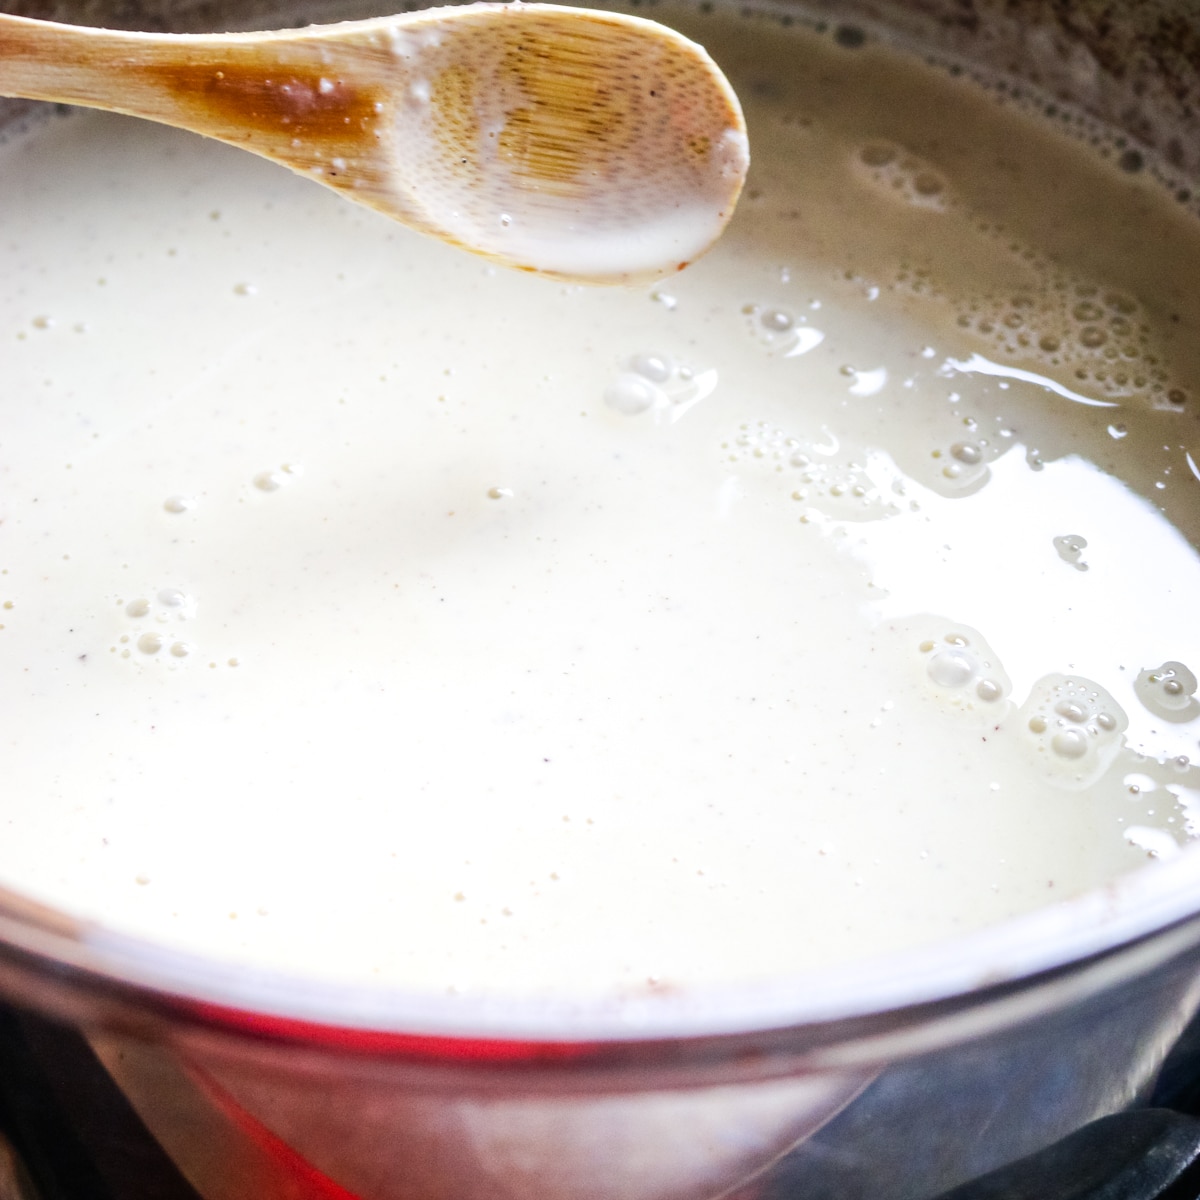
    Step 2. Dressing - combine all ingredients together in mason jar and blend with an immersion blender. If skipping parsley, just stirring everything together with a spoon is sufficient but fresh parsley adds so much flavor.

    Creamy blue cheese dressing made from scratch

    Step 3. Salad - roughly chop the lettuces (I love a combination of romaine, butter, and sometimes red or green leaf lettuce), add the rest of the veggies. You can either toss everything together with the salad dressing or drizzle on top in a zig-zag motion.

    Creamy blue cheese dressing drizzled over buffalo chicken dressing

    Common Questions for this Buffalo Chicken Salad

    Q. Can I use store bought Buffalo Wing Sauce and salad dressing?
    A. Homemade is always ideal but the second best option is Noble Made Mild Buffalo wing sauce.  Finding a clean Blue Cheese Dressing is a little more trickier because even organic versions contain soybean oil and canola oil. All the more reason to whip up some yourself with only 4 ingredients! You'll have better luck finding good quality ranch dressing but the finished flavor won't be the same.

    Q. Can I meal prep this Buffalo Chicken Salad?
    A. This salad is great option to include in meal prep. You can make the chicken well in advance and store in the refrigerator for up to a week. Same with the salad dressing and Buffalo Wing Sauce if not used for chicken. The vegetables (except for tomatoes) can be prepped and stored in airtight container in the refrigerator for up to 48 hours.

    Q. What is the best chicken for Buffalo Chicken Salad?
    A. The best cut of chicken is the chicken thighs but breasts work great too. Avoid chicken wings since they are not exactly salad-friendly.

    Q. Is it necessary to marinade chicken?
    A. Marinading the chicken in Buffalo Wing Sauce will produce the best flavor. If you are short on time, just toss the chicken with the wing sauce and cook in a stainless steel pan over medium-high heat until cooked through, approximately 12-14 minutes.

    Q. What can be served with this Buffalo Chicken Salad?
    A. We love this salad on it's own. It has just the right amount of protein, fats, and carbs to make a complete meal. However, if you are looking for more carb-heavy sides to compliment this salad, consider these Cajun Sweet Potato Fries or these Bacon and Cheese Baked Potato. You can also double the chicken to make sure you get enough protein.

    Printable Recipe

    Healthy Buffalo Chicken Salad with Blue Cheese Dressing
    Print Recipe
    5 from 2 votes

    Buffalo Chicken Salad with Blue Cheese Dressing

    Buffalo Chicken tossed with lettuce and garden vegetables and combined with Blue Cheese dressing. 
    Prep Time20 minutes mins
    Cook Time20 minutes mins
    Resting Time20 minutes mins
    Total Time1 hour hr
    Course: Salad
    Cuisine: American
    Keyword: buffalo chicken, healthy salad
    Servings: 8 servings
    Calories: 430kcal
    Author: Anya @ Prepare & Nourish

    Ingredients

    • 2 pounds chicken thighs cut into 1" pieces
    • 1 cup buffalo wing sauce divided

    Salad

    • 1 head romaine lettuce chopped
    • 1 head butter lettuce chopped
    • 2 large carrots cut into matchsticks
    • 3 celery stalks sliced
    • 6 green onions cut
    • 1 ½ cup grape tomatoes halved
    • 1 English cucumber cut into strips or half moons
    • 1 red bell pepper cut into strips

    Blue Cheese Dressing

    • ½ cup mayonnaise
    • ¼ cup sour cream or plain Greek yogurt
    • ½ cup blue cheese crumbles
    • 1 teaspoon lemon juice
    • 1 teaspoon real salt
    • 6 fresh parsley sprigs optional
    • 2 garlic cloves optional

    Instructions

    Buffalo Chicken

    • Marinade chicken in ⅔ cup of Buffalo Wing sauce for 2 hours or overnight.
    • Remove chicken from the refrigerator and allow to come to room temperature (approximately 20 minutes). Preheat oven to 425 degrees Fahrenheit.
    • Spread chicken on a sheet in single layer and bake for 12-15 minutes or until chicken is cooked through. 
      Making buffalo chicken bites for healthy salad

    Blue Cheese Dressing

    • Add all ingredients in jar and blend with immersion blender if using parsley. Alternatively, you can finely mince parsley or omit it entirely.
      Making blue cheese dressing in a mason jar and immersion blender

    Salad

    • Combine all the vegetables together or arrange as shown in picture. Toss with salad dressing or drizzle on top.
      Healthy Buffalo chicken salad with lots of vegetables
    • Top with chicken and additional blue cheese crumbles.
      Blue cheese crumbles on top of Buffalo Chicken Salad

    Notes

    • Marinading chicken will produce best flavor. However, if short on time, toss chicken with buffalo wing sauce and cook in a pan over medium-high heat until cooked through.
    • Salad makes very generous portions as a meal for 5 people or a side for 8. Nutrition facts reflect 8 servings.

    Nutrition

    Calories: 430kcal | Carbohydrates: 10g | Protein: 23g | Fat: 34g | Saturated Fat: 9g | Polyunsaturated Fat: 11g | Monounsaturated Fat: 11g | Trans Fat: 1g | Cholesterol: 127mg | Sodium: 1535mg | Potassium: 752mg | Fiber: 3g | Sugar: 5g | Vitamin A: 11539IU | Vitamin C: 31mg | Calcium: 120mg | Iron: 2mg

    If you liked this Buffalo Chicken Salad, please consider rating the recipe and leaving a comment below. ⇓

    Healthy Buffalo Chicken Salad

    Homemade Buffalo Sauce

    Pouring buffalo wing sauce into a smal jar for refrigeration

    Homemade Buffalo Sauce is a fiery, zesty, and a delicious sauce that can easily be whipped together with 4 ingredients and 5 minutes.

    Homemade Buffalo Wing sauce in a small jar with a spoon

    This easy and healthy Homemade Buffalo Sauce will become a new favorite condiment! Made with hot sauce, butter (or ghee for dairy free), Worcestershire sauce, and a touch of honey, it comes together in 5 minutes with the best flavor and texture! It's perfect for wings, dips, salads, and veggies.

    Homemade Buffalo Sauce

    Before we get into what exactly is buffalo wing sauce, let's first establish that homemade sauces are lightyears better than what you'd find in stores.

    Making your own condiments like mayonnaise, salad dressings, and sauces is the best way to avoid nasty fillers, thickeners, and preservatives in your food.

    The good thing is that most condiments actually take very little effort to make them at home. A bonus perk is that the taste is supremely better than any store bought version can offer. Once you get a taste of Homemade Buffalo Sauce, there is no turning back to stuff pulled off the store shelves.

    Check out other homemade dressings and sauces:

    Homemade Mayonnaise
    Soy-Free Worcestershire Sauce
    Sriracha Spicy Mayo
    Simple House Dressing

    Pouring buffalo wing sauce into a smal jar for refrigeration

    What is buffalo wing sauce?

    Buffalo wing sauce is a tangy sauce consisting mostly of cayenne pepper hot sauce and melted butter. Some add other ingredients to emphasize a certain spin on buffalo sauce but the main key players are very simple kitchen staples.

    Buffalo wing sauce has varying levels of spiciness. It can be mild, medium, or hot depending on your preference.

    According to some reports, buffalo sauce originated in Buffalo, New York. There are several different claims as to who the original owner of this magic sauce is but one thing remains: the growth and popularity of buffalo sauce is enjoyed by all.

    Buffalo wing sauce was typically only used on chicken wings. In the 1960s, chicken wings were considered an undesirable cut of meat, primarily reserved for stock and broth. To give them a chance at life, chefs and cooks smothered them in buffalo sauce and the idea took off!

    During the 1970s and 1980s, buffalo wings gained in popularity as an appetizer across the United States and Canada. Which brings us to today, where we have buffalo chicken galore, complete with pizzas, burgers, and salads all showcasing that tangy buffalo flavor.

    Ingredients for Buffalo Wing Sauce

    What are the ingredients in Homemade Buffalo Sauce?

    This Homemade Buffalo sauce recipe could not be easier. It calls for 4 simple ingredients:

    • Hot Sauce - use your favorite vinegar-based hot sauce. Rumor has it that the original Buffalo Wing Sauce recipe was made with Frank's RedHot original flavor hot sauce. The good news is that Frank's RedHot has simple and clean ingredients making it a great option to use for paleo and Whole30 Homemade Buffalo Sauce.
    • Butter - a very necessary ingredient in Buffalo Wing Sauce recipe as it adds richness and depth to this yummy sauce
    • Worcestershire Sauce - this kitchen staple adds that perfect umami flavor. If you want to skip Worcestershire sauce, add a dash of smoked paprika, garlic and onion powder to give that similar taste.
    • Honey - not so much for adding sweetness, a tablespoon of this healthy sweetener will balance the hot sauce

    Whisked butter, hot sauce and honey to make Buffalo Wing Sauce

    Healthy Buffalo Sauce Recipe

    This Homemade Buffalo Sauce is a much healthier version that what you'd find in stores. Even organic versions often have thickeners, fillers, and rancid oils that aren't welcome in a healthy diet.

    If you are on a healing diet like Whole30, GAPS, or Paleo, check out these variations:

    • For GAPS - skip the Worcestershire sauce and use ½ teaspoon smoked paprika, ½ teaspoon garlic powder and ½ teaspoon onion powder.
    • For Whole30/Paleo - use ghee in place of butter and watch for that Worcestershire sauce ingredients. If you are looking for a Paleo/Whole30-compliant Worcestershire sauce, you can find that recipe here.

    How to Make Homemade Buffalo Sauce

    How to Make Homemade Buffalo Wing Sauce from Scratch in 3 easy steps

    Step 1. Melt butter in a small saucepan over medium-low heat.

    Step 2. Add hot sauce, Worcestershire sauce, and honey. Whisk gently over low heat for approximately 3 minutes.

    Step 3. Remove from heat, season with salt and pepper to taste and enjoy!

    Homemade Buffalo Sauce will keep refrigerated in a sealed container for up to 2 weeks. It may solidify because of the butter, if so, gently warm it up in a small saucepan over low heat.

    Common Questions about this Homemade Buffalo Sauce Recipe

    Q. Can I use hot sauce other than Frank's RedHot Sauce?

    A. Yes. If you have a different hot sauce that you absolutely love - use that! My only suggestion here would be to use one that is vinegar-based and free from bad ingredients.

    Q. Can I adjust the level of heat?

    A. If using Frank's RedHot sauce, this Homemade Buffalo Wing Sauce will not produce necessarily a very spicy sauce. This could be a good thing, depending on the subject matter. Everyone has different tolerance for heat. If you want to add some heat, I would recommend adding a touch of cayenne pepper to your preference.

    Q. Can this sauce be used in other recipes besides chicken?

    A. Buffalo sauce may have started out as a chicken wing sauce but it is so much more than that. Try it to top eggs, casseroles, hash browns, sandwiches, and salads. It really is a great alternative to straight up hot sauce thanks in part to it's luscious texture and milder flavor.

    Printable Recipe

    Homemade Buffalo Wing sauce in a small jar with a spoon
    Print Recipe
    5 from 2 votes

    Homemade Buffalo Sauce

    Homemade Buffalo Sauce is a fiery, zesty, and a delicious sauce that can easily be whipped together with 4 ingredients and 5 minutes.
    Prep Time5 minutes mins
    Cook Time5 minutes mins
    Total Time10 minutes mins
    Course: Condiment
    Cuisine: American
    Keyword: buffalo sauce, healthy condiment
    Servings: 16 servings
    Calories: 57kcal
    Author: Anya @ Prepare & Nourish

    Ingredients

    • ½ cup unsalted butter
    • ½ cup hot sauce
    • 1 tablespoon Worcestershire sauce
    • 1 tablespoon honey
    • salt and pepper to taste

    Instructions

    • Melt butter in a small saucepan over medium-low heat.
    • Add remaining ingredients and whisk gently to combine. Cook until warmed through and combined well, approximately 3 minutes.
      Simmering butter with hot sauce for Buffalo Wing Sauce recipe
    • Use immediately in other recipes or refrigerate in an airtight container for up to 2 weeks.
      pouring buffalo wing sauce into small container

    Notes

    • Buffalo wing sauce will solidify slightly when refrigerated. To warm, transfer to a small sauce pan and reheat on low heat until melted.
    • Recipe makes 1 cup or 16 tablespoon servings.

    Nutrition

    Calories: 57kcal | Carbohydrates: 1g | Protein: 1g | Fat: 6g | Saturated Fat: 4g | Polyunsaturated Fat: 1g | Monounsaturated Fat: 1g | Trans Fat: 1g | Cholesterol: 15mg | Sodium: 209mg | Potassium: 22mg | Fiber: 1g | Sugar: 1g | Vitamin A: 190IU | Vitamin C: 6mg | Calcium: 4mg | Iron: 1mg


    If you liked this Homemade Buffalo Sauce, please consider rating the recipe and leaving a comment below. ⇓

    4 ingredient Buffalo Wing sauce recipe text overlay over a photo of said sauce

    Cucumber Tomato and Onion Salad

    Tomato wedges with cucumber slices and thinly sliced white onion

    This Cucumber Tomato and Onion Salad is a simple, yet refreshing addition to any summer meal. With only 5 ingredients, it comes together in under 15 minutes.

    Cucumber Tomato and Onion Salad on a fork

    Long before the Cucumber Tomato Salad took the internet by storm, this simple yet delicious recipe graced the tables of most Slavic kitchens.

    This basic recipe of tomatoes, cucumbers, and dill continues to be a popular salad amongst the Slavic people. And now making the rounds in the west. And for good reason.

    Tomatoes and cucumbers are very prolific in the summer months, making this an inexpensive addition to any meal.

    In fact, we typically enjoy this salad only seasonally when tomatoes and cukes are abundant and better yet, straight from the garden. Fresh herbs like parsley and dill are particularly easy to grow in small pots and are inexpensive at the farmer's markets.

    It's a great salad that is crisp, refreshing with minimal ingredients.

    There can be as many variations of this classic salad as there are home cooks but the chief ingredients remain the same: garden-grown juicy tomatoes, crispy cucumbers, zesty onions, and fresh garden herbs. Tossed in a simple dressing of healthy oil and real salt and freshly ground pepper. Vinegar is not necessary but can be added for extra tang.

    Tomatoes, cucumbers, and onions with fresh dill

    Cucumber Tomato and Onion Salad

    Many love this salad for it's versatility. Working with is available to you, whether in your garden or farmer's market, and still packed with flavor!

    It's really easy to customize it to make it work for you. No English cucumber? Just use Persian, pickling, or regular cucumbers. No beefsteak tomatoes? Use whatever tomatoes you can get your hands on. No fresh herbs? Dried works just as well.

    Tomato and Cucumber Salad Recipe - in 15 minutes?

    Yes, this salad actually does take only 15 minutes, depending on how good (i.e. fast) your chopping skills are.

    No marinating. No separate salad dressing. Just chop the ingredients and toss together with your favorite oil and DONE! And yet you'll be pleasantly surprised how refreshing and delicious this salad is for how little effort is required.

    Sliced cucumbers, thinly sliced onions, and tomato wedges in a white bowl

    How to cut tomatoes for salad?

    If working with a large beefsteak or similar size tomato, it is best to cut the fruit in large wedges. This is especially true for this salad.

    The reason is because a large portion of this salad consists of juicy tomatoes and juicy tomatoes release a lot of moisture. Therefore, it is best to cut the tomatoes in large chunks or wedges.

    If you choose to cut them in smaller pieces, keep in mind that they will release a lot of moisture simply because there is more surface area on the tomatoes.

    Ingredients for tomato cucumber and onion salad

    Recipe for Cucumber Tomato Salad

    So what goes in a Cucumber Tomato Salad? The ingredient list is short with common substitutions.

    • Medium/large tomatoes: Any variety of tomatoes will work. Heirloom tomatoes win for their delectable taste and texture but Romas and Early Girls will work too. Cherry and grape tomatoes sliced in half work great too.
    • Cucumbers: English cucumber is ideal for this recipe because of it's low moisture content. Persian cucumbers are a close second.
    • Onions: Any sweet onion will work: white or red are best, sweet yellow onion works great too. Green onion adds great flavor too.
    • Herbs: Any fresh herbs will work but favorites are parsley, dill, and basil. You can also swap dried herbs in place of fresh using a ratio of 1:2 (1 tablespoon dried replaces 2 tablespoons fresh herbs).
    • Oils: The two oils I regularly use in this salad are Perfect Supplement's MCT oil and La Tourangelle Roasted Walnut Oil. Avocado oil and extra virgin olive oil are close contenders. You're welcome to use whatever healthy oil you prefer. I would go easy on the oils with very strong flavor (i.e. coconut oil).

    Serving Suggestions for Cucumber Tomato and Onion Salad

    This salad pairs well with any form of potatoes and a healthy protein. Check out these suggestions:

    • Easy Chicken Scalloped Potatoes
    • Instant Pot Ribs
    • Fish en Papillote
    • Butter and Dill Potato Medley
    • Easy Tuna Casserole
    • Baked Gluten Free Chicken Tenders
    • Keto Chicken Cabbage Casserole

    Printable Recipe

    Print Recipe
    5 from 2 votes

    Cucumber Tomato and Onion Salad

    This Cucumber Tomato and Onion Salad is a simple, yet refreshing addition to any summer meal. With only 5 ingredients, it comes together in under 15 minutes.
    Prep Time15 minutes mins
    Total Time15 minutes mins
    Course: Salad
    Cuisine: European
    Keyword: cucumbers, low-carb, paleo, salad, tomato salad, tomatoes
    Servings: 6 servings
    Calories: 73kcal
    Author: Anya @ Prepare & Nourish

    Ingredients

    • 5 medium-large tomatoes (1 pound) cut into wedges
    • 1 English cucumber cut into half-moons
    • ½ white onion thinly sliced
    • 3 tablespoons avocado oil any healthy oil will work
    • ½ teaspoon sea salt
    • ½ teaspoon black pepper

    Instructions

    • In a large bowl, add tomatoes, cucumbers, and onions.
      Cucumbers and tomatoes for a salad
    • Drizzle oil over the vegetables and season with salt and pepper. Toss to combine and serve.
      Tomatoes, cucumbers, and onions with fresh dill

    Notes

    Serving size is approximately 1 cup.
    Leftover salad can be transferred to a container and stored in the refrigerator for up to 2 days.

    Nutrition

    Calories: 73kcal | Carbohydrates: 3g | Protein: 1g | Fat: 7g | Saturated Fat: 1g | Polyunsaturated Fat: 1g | Monounsaturated Fat: 5g | Sodium: 195mg | Potassium: 89mg | Fiber: 1g | Sugar: 1g | Vitamin A: 54IU | Vitamin C: 2mg | Calcium: 11mg | Iron: 1mg


    If you liked this Cucumber Tomato and Onion Salad, please consider rating the recipe and leaving a comment below. ⇓

    Cucumber and Tomato Salad with text overlay

    Bacon and Cheese Baked Potato

    Close up of baked potatoes with bacon and green onions

    Bacon and Cheese Baked Potato is the ultimate comfort food. These taters are stuffed with cheesy and buttery potato filling with pops of crunchy bacon and green onions.

    Baked loaded potatoes with bacon and green onions on a baking sheet

    If you've never had Bacon and Cheese Baked Potato, you are in for a treat! This fun recipe is typically enjoyed as as side dish. So you may want to pair it with healthy protein like grilled chicken and a large salad to keep things balanced. These Bacon and Cheese Baked Potato are what carb dreams are made of.

    Bacon and Cheese Baked Potato

    Bacon and Cheese Baked Potato is a loaded version of Twice Baked Potatoes.

    And the name is says it all. Part of the process is baking potatoes...twice. But the second time around, we're throwing in lots of delicious additions like cheddar cheese, bacon, and sour cream.

    The result is a delicious, creamy, and hearty comfort food that can be paired with additional protein (like these Instant Pot Ribs) and a salad.

    Potatoes with Bacon and Cheese on baking sheet with green onions

    What are the best potatoes to use in Bacon and Cheese Baked Potatoes?

    Russets are the best choice for Twice Baked Potatoes as well as these Bacon and Cheese Baked Potatoes. Their large size is a perfect serving size. One whole potato (two halves) is a generous serving for a main dish, and one half works great as a side.

    Moreover, the skin of russet potatoes is a lot more sturdy than any other variety of potatoes, which makes it easier to hollow them out and fill with all the delicious stuffings.

    Russet potatoes are also great because the higher starch content results in fluffier mashed potatoes.

    When choosing potatoes, look for ones that are oblong in length but with a round circumference crosswise. Potatoes that are more flat will yield shallow potato skins so you want to choose ones that are more uniform.

    Can you overcook a baked potato?

    Potatoes are a pretty hardy root but even still, there is such a thing as an overbaked potato. Wrinkled potato skins and a very dry and flavorless flesh is the result of overbaked potatoes so be sure to set a timer when baking potatoes.

    Depending on the size of your spuds, you want to bake them at 400 degrees Fahrenheit for 50-60 minutes. You can test the doneness of the potatoes when they give off a sweet aroma and are soft to touch.

    Wrapping potatoes in foil is not recommended as it traps moisture causing the skin to be wet and the inside gummy and soggy.

    Easy Twice Baked Potatoes with green onions, cheddar and bacon

    What are the ingredients in the Best Twice Baked Potatoes?

    These loaded Bacon and Cheese Baked Potatoes have all your favorite comfort-food ingredients. Let's take a look:

    • Russet Potatoes - You can't make Twice Baked Potatoes with the potatoes. Luckily, these starchy root vegetables are readily available in most American grocery stores and are relatively inexpensive compared to other varieties. Because we are cooking and eating the skin, we highly suggest opting for organic potatoes to reduce pesticide exposure.
    • Bacon - Potatoes and bacon are a match made in food heaven. For ease and convenience, you can make Bacon Bits using these simple instructions here, or you can bake a few strips in the oven for a mess-free option. We love our Butcher Box bacon and have been using them for years because the quality is unmatched. Check out my ButcherBox review and see if it's worth it for your family.
    • Dairy (butter, sour cream, milk) - To make that mashed potato filling creamy and luscious.
    • Seasonings (garlic powder, paprika) - Adds an extra punch of flavor to an already delicious side dish.
    • Cheese - Most any kind of cheese that melts well will work in this dish but an all-time favorite is cheddar. Feel free to experiment with other cheeses like gruyere, Swiss, Monterey Jack, Colby, etc... Most cheese will be stirred into the creamy mashed potato filling but be sure to reserve some as topping.
    • Green Onions - A classic way to finish off Twice Baked Potatoes with this common garnish.

    Common Questions:

    Why are my mashed potatoes gummy?

    To avoid gummy potatoes, be sure to mash potatoes while they are still warm. Additionally, avoid overmixing the potatoes as that can also contribute to gummy mashed potatoes.

    Can these Bacon and Cheese Baked Potatoes be made dairy free?

    Yes, you may use your favorite dairy-free swap for sour cream and nut milk for milk/half and half. You can omit the cheese entirely. Keep in mind that the flavor will be different without the dairy ingredients and these will no longer be Bacon and Cheese Baked Potatoes.

    Can you freeze Twice Baked Potatoes?

    Yes! Twice Baked Potatoes, though incredibly comforting and delicious, do take a fair amount of time to make. So it makes sense to make them in larger quantities and freeze for later. This recipe works great to double and freeze half for an easy meal next time. Follow the instructions below for making these Bacon and Cheese Baked Potato ahead.

    Bacon on Stuffed baked potato

    Make Ahead Bacon and Cheese Baked Potato:

    Bacon and Cheese Baked Potatoes are great to make ahead of time and refrigerate them for later that evening. They can also be frozen and reheated for another time. Follow these make ahead tips for best flavor:

    • Make these baked potatoes per recipe but don't bake them the second time. Allow the potatoes to chill completely. You may transfer to the refrigerator for later use or freeze according to instructions below.
    • Freezing Instructions in Casserole Dish: You may freeze these loaded potatoes in a freezer-safe casserole dish, then cover well with foil or lid and transfer to freezer.
    • Freezing Instructions for Single Servings: To individually freeze twice baked potatoes: wrap potato halves in foil and transfer to freezer.
    • Reheating twice baked potatoes: To bake directly from the freezer, bake the casserole dish covered at 425 degrees Fahrenheit for 35-40 minutes or until mostly warmed through. Uncover, top with additional cheese if desired, and bake for 15 minutes until completely warmed through and cheese is melted. Use the same process for reheating individual servings. To reheat thawed potatoes, don't cover the dish with foil and reduce the bake time to 20-25 minutes or until completely warmed through and cheese is melted.
    • Another tip to make these an easy side dish is to make bacon bits in bulk. Follow instructions in this post how to make bacon crumbles.

    Recipe for Baked Potato with Cheese and Bacon

    1. Bake potatoes and bacon: prick washed and dried potatoes a few times with a fork. Coat lightly with oil and bake until fork tender. Using same oven temperature, cook bacon in the oven on the bottom rack for 16-18 minutes.
    2. Drain cooked bacon on paper towels, set aside to cool, then chop or crumble. Remove potatoes from oven and lower the temperature.
    3. Slice potatoes in half lengthwise and scoop out the flesh. In a bowl, combine together mashed potatoes, butter, sour cream, milk and seasonings.
    4. Add to the mashed potatoes half of each: cheese, green onions, chopped bacon and combine.How to Make Twice Baked Potatoes with step by step instructions
    5. Spoon the mashed potato mixture back into the potato skins. Top with remaining cheese and bacon.
    6. Return potatoes back to the oven and bake until heated through and cheese melted. Garnish with remaining green onions.Combined mashed potato stuffing back into potato skins

    Potatoes with Bacon and Cheese

    Printable Recipe

    Baked loaded potatoes with bacon and green onions on a baking sheet
    Print Recipe
    5 from 1 vote

    Bacon and Cheese Baked Potatoes

    Bacon and Cheese Baked Potato is the ultimate comfort food. These taters are stuffed with cheesy and buttery potato filling with pops of crunchy bacon and green onions.
    Prep Time5 minutes mins
    Cook Time55 minutes mins
    Second Baking15 minutes mins
    Total Time1 hour hr 15 minutes mins
    Course: Side Dish
    Cuisine: American
    Keyword: bacon and cheddar baked potato, baked potatoes,, loaded baked potato, twice baked potato
    Servings: 6 servings
    Calories: 578kcal
    Author: Anya @ Prepare & Nourish

    Ingredients

    • 6 russet potatoes (approx. 6 ounce ea.) scrubbed and fully dried
    • 1 tablespoon avocado oil
    • 8 strips bacon divided
    • 4 tablespoons butter
    • ½ cup sour cream
    • ¼ cup milk or half & half
    • 1 teaspoon garlic powder
    • ¼ teaspoon paprika
    • ½ teaspoon sea salt
    • 2 cups grated cheese (cheddar, Monterrey, Mexican, etc..) divided
    • ½ cup green onions divided

    Instructions

    • Preheat oven to 400 degrees Fahrenheit. Prick each potato a few times with a fork. Brush with avocado oil. Bake potatoes for 45 minutes or until fork tender on middle or top rack of the oven.
      Step 1: baking potatoes
    • Meanwhile, cook bacon either in a frying pan on medium-low heat for 10 minutes or in the same oven as potatoes on the bottom rack for 20-23 minutes. Drain on paper towels, cool, then chop.
      Step 2: Cook bacon and drain
    • Remove potatoes from oven and reduce oven temperature to 350 degrees Fahrenheit. When cool enough to handle, slice each potato in half lengthwise. Scoop out the flesh of the potato into a medium bowl, leaving about ¼" of the potato skin.
      Step 3: scoop out the flesh of potato
    • Combine scooped out potatoes, butter, sour cream, milk, and seasonings with a potato masher or handheld mixer (do not overmix).
      Step 4: combine potato, butter, sour cream and seasonings together
    • Add half of the green onions, cheese, and bacon crumbles and combine well. Add additional milk if necessary to reach creamy consistency.
      Step 5: Add cheese, bacon, and green onions to mashed potato mixture
    • Spoon mashed potato filling back into the potato skins, making slight mounds in the middle. Top with remaining cheese and bacon. Bake for 15 minutes or until cheese is melted.
      Bacon on Stuffed baked potato
    • Garnish with additional green onions, parsley, or dollop of sour cream.
      Close up of baked potatoes with bacon and green onions

    Notes

    A generous serving size is 2 potato halves (and what Nutrition Facts reflects).
    Leftovers will keep in the refrigerator for 3-4 days. Reheat in a toaster oven until heated through.
    To Freeze Baked Potatoes:
    Follow instructions per recipe but skip the second baking. Freeze stuffed potatoes in a casserole dish or individually wrapped in foil. Will keep in freezer for up to 3 months.
    To Reheat Twice Baked Potatoes:
    To reheat frozen potatoes, transfer to a casserole dish and cover with foil. Bake covered at 425 degrees Fahrenheit for 35 minutes. Remove cover, top with cheese, and continue to bake for another 15 minutes or until warmed through and cheese is melted. Top with green onions if desired.
    To reheat thawed potatoes, bake uncovered for 20-25 minutes or until warmed through and cheese is melted. Top with green onions if desired.

    Nutrition

    Calories: 578kcal | Carbohydrates: 41g | Protein: 19g | Fat: 38g | Saturated Fat: 19g | Polyunsaturated Fat: 3g | Monounsaturated Fat: 13g | Trans Fat: 1g | Cholesterol: 90mg | Sodium: 721mg | Potassium: 1057mg | Fiber: 3g | Sugar: 3g | Vitamin A: 884IU | Vitamin C: 14mg | Calcium: 342mg | Iron: 2mg


    If you liked this Bacon and Cheese Baked Potato, please consider rating the recipe and leaving a comment below. ⇓

    Twice Baked Potatoes text overlay on picture of baked potatoes with bacon and green onions

    5-Minute Spicy Mayo (Mayo with Sriracha)

    Sriracha mayo in a clear bowl, and there’s a spoon with it.

    This sriracha mayo recipe is the perfect condiment for your favorite dishes. It's spicy, creamy, and full of flavor. Ready in 5 minutes, this mayo with sriracha is great as a dip, dressing, or sauce for poke bowls, fries, and more!

    Sriracha mayo in a clear bowl, and there’s a spoon with it.
    Looking for more simple condiments? 
    Check out spicy garlic yogurt sauce, avoocado oil mayonnaise, and buffalo sauce.
    [feast_advanced_jump_to]

    💡Recipe Overview

    • Prep and Cook Time: 5 minutes to prep
    • Cooking Method: No cook
    • Dietary Info: Keto, Paleo, Gluten-free, Dairy-free
    • Tools Needed: small bowl
    • Skill Level: Easy

    What is an ancestral diet? Read my post on what nourishing foods are based on the traditional dietary principles of the Weston A. Price Foundation.

    Mayo and Sriracha: The Saucy Power Couple

    There's probably not a single person who doesn't know what mayonnaise is, right? It's the dreamy creamy wonder that's basically the glue that holds every sandwich together.

    Now, let's talk about sriracha. Oh, sriracha. This fiery, garlicky goodness has been around for centuries, originally created in Sri Racha, Thailand (hence the name), where it was used to spice up everything from noodles to omelettes.

    Fast forward to the 1980s, and bam, Huy Fong Foods brought it stateside, putting it in nearly every pantry and dubbing it the iconic "rooster sauce."

    So what happens when you combine these two legends? Magic. Throw in some lime juice to cut through the richness and toasted sesame seed oil - and it's perfection.

    This spicy mayo gives you all the richness and creaminess of mayo, with a fiery kick from sriracha. It's the condiment you never knew you needed but will wonder how you lived without.

    image of Prepare and Nourish owner

    Ingredients for Spicy Mayonnaise

    Ingredients for spicy mayo.
    • Mayo: This is the creamy, rich base that gives the sauce its smooth texture (so make sure it's good quality). It balances the heat from the sriracha and helps everything blend together into a luscious, spoonable condiment. My avocado oil mayonnaise recipe works great in this dip.
    • Sriracha: Grab your favorite sriracha sauce to give it just the heat this spicy mayo deserves. Adjust the amount depending on how spicy you want it.
    • Lime juice: A little fresh lime juice brightens everything up and cuts through the richness of the mayo.
    • Toasted sesame oil: Just a teeny tiny amount of sesame oil to add a nutty and smoky depth. It makes this sauce more interesting than just basic, boring spicy mayo.
    sriracha mayo in a clear bowl, and there’s a spoon with it.

    How to Make Mayo with Sriracha

    The complete printable recipe is below in the recipe card for your convenience. Follow these simple step-by-step instructions for the best results.

    Mixing sriracha mayo in a white bowl.

    Step 1. Mix

    In a small mixing bowl, combine mayonnaise, sriracha sauce, lime juice, and toasted sesame oil.

    Sriracha mayo in a clear bowl, and there’s a spoon with it.

    Step 2. Serve

    Use immediately as a dip, sauce, or salad dressing. Or store in an airtight container in the refrigerator for up to one week.

    Helpful Tips

    1. To make the drizzle consistency - Just add 1-2 tablespoons of water and stir well to combine to thin out the spicy mayo a bit. 
    2. Add extra flavor - Try adding a few teaspoons of garlic powder, onion powder, or a small squeeze of honey to balance the heat. 
    3. Adjust the spice level - If you like it milder, start with less sriracha and gradually add more to suit your taste. 

    Product Highlight!

    Refined-Sugar Free Sriracha

    I love this Sriracha as it's naturally sweetened with dates and raisins instead of refined sugar. It still has all the bold, spicy flavor you expect, but with real food ingredients you can actually feel good about.

    Grab yours →
    yellowbird sriracha brand.
    💭Meal Prep Suggestion!
    Condiments and salad dressings are some of the easiest things to meal prep, and this spicy mayo fits right in — it takes just minutes to make and keeps well in the fridge all week for quick, flavor-packed meals.
    Ahi tuna poke in a white bowl with mayonnaise and chopsticks on the side.

    Serving Suggestions

    Here's a quick list of serving suggestions for your mayo and sriracha - because let's be real, this stuff makes everything better.

    Poke bowls: A must-have drizzle over anything poke. Need ideas? Try ahi tuna poke bowl, smoked salmon poke, or salmon poke.

    Other seafood: Try it on salmon sushi bake or blackened cod tacos.

    Dipping sauce: Perfect for sweet potato fries, crispy roasted potatoes, and air fryer zucchini.

    Don't forget the meats: I've made this mayo with sriracha to serve with oven baked sausage and peppers and Instant Pot ribs before. Chef's kiss.

    Sriracha mayo in a clear bowl, and there’s a spoon with it.

    Frequently Asked Questions

    How do I store mayo with sriracha?

    Store in an airtight container in the refrigerator for up to 1 week. Be sure to stir it well before using, as ingredients may slightly separate over time. 

    It's too spicy for my taste! How do I tone it down?

    No worries! If your mayo and sriracha is too hot, simply add a little more mayonnaise to balance out the heat. Cut back on the sriracha for a milder kick or use a mild chili sauce instead.

    Can I use a different hot sauce instead of sriracha in spicy mayo?

    Absolutely! If you're not a fan of sriracha, you can use other hot sauces like sambal oelek, chili garlic sauce, or even a few dashes of Tabasco for a different heat profile. As always, I recommend checking that ingredient label so it doesn't have any funky ingredients.

    Looking for more related recipes? Here are some ideas:
    • ranch dressing in a mason jar with fresh dill on top.
      Greek Yogurt Ranch Dressing Recipe
    • garlic sauce with specks of black pepper and minced garlic with fresh parsley leaf.
      Easy 5-minute Spicy Garlic Yogurt Sauce
    • Pouring buffalo wing sauce into a smal jar for refrigeration
      Homemade Buffalo Sauce
    • weck jar of freshly made pesto sauce
      Authentic Fresh Basil Pesto Recipe
    Did you make this mayo with sriracha? Please leave a ⭐⭐⭐⭐⭐ recipe rating in the recipe card below and leave a review in the comments. Thank you!💚

    Printable Recipe

    Sriracha mayo in a clear bowl, and there’s a spoon with it.
    Print Recipe
    5 from 1 vote

    5-Minute Spicy Mayo (Mayo with Sriracha)

    This sriracha mayo recipe is the only spicy mayo you'll need. It's spicy, creamy, and full of flavor.
    Prep Time5 minutes mins
    Total Time5 minutes mins
    Course: Condiment
    Cuisine: American, Asian
    Keyword: mayo and sriracha, mayo with sriracha, sriracha mayo, sriracha mayo recipe
    Servings: 10 servings
    Calories: 155kcal
    Author: Anya @ Prepare & Nourish

    Ingredients

    • ½ cup mayonnaise
    • 2 tablespoons sriracha sauce
    • 1 tablespoon lime juice
    • 1 teaspoon toasted sesame oil

    Instructions

    • In a small mixing bowl, combine ½ cup mayonnaise, 2 tablespoons sriracha sauce, 1 tablespoon lime juice, and 1 teaspoon toasted sesame oil.
    • Use immediately as a dip, sauce, or salad dressing. Or store in an airtight container in the refrigerator for up to one week.

    Notes

    This spicy sriracha mayo recipe yields ½ to ⅔ cup, making approximately 10 servings if you use about 1 tablespoon per serving. 
    Storage: Store in an airtight container in the refrigerator for up to 1 week. Be sure to give it a good stir before using, as ingredients may slightly separate over time. 
    Helpful Tips: 
    1. To make the drizzle consistency - Just add 1-2 tablespoons of water and stir well to combine to thin out the spicy mayo a bit. 
    2. Add extra flavor - Try adding a few teaspoons of garlic powder, onion powder, or a small squeeze of honey to balance the heat. 
    3. Adjust the spice level - If you like it milder, start with less sriracha and gradually add more to suit your taste. 

    Nutrition

    Calories: 155kcal | Carbohydrates: 1g | Protein: 1g | Fat: 17g | Saturated Fat: 3g | Trans Fat: 1g | Cholesterol: 9mg | Sodium: 194mg | Potassium: 14mg | Fiber: 1g | Sugar: 1g | Vitamin A: 18IU | Vitamin C: 1mg | Calcium: 2mg | Iron: 1mg

    Easy Tuna Noodle Casserole Recipe (no canned soup!)

    tuna noodle casserole on white plate.

    This Easy Tuna Noodle Casserole Recipe is made from scratch and has no canned soup! It's a delicious comfort food featuring flaky tuna, gluten-free egg noodles, creamy onions and mushrooms, and peas. The best part is this old-fashioned classic meal can be on your table in 40 minutes.

    tuna noodle casserole with serving scooped out.

    Quick and delicious casserole recipes are essential for busy weeknights or when feeding a crowd. They provide a hearty and satisfying meal with minimal effort.

    Try chicken and potato bake or this chicken cabbage casserole for a tasty and stress-free dinner.

    And now you can add this easy tuna noodle casserole to your meal prep as a healthy and delicious meal that will satisfy you.

    This homemade version skips the canned condensed soup for a creamy and savory sauce packed with flavor. With protein-rich tuna and wholesome veggies, this classic comfort food will nourish you well.

    Continue reading for the easy-to-follow recipe and tips to make it even more nutritious! You can also jump through the table of contents below to find the information you need quicker.

    [feast_advanced_jump_to]

    Why you'll love this recipe

    Easy comfort food - If you have fond memories of enjoying classic tuna casserole at family gatherings, making this comfort food will bring back happy memories. Plus, this easy dinner recipe can be on your table in 40 minutes.

    No canned soup here - But not without flavor! The rich and savory made-from-scratch sauce using a combination of broth, milk, and cream cheese is enough to make you drool over this easy recipe.

    It's hearty and filling - This easy tuna noodle casserole is a one-pan meal (technically two if you're counting the skillet) that combines protein-rich tuna, comforting noodles, and rich creamy sauce, making it a filling and satisfying meal.

    Make it work for you - A dish that's easily customized? Yes, please! Use your favorite noodles and veggies. Don't like peas? Skip them? Double up on the mushrooms if that's your thing. This cheesy tuna casserole is a versatile meal the whole family will love.

    💭Fun Fact: Tuna casserole was one of the most popular dishes served in American households during the 1950s and 60s, thanks to its affordability, ease of preparation, and ability to feed a large family. (source)
    creamy mixture with mushrooms and peas added on top.

    Ingredients

    The classic tuna noodle casserole recipe has simple ingredients you likely already have in your pantry and fridge. The ingredient list may look long, but I promise, this meal comes together quickly once you get going.

    • Egg noodles: The noodles serve as the base, providing a comforting and filling element. This key ingredient adds texture and substance and absorbs the creamy sauce. The good news is that you can still enjoy this hearty meal with gluten-free noodles, and it won't taste any different!
    • Canned tuna: I prefer solid white albacore tuna packed in water. Wild Planet and Safe Catch are great wild-caught tuna brands using sustainable fishing practices called pole and line fishing.
    • Vegetables: Yellow onion, garlic, mushrooms, and frozen peas add flavor, texture, and nutrition to the pasta bake.
    • Cream cheese: This will help create a creamy base for the sauce. It adds richness to the dish, helping thicken the sauce and create a smooth texture.
    • Milk: Added to the cream cheese to thin it out and help create that sauce. You can also use half and half or sub this with broth.
    • Broth: This liquid gold is added to the creamy cheese sauce to add moisture and depth of flavor. It also helps to balance the creaminess and richness of the sauce. You can use vegetable or chicken broth.
    • Cheeses: Cheddar cheese added to the bake adds savory and salty flavor and complements the tuna and creamy sauce, while Parmesan cheese adds a nutty and satisfying finish.

    You will also need a few tablespoons of butter to saute the veggies, salt and black pepper, and fresh or dried parsley for garnish.

    See the recipe card for exact quantities.

    Make it Nutrient Dense

    Staying true to the heart of Prepare and Nourish, there are intentional steps you can take to maximize nutrition in this old-fashioned tuna casserole. We're already starting with the best tuna noodle casserole recipe without a can of soup but there's more! Check out these simple tips:

    Start with healthy fat. The recipe calls for sauteing veggies in a healthy fat like butter. I love my local grass-fed butter, but Kerrygold from Ireland is also a great option. Alternatively, you can use beef tallow or lard. If you prefer using an oil, I recommend avocado or extra virgin olive oil.

    Use quality dairy ingredients. If budget allows, go with good quality dairy products like grass-fed cheese and organic whole milk. Even better if you can source raw dairy. Check the cream cheese ingredients to ensure they do not have gums or thickeners - Nancy's Yogurt is a great brand!

    Add bone broth. The broth is a nutrient-rich food that comes with many health benefits. I like to include broth in as many of our meals as possible. Adding this to thin out the creamy sauce adds richness, flavor, and nutrition. For a milder casserole, use chicken broth, but beef broth is an excellent choice if you want a little more depth.

    Serve with fermented food. A spoonful of fermented condiments like raw sauerkraut or red cabbage kraut is always an excellent idea to help support gut health.

    Tips to Make Gluten-Free Tuna Casserole

    I love this tuna casserole from scratch because you can easily customize it with your favorite noodles.

    To achieve a traditional, classic tuna casserole recipe, I used gluten-free egg noodles from Jovial. This whole-grain brown rice egg tagliatelle pasta tastes like regular pasta but without gluten.

    You can also make this easy dinner recipe keto and low-carb by using zucchini noodles or long strands of spaghetti squash instead of egg noodles.

    The good news is that because the cream sauce does not contain flour, you won't have to modify any other part of the recipe to convert it to low carb should you use a veggie-based noodle.

    tuna noodle casserole on white plate.

    Helpful Tips

    Cook noodles in salted water. Use the package directions for cooking noodles, but ensure the water is heavily salted for the best flavor.

    Season with salt. I didn't include the salt amount in the recipe card because that will depend heavily on your ingredients, such as broth and cheese. Do a taste test of the creamy sauce after adding all the ingredients and adjust as needed.

    Total liquid amount. You can vary the amount of milk, heavy cream, half and half, or broth you use, but you need one cup to thin out the cream cheese and create a decadent sauce.

    Step-by-Step Instructions

    The complete printable recipe with specific details is below in the recipe card for your convenience.

    This easy tuna casserole recipe has a few different elements going on but comes together quickly. Cook the pasta, make the homemade creamy sauce, toss to combine, and bake in the oven until golden brown. It helps to have all the ingredients ready to go.

    egg noodles in white baking dish.

    Step 1. Cook noodles

    Cook the egg noodles until they are al dente and transfer to a baking dish.

    onions and mushrooms sauteed in stainless steel skillet.

    Step 2. Saute veggies

    Meanwhile, saute onions and mushrooms in butter over medium heat until softened.

    💭Pro tip: "Al dente" is an Italian term commonly used to describe pasta that is cooked to a firm, but tender texture. In English, it translates "to the tooth."
    cream cheese block added to milky mushroom mixture in large skillet.

    Step 3. Add liquids

    Add broth, milk, and cream cheese and gently simmer until thickened and combined well.

    flaky tuna with cheese added to creamy mixture in skillet.

    Step 4. Stir in rest

    Next, add the frozen peas, grated cheese, and flaky tuna. Stir to combine everything.

    💭Pro tip: Use low heat when making sauce with dairy products to prevent the milk from boiling over and stir often to help distribute heat, breaking up the block of cream cheese. 
    Gluten-Free Tuna Noodle Casserole

    Step 5. Combine everything

    Pour the creamy mixture over the noodles in the casserole dish and stir to combine.

    cheese on top on casserole in dish.

    Step 6. Bake casserole

    Sprinkle with Parmesan cheese if desired, and bake until bubbly. Broil for the last 5 minutes to brown the tops.

    tuna noodle casserole in white baking dish.

    Helpful Tools & Links

    Below are some affiliate links that may be helpful to you as you make this recipe. You can find some of these items cheaper at your local store, but having a link helps you know what you're looking for.

    • Tools: chef knife, cutting board, baking dish
    • Ingredients: real salt, black pepper, olive oil, canned tuna, gluten-free egg noodles
    • Storage Supplies: glass containers with lid

    Serving Suggestions

    Garnish this casserole meal with fresh herbs such as chopped parsley or dill for a pop of color and flavor.

    We love serving this healthy tuna casserole with a side salad of mixed greens, cherry tomatoes, and a simple house dressing.

    You can also pair your favorite vegetable such as roasted broccoli or buttery garlic green beans.

    Easy Tuna Casserole pairing suggestions
    • Roasted purple cabbage with dill and garlic on white platter.
      Roasted Red Cabbage Steaks with Garlic
      Cook Time35 Minutes
    • Tomato wedges with cucumber slices and thinly sliced white onion
      Cucumber Tomato and Onion Salad
      Cook Time15 Minutes
    • Creamed Mushrooms in a small bowl with garnished parsley
      Creamed Mushrooms
      Cook Time45 Minutes
    • Shredded cabbage with cucumbers in a white bowl.
      Cabbage Cucumber Salad
      Cook Time20 Minutes

    Storage and Reheating Instructions

    To store: Leftovers can be stored in an airtight container in the fridge for up to 3-4 days. You can learn more about properly storing this classic casserole in a designated post on how long does tuna casserole last in the fridge.

    Storage containers: Glass containers are a terrific option as they can go from fridge to oven. These glass snap containers are perfect for that purpose.

    To reheat: Leftover tuna casserole can be safely reheated on the stovetop, traditional oven, Instant Pot, or air fryer. Using one of these four methods gives you best results without drying out the casserole. Learn how to reheat tuna casserole properly.

    tuna noodle casserole with mushrooms and peas in white dish.

    FAQs

    Can I make this recipe ahead of time?

    You can assemble this recipe ahead of time and refrigerate until ready to bake. Cover the casserole tightly with plastic wrap or a lid to prevent it from drying out. Let it come to room temperature before popping it in the oven to bake.

    What other veggies would be good in tuna casserole?

    Onions, mushrooms, and peas are a classic addition to tuna casserole, but you can add steamed broccoli, cauliflower, or green beans. Remember that it has to be parcooked before adding it to the casserole mixture, so gently steam it or blanch it first.

    Can you freeze tuna casserole?

    You can freeze tuna casserole for 2-3 months if properly stored. Just wrap it tightly in plastic wrap before freezing. To reheat, thaw the casserole overnight in the refrigerator and bake as directed. Check out the post on reheating previously cooked casserole to achieve the best flavor. The texture may slightly change, but it will still be delicious.

    How can I make healthy tuna casserole without canned soup?

    This recipe is fantastic for skipping canned soup and making tuna casserole from scratch. The good news is that you can still achieve that same creaminess and rich flavor by swapping out a can of soup for a mixture of cream cheese, milk, broth, and seasonings.

    Looking for more related recipes? Here are some ideas:
    • scalloped potatoes on a white dish with tomatoes and chicken.
      Chicken Potato Casserole (Easy Chicken Potato Bake)
      Cook Time1 Hours 20 Minutes
    • cabbage rolls on a white plate with sour cream drizzle.
      Lazy Cabbage Rolls
      Cook Time1 Hours 25 Minutes
    • A slice of pizza on a white plate, grated cheese in a clear bowl, and a crustless pizza in a pan on the side.
      Easy Crustless Skillet Pizza
      Cook Time50 Minutes
    • Cabbage and Chicken casserole in a baking dish
      Chicken Cabbage Casserole
      Cook Time45 Minutes
    Did you make this? Please leave a ⭐ recipe rating in the recipe card below and leave a review in the comments. Thank you!💚

    Printable Recipe

    tuna noodle casserole on white plate.
    Print Recipe
    5 from 3 votes

    Easy Tuna Noodle Casserole Recipe (no canned soup!)

    This Easy Tuna Noodle Casserole Recipe is made from scratch and has no canned soup! It's a delicious comfort food featuring flaky tuna, gluten-free egg noodles, creamy onions and mushrooms, and peas. The best part is this old-fashioned classic meal can be on your table in 40 minutes.
    Prep Time25 minutes mins
    Cook Time15 minutes mins
    Total Time40 minutes mins
    Course: Main Course
    Cuisine: American
    Keyword: easy tuna noodle casserole, healthy tuna casserole, old fashioned tuna casserole
    Servings: 8
    Calories: 439kcal
    Author: Anya @ Prepare & Nourish

    Ingredients

    • 8-12 ounces egg noodles
    • 3 tablespoons butter
    • 1 yellow onion diced
    • 8 ounces mushrooms sliced
    • 8 ounces cream cheese
    • 3 garlic cloves minced
    • ½ cup broth chicken or vegetable
    • ½ cup milk or half and half, or additional broth
    • 2 cups frozen peas
    • 2 5 ounce cans albacore tuna drained and flaked
    • 2 cups cheddar cheese
    • ½ cup Parmesan cheese
    • 1 tablespoon dried parsley
    • salt and pepper to taste

    Instructions

    • Prep noodles. Preheat oven to 400℉ (204℃). Grease a 9X13 casserole dish with butter or cooking spray and set aside. Cook noodles according to the instructions on the box "al dente". Once cooked, transfer to the prepared casserole dish and spread evenly across the dish.
    • Saute onions. In a large stainless steel skillet, melt butter over medium-high heat. Add diced onions and saute until translucent and slightly golden, stirring regularly for about 5-7 minutes.
    • Cook mushrooms. Push the onions to the side and add sliced mushrooms to the pan. Continue to cook until tender. If mushrooms are of a thicker cut, reduce heat to medium-low and cook for longer so onions do not get burned.
    • Add liquids. Turn heat to low, and add cream cheese, milk, broth, and minced garlic. Gently simmer, stirring often to break apart the cream cheese until thickened and combined well.
    • Stir in the rest. Add frozen peas and stir to combine. Add flaked tuna chunks and grated cheese to the mixture and combine well.
    • Combine. Pour mixture over the cooked noodles and toss to combine with a pair of tongs—season with salt and pepper to taste.
    • Bake. Sprinkle Parmesan cheese on top and bake uncovered for 15 minutes until bubbly and the top is lightly browned. Rest for 5-10 minutes before serving.

    Notes

    Storage: Leftover tuna casserole can be stored in an airtight container for up to 3 days. To reheat, warm in an unpreheated oven until heated through.
    Helpful Tips:
    1. Cook noodles to al dente or "to the tooth" so it still has a bite to them to avoid mushy casserole.
    2. Use one cup of liquid: that can be any combination of water, broth, or milk, depending on the preference of richness.
    3. Season with salt as you go; that will depend on the individual ingredients (i.e. cheese and broth are both salty).
    4. If using cooked squash or another low-carb noodle option, omit milk and broth entirely and reduce oven bake time to 10 minutes.

    Nutrition

    Calories: 439kcal | Carbohydrates: 31g | Protein: 18g | Fat: 27g | Saturated Fat: 16g | Polyunsaturated Fat: 1g | Monounsaturated Fat: 7g | Trans Fat: 0.2g | Cholesterol: 98mg | Sodium: 484mg | Potassium: 369mg | Fiber: 4g | Sugar: 6g | Vitamin A: 1200IU | Vitamin C: 17mg | Calcium: 349mg | Iron: 1mg

    Oven-Baked Sausage and Peppers

    Sausage and peppers on a baking sheet, with two white plates and utensils on the side.

    Oven baked sausage and peppers is an easy, flavorful meal made with tender sausage, sweet bell peppers, onion, and lots of seasoning - all roasted together on one baking sheet. Minimal prep and even less clean up - perfect for a quick, low-effort dinner.

    Sausage and peppers on a baking sheet, with two white plates on the side.
    Looking for more easy sheet pan meals?
    Check out sheet pan salmon and asparagus, sheet pan nachos, and sheet pan breakfast quesadilla.
    [feast_advanced_jump_to]

    Recipe Overview

    • Prep and Cook Time: 10 minutes to prep and 30 minutes to cook
    • Cooking Method: Oven-baked
    • Dietary Info: Low-Carb, Whole30, Paleo, and GAPS
    • Tools Needed: large baking sheet
    • Skill Level: Easy

    What is an ancestral diet? Read my post on what nourishing foods are based on the traditional dietary principles of the Weston A. Price Foundation.

    Ultimate Last-Minute Meal Hack

    You know those days when dinner feels like a race against the clock?

    This sausage and peppers recipe is my secret weapon. It's one of those dishes I can throw together last minute - no stress, no planning needed (and believe me, I've forgotten to thaw out the meat a time or two!).

    I always have sausages from Costco in the freezer, and even if they're frozen solid, I can have them ready to cook in under an hour.

    Just a quick thaw in water, and I'm good to go. It's simple, satisfying, and doesn't keep me waiting around for long. Plus, there's no need to flip the sausages halfway through cooking, which is always a win in my book!

    image of Prepare and Nourish owner

    Ingredients for Oven-Baked Sausage and Peppers

    Ingredients for sausage and peppers on a white table.
    • Sausages: Use your favorite sausages (you'll need about a pound, which is roughly 5-6 large links). You can use Italian, Andouille, bratwurst, or a spicier option. Just keep in mind, if using an uncooked sausage, you may have to temp test it before pulling it out of the oven to make sure it's cooked through.
    • Bell peppers: A colorful mix of green, yellow, and red bell peppers adds both sweetness and crunch. Green bell peppers tend to be a tad on the bitter side, so you can just use the red and yellow bell peppers but this is totally a matter of preference.
    • Red onion: Adds a mild sweetness as it roasts. The caramelized edges are everything here. If you don't have red onion, you can use a sweet yellow onion or a white onion instead.
    • Lemon: I love tucking lemon chunks throughout the sheet pan - the heat brings out their zestiness, and I squeeze the juices over the roasted sausages and veggies for an extra burst of flavor. The best!
    • Olive oil: The oil helps everything roast beautifully, giving the sausages a crisp, golden exterior while keeping the peppers and onions tender and flavorful. It also helps the seasoning to cling to every bite.
    • Flavor: Italian seasoning and unrefined sea salt is a must here. If you don't have Italian seasoning on hand, you can make a simple substitute with equal parts of dried oregano, basil, thyme, and rosemary.

    Substitutions and Variations

    • Seasoning variations - Instead of Italian seasoning, try a smoky paprika or Cajun seasoning for a different flavor profile.
    • Vegetables - Use what you have on hand - zucchini, cherry tomatoes, or mushrooms all work great.
    Sausage and peppers on a baking sheet.

    How to Make Sausage and Peppers in the Oven

    The complete printable recipe is below in the recipe card for your convenience. Follow these simple step-by-step instructions for the best results.

    Sausage and peppers with seasoning on a baking sheet.

    Step 1. Prepare

    Preheat the oven to 400°F. Place the sausage, bell peppers, and red onion on a large baking sheet. Drizzle with olive oil, then season with Italian seasoning and sea salt. Toss everything together until well coated.

    Seasoned sausage and peppers on a baking sheet.

    Step 2. Cook

    Spread the sausage and vegetables in a single layer on the baking sheet. Tuck lemon wedges throughout. Roast until the vegetables reach your desired tenderness. For a golden finish, broil on high for the last few minutes.

    Helpful Tips

    1. Promote even cooking: Arrange the sausage and veggies in a single layer on the baking sheet to ensure even roasting. Overcrowding the pan can cause steaming rather than roasting. 
    2. Italian seasoning adjustment: If you don't have this blend on hand, use 1 teaspoon of dried basil, 1 teaspoon dried oregano, ½ teaspoon garlic powder, and ½ teaspoon dried thyme. 
    3. Cut at a bias: Cut the sausages diagonally to expose more surface area to the sheet pan so it caramelizes and browns nicely. I also like to set the oven to broil the last 5 minutes of cooking to get golden brown crispy edges. 
    4. Lemon squeeze: Roasting the lemon wedges brings out a deeper, roasted citrus flavor. Don't forget to squeeze the lemon directly over the bell peppers and sausage for that extra touch. 

    Troubleshooting

    • Sausage not browning? Make sure to keep the oven temp high at 400°F and cut the sausage at a bias (diagonally) to give it more surface area to touch with the baking sheet and being exposed to hot air.
    • Overcooked veggies? Keep the peppers and onions large so they roast at the same time as the sausage. You don't want mushy bell peppers. 

    Product Highlight!

    Large Stainless Steel Sheet Pan

    I love my large SS sheet pan - it is such a workhorse and so versatile. It distributes heat evenly and makes it super easy to clean up afterward.

    Grab yours →
    baking sheets with racks
    💭Meal Prep Suggestion!
    These oven baked sausage and peppers is super meal prep friendly. Make a double batch and divide into smaller containers. Store in the fridge for up to 4 days and you've got ready-to-go lunches or dinners.
    Sausage and peppers on a white plate, with a spoon in it.

    What to Serve with Sausage and Peppers

    Sausage and peppers in the oven are flavorful on their own, but pairing them with the right sides can take the meal to the next level. Here are some great options:

    Side dish: Serve with crispy potatoes (bonus - throw them in the oven at the same time!) or over Instant Pot buckwheat or bone broth rice.

    Fresh salads: Don't forget to round out your meal with refreshing and vibrant salads. Classic house salad is always a delicious option.

    Condiments: I like adding a small side of ferments like raw sauerkraut or fermented jalapeno peppers.

    More sausage and pepper pairing suggestions:
    • roasted bok choy on a white platter
      Easy Roasted Bok Choy Recipe in Air Fryer
      Cook Time15 Minutes
    • Shredded cabbage with cucumbers in a white bowl.
      Cabbage Cucumber Salad
      Cook Time20 Minutes
    • mashed potatoes with butter drizzle and fresh chives.
      Creamy Mashed Potatoes with Cottage Cheese
      Cook Time25 Minutes
    • garlic cucumber dill salad in a white bowl.
      Easy and Fresh Cucumber Dill Salad Recipe with Garlic
      Cook Time15 Minutes
    Sausage and peppers on a baking sheet, with two white plates and utensils on the side.

    Frequently Asked Questions

    How do I store and reheat sausage and peppers?

    Store leftover sausage and peppers in an airtight container for up to 4 days in the refrigerator. These glass snap containers are perfect for leftovers. To reheat, transfer the sausage and peppers to a small saucepan and warm over medium-high heat, stirring gently and often.

    Can I freeze oven-baked sausage and peppers?

    Yes! Cool the sausage and peppers first, then transfer to a freezer-safe container, removing as much air as possible to prevent freezer burn. Store in the freezer for up to 3 months. Thaw overnight in the fridge and reheat.

    What's the best way to cut a bell pepper into large strips?

    Cut the bell pepper in half lengthwise and remove the stem, seeds, and as much pith as possible. Place the pepper, skin side down, on the cutting board and slice into ½-inch thick strips. Repeat the process for the other half of the pepper.

    Looking for more veggie & meat dishes? Here are some ideas:
    • fried cabbage and sausage with dill and fresh parsley garnish in a skillet.
      Easy Fried Cabbage and Sausage Skillet Recipe
    • Ground beef with broccoli and rice on a plate, with extra ground beef, broccoli in a pan, and spices on the side.
      Ground Beef and Broccoli Recipe
    • golden brown balsamic chicken roasted on sheet pan with asparagus, tomatoes, and onions.
      Easy One Pan Balsamic Chicken and Asparagus
    • Close up of baked potatoes with bacon and green onions
      Bacon and Cheese Baked Potato
    Did you make this oven-baked sausage and pepper? Please leave a ⭐⭐⭐⭐⭐ recipe rating in the recipe card below and leave a review in the comments. Thank you!💚

    Printable Recipe

    Sausage and peppers on a baking sheet, with two white plates and utensils on the side.
    Print Recipe
    5 from 1 vote

    Easy Sheet Pan Sausage and Peppers

    Oven-baked sausage and peppers is an easy, sheet-pan meal with sausage, peppers, onions, and seasoning—perfect for a quick dinner.
    Prep Time10 minutes mins
    Cook Time30 minutes mins
    Total Time40 minutes mins
    Course: Dinner, Main Course
    Cuisine: American
    Keyword: oven baked sausage and peppers, sausage and peppers, sausage and peppers in the oven
    Servings: 4 servings
    Calories: 516kcal
    Author: Anya @ Prepare & Nourish

    Ingredients

    • 1 pound fully cooked sausage links cut into 1" chunks cut on bias
    • 3 bell peppers, any color cored and cut into strips
    • 1 large red onion halved then coarsley sliced into half moons
    • 3 tablespoons olive oil
    • 1 tablespoon Italian seasoning
    • 1 ½ teaspoon sea salt
    • 1 lemon cut into quarters or ⅛ths

    Instructions

    • Preheat the oven to 400°F. Add all ingredients including 1 pound fully cooked sausage links, 3 bell peppers, any color, and 1 large red onion to a large baking sheet. Toss with 3 tablespoons olive oil, 1 tablespoon Italian seasoning, and 1 ½ teaspoon sea salt.
    • Arrange all vegetables and sausage in one layer on the sheet pan so they are all spread out in single layer. Cut 1 lemon into wedges and tuck throughout the baking sheet.
    • Roast for 30 minutes or until vegetables are cooked to your preferred tenderness. Broil on high the last 4 minutes until golden, if desired. Remove from oven and carefully squeeze the lemon wedges over the vegetables and sausage. Toss gently and transfer to serving platter.

    Notes

    Storage: Store leftover oven baked sausage and peppers in an airtight container in the refrigerator for up to 4 days. To reheat, transfer to a small skillet and warm over medium heat, stirring occasionally. You may need to add a splash of water or broth to loosen it up. 
    To freeze: Freeze in a freezer-safe container for up to 3 months. Thaw overnight in the fridge and reheat in a skillet over medium heat. 
    Helpful Tips:
    1. Promote even cooking: Arrange the sausage and veggies in a single layer on the baking sheet to ensure even roasting. Overcrowding the pan can cause steaming rather than roasting. 
    2. Italian seasoning adjustment: If you don't have this blend on hand, use 1 teaspoon of dried basil, 1 teaspoon dried oregano, ½ teaspoon garlic powder, and ½ teaspoon dried thyme. 
    3. Cut at a bias: Cut the sausages diagonally to expose more surface area to the sheet pan so it caramelizes and browns nicely. I also like to set the oven to broil the last 5 minutes of cooking to get golden brown crispy edges. 
    4. Lemon squeeze: Roasting the lemon wedges brings out a deeper, roasted citrus flavor. Don't forget to squeeze the lemon directly over the bell peppers and sausage for that extra touch. 
    Troubleshooting:
    Sausage not browning? Make sure to keep the oven temp high at 400°F and cut the sausage at a bias (diagonally) to give it more surface area to touch with the baking sheet and being exposed to hot air. 
    Overcooked veggies? Keep the peppers and onions large so they roast at the same time as the sausage. You don't want mushy bell peppers. 

    Nutrition

    Calories: 516kcal | Carbohydrates: 15g | Protein: 17g | Fat: 44g | Saturated Fat: 13g | Polyunsaturated Fat: 4g | Monounsaturated Fat: 24g | Cholesterol: 84mg | Sodium: 1837mg | Potassium: 676mg | Fiber: 4g | Sugar: 6g | Vitamin A: 2829IU | Vitamin C: 131mg | Calcium: 72mg | Iron: 2mg

    Roasted Green Beans with Bacon

    Whole30 green beans with bacon

    Roasted Green Beans with Bacon are perfectly tender and so delicious. This easy 20-minute side dish goes with just about anything.

    Whole30 green beans with bacon

    This simple yet delicious side dish not only goes with just about any main entree (see serving suggestions below) but it is also naturally Whole30, paleo, low carb and GAPS friendly. Just be sure to check the ingredients on that bacon package to avoid excess sugar and preservatives. But if you go with quality bacon like ButcherBox, you should be good.

    Roasted Green Beans with Bacon

    It's hard to resist eating these green beans straight off the pan. They are deliciously crisp-tender with just the right amount of seasonings and crunchy bacon to go with it. It makes an easy and delicious side dish to just about any entree and the best part is it can be ready in under 30 minutes!

    Oven raosted green beans and crunchy bacon on sheet pan with spatula

    Can you roast green beans in the oven?

    Yes! In fact that is the most convenient and easiest way to cook them.

    It saves time because you don't have to babysit them as you would if using a pan on stove top. And you can easily throw all the green beans on a sheet pan and pop it in the oven rather than the need to cook them in batches if using a skillet.

    What are the best green beans to roast in oven?

    In a typical neighborhood market, you will often find two types of green beans: the waxy, round string beans and the delicate, thin Haricots Verts.

    Green beans are the more popular string beans but you can also find heirloom yellow and purple varieties at the farmer's markets.

    Haricots Verts is a French term for green beans but they also differ from the commonly found string beans. Haricots Verts are longer and thinner and tend to be more tender with a robust flavor. Because they are slender, you want to cut back in the roasting time so they still retain that texture that we love in green beans.

    Seasoned raw green beans on a sheet pan

    How to season oven roasted green beans?

    There are so many different ways to season roasted green beans. This particular recipe is simple with just salt, pepper and a little garlic powder. But you can also season with whatever your heart desires. Some great options would be Italian seasoning, dried parsley, paprika, and onion powder.

    Keep in mind that the finished flavor of the green beans will also depend on the flavor of the bacon used. Besides just being quality product, I love ButcherBox bacon because of the mild flavor. I would recommend going with a bland-flavored bacon so there's no competition of flavors.

    If you are skipping the bacon for whatever reason, you can also top your roasted green beans with some of these simple additions:

    • A pat or two of pastured butter and dusting of Parmesan cheese
    • Red pepper flakes and sesame seeds with drizzle of sesame oil
    • Lemon zest and lemon squeezed over the green beans

    Green beans with crunchy bacon on top

    How long to roast green beans in the oven?

    Always cook with washed and fully dried green beans. If there is even a drop of water that will create condensation that will actually steam the green beans and rob that golden roasted flavor.

    Depending on the thickness of the green beans (string beans or Haricots Verts?), you will roast the green beans for approximately 20-30 minutes. The tenderness of the green beans is a matter of preference and there is no right or wrong answer here.

    Like them more on the crunchy side? Go with 21 minutes. More soft and tender? Roast for the full 30 minutes.

    A simple trick to getting the best flavor and appearance of any roasted vegetable is to broil on high for a minute or so. No one can resist perfectly roasted golden green beans.

    Green beans on a sheet pan with added bacon

    How to roast green beans in the oven?

    Oven-roasted green beans is actually quite simple to prepare. It is literally the easiest side dish you will ever make.

    Start with trimming the green beans. Cut off the ends diagonally to expose more surface area. I prefer doing this when I rinse green beans under running cold water and using kitchen shears such as these instead of a knife.

    Season the green beans with salt, pepper and garlic powder and drizzle with some healthy oil.

    The key to getting the most delicious, crisp-tender green beans is to roast them in a hot oven. So be sure your oven is preheated to 425 degrees Fahrenheit.

    After 8 minutes of roasting, carefully remove pan from oven and flip the green beans. Now is also a good time to add chopped bacon throughout the pan between green beans.

    Pop the pan back into the oven for an additional 13 minutes, followed by a minute or two of broiling and you are set!

    Green beans with crunchy bacon pieces in a serving platter

    Tips to Roasting Green Beans in Oven:

    • Look for fresh, bright green beans. They should have firm skin and snap easily. You can use round string beans or the thinner variety Haricots Verts.
    • Pat green beans dry before roasting. Any water will turn into mushy not golden spots on the green beans.
    • Don't crowd the beans. If you are doubling the recipe, use two pans but do not overcrowd the beans. There needs to be sufficient room for heat to travel between the beans and every single green bean has to touch the hot pan.
    • Remove green beans from oven when they are crisp-tender, unless you prefer them soft, in which case a few more minutes will help to finish that roasting process.
    • Broil the green beans for a minute or two at the end to add some of that golden glow to the tops of the green beans.

    Roasted Green Beans with Bacon Serving Suggestions

    These are great on their own - they may not even make it till dinner time. 😉 But here are a few serving suggestions that would pair great with these Roasted Green Beans with Bacon:

    • Instant Pot Paleo Ribs
    • Keto Chicken Cabbage Casserole
    • Lazy Cabbage Rolls
    • Crustless Skillet Pizza
    • Instant Pot Sprouted Brown Rice with Beef

    Printable Recipe

    Green beans with bacon on a platter with a serving spoon
    Print Recipe
    4.41 from 5 votes

    Roasted Green Beans with Bacon

    Roasted Green Beans with Bacon are perfectly tender and so delicious. This easy 20-minute side dish goes with just about anything!
    Prep Time8 minutes mins
    Cook Time22 minutes mins
    Total Time30 minutes mins
    Course: Sides
    Cuisine: American
    Keyword: GAPS, low-carb, paleo, Whole 30
    Servings: 4 servings
    Calories: 215kcal
    Author: Anya @ Prepare & Nourish

    Ingredients

    • 1 pound green beans washed and trimmed
    • 2 tablespoon avocado oil or olive oil
    • 1 teaspoon garlic powder
    • ½ teaspoon sea salt
    • ¼ teaspoon black pepper
    • 5 strips bacon cut into 1" pieces

    Instructions

    • Preheat oven to 425 degrees Fahrenheit.
    • Toss washed, trimmed and fully dried green beans with oil, salt and pepper, and garlic powder.
    • Roast for 8 minutes on middle rack.
    • Remove pan from oven and flip the green beans. Add the 1" cut bacon pieces all over the green beans and return to the oven for additional 13 minutes.
    • Broil for 1-2 minutes, constantly watching to make sure the green beans don't get charred.
    • Remove from pan and transfer to platter and enjoy immediately.

    Nutrition

    Calories: 215kcal | Carbohydrates: 9g | Protein: 6g | Fat: 18g | Saturated Fat: 5g | Cholesterol: 18mg | Sodium: 480mg | Potassium: 303mg | Fiber: 3g | Sugar: 4g | Vitamin A: 782IU | Vitamin C: 14mg | Calcium: 42mg | Iron: 1mg


    If you liked this Roasted Green Beans with Bacon recipe, please consider rating and leaving a comment below. ⇓

    >>> Pin This <<<

    Oven roasted green beans with bacon text overlay over finished green bean side dish

    Mexican Stuffed Acorn Squash

    Roasted and Stuffed Acorn Squash with drizzle of sour cream, cilantro and jalapeno

    This vegetarian Mexican Stuffed Acorn Squash is easy as it is delicious. It's filled with sauteed onions, hearty vegetables, rice and beans and are baked to golden perfection. A simple yet tasty weeknight meal.

    Mexican Stuffed Acorn Squash with sour cream and cilantro and lime wedges as garnish.

    Acorn squash is a winter squash that resembles acorns, hence the name. They are perfectly sized to hold individual servings of pretty much anything, such as this Mexican-inspired vegan stuffing. Because these stuffed acorn squash halves are meatless, the cooked flesh of the acorn squash will add some bulk and substance.

    Mexican Stuffed Acorn Squash

    These Mexican Stuffed Acorn Squash requires a few steps, but none that are difficult. In fact, the entire dish comes together effortlessly in under an hour. You can make the Mexican-inspired stuffing while the squash is roasting in the oven.

    Then scoop that delicious stuffing which features sauteed onions, hearty veggies, rice and beans, into the roasted squash halves and bake until perfect golden perfection. The cheese is totally optional and omitting it makes these Mexican Stuffed Acorn Squash vegan and vegetarian.

    A drizzle of sour cream (again, omit if dairy-free), chopped cilantro and green onions, and zesty pico de gallo completes this easy meal.

    How to bake acorn squash

    How to Bake Acorn Squash

    Cooking acorn squash is easier than you think. The hardest part is actually cutting the squash lengthwise in half so be sure your knife is sharp and work surface steady.

    I prefer to cook my acorn squash as I do all my squashes - perfectly roasted in the oven.

    Follow these easy steps to roast acorn squash:

    1. Preheat oven to 425 degrees Fahrenheit and line a rimmed baking sheet with parchment paper.
    2. Cut the squash with a sharp knife lengthwise from tip to stem. (Tip: it's easiest to first pierce the squash in the center along one of the depression lines. Cut through to the tip on one side. Then spin the squash around and finish by cutting through the top portion to the stem)
    3. Using a large spoon, scoop out the seeds and discard or save to roast at a later time.
    4. Place the cleaned squash halves cut side up on the parchment-lined pan. Drizzle some avocado oil over the squash or use an avocado-oil cooking spray for ease. Season with sea salt. Turn the squash halves cut-side down and bake for 30-40 minutes just until fork tender.

    Rice, beans and corn stuffed acorn squash cut in half to expose stuffing.

    Vegan Stuffed Acorn Squash

    These Mexican Stuffed Acorn Squash halves are meatless and if you omit the cheese, it could easily pass as a vegan meal.

    As much as I love acorn squash, the stuffing is clearly the star of this dish. It hails sauteed onions, bell pepper, tomato, rice, corn and beans all tossed in appropriate seasonings. After everything is combined, it is then scooped into the roasted squash bowls, topped with cheese (optional) and baked to bring all the flavors together.

    I personally love cooking rice in bone broth for added nutrition. You can use this method to cook perfect rice in the Instant Pot or use any leftover rice from a previous meal.

    The stuffing also calls for 1 cup of frozen corn and black beans. If you are cooking your own beans, I always recommend that you soak them first and cook in large batches in the Instant Pot. Beans freeze exceptionally well and can be frozen in pre-measured sizes (1 cup, 2 cups, etc..)

    A standard can of beans typically holds a little over 2 cups of beans, so you will have some leftover that can be used for a future recipe.

    After filling the squash halves with the Mexican mixture, you may find that you are left with some leftovers. Transfer any leftover stuffing mixture to a sealed container and keep in the refrigerator for up to 5 days. It can be added to chopped romaine lettuce and dressed with Ranch or a drizzle of avocado oil and lime for an easy salad.

    Stuffed Acorn Squash ready to go into the oven, topped with Mexican cheese blend.

    What to garnish Mexican Stuffed Acorn Squash with:

    You can top these stuffed squash halves with pretty much anything and everything. Some of my favorites are:

    • Fresh herbs like cilantro and green onions
    • Dollop of sour cream and additional cheese
    • Squeeze a lime wedge or two
    • Fermented Tomato Salsa - Pico de Gallo
    • 5-Minute Blender Salsa
    • Slice or dice fresh avocado or The Best Chunky Guacamole
    • Fresh jalapeno slices or Lacto-Fermented Jalapeno Peppers

    Printable Recipe

    Roasted and Stuffed Acorn Squash with drizzle of sour cream, cilantro and jalapeno
    Print Recipe
    4.34 from 3 votes

    Mexican Stuffed Acorn Squash

    This vegetarian Mexican Stuffed Acorn Squash is easy as it is delicious. It's filled with sauteed onions, hearty vegetables, rice and beans and are baked to golden perfection. A simple yet tasty weeknight meal.
    Prep Time10 minutes mins
    Cook Time40 minutes mins
    Course: Main Course
    Cuisine: Mexican
    Keyword: Dairy-free, vegan, vegetarian
    Servings: 4 servings
    Calories: 614kcal
    Author: Anya @ Prepare & Nourish

    Ingredients

    • 2 acorn squash small-medium sized
    • 4 tablespoons avocado oil divided
    • 1 yellow onion diced
    • 3 garlic cloves minced
    • 1 teaspoon chili powder
    • ½ teaspoon ground cumin
    • ½ teaspoon sea salt
    • 1 cup white rice cooked
    • 1 cup frozen corn frozen
    • 1 cup black beans
    • 1 beefsteak tomato diced
    • 1 green bell pepper diced
    • 1 cup Mexican cheese blend optional

    Optional Garnish

    • cilantro, fresh jalapenos, sour cream, lime, green onions optional

    Instructions

    Cooking Acorn Squash

    • Preheat oven to 425 degrees Fahrenheit.
    • Cut the squashes in half lengthwise from tip to stem. Scoop out seeds and discard. Drizzle 1 tablespoon avocado oil on the cut side and season lightly with sea salt.
    • Place squash halves on a rimmed baking sheet, cut side down and roast in preheated oven for 30 minutes.

    Mexican Stuffing for Squash

    • Heat oil in a large skillet over medium-high heat. Add diced onions and cook until translucent, approximately 5 minutes.
    • Remove from heat. Add minced garlic and seasonings and stir to combine. Stir in the remaining ingredients, except for cheese and toss well.

    Mexican Stuffed Acorn Squash

    • Remove squash from oven and carefully turn them over. Spoon the rice and beans stuffing evenly into the 4 squash halves. Top with cheese if using.
    • Return to oven and bake for 15 minutes or until cheese is melted and everything is cooked through.
    • Garnish with your favorite toppings: sour cream, green onions, cilantro, sliced jalapenos.

    Notes

    Cooking Acorn Squash in Instant Pot:
    1. Pour one cup of water into the Instant Pot and add the trivet. Cut the squash in half and scrape out seeds and stringy bits. Place the squash halves into the Instant Pot on the trivet.
    2. Close the lid on the Instant Pot and set the valve to "sealing." Cook on "manual" for 5 minutes for small squash, 7 minutes for larger squash. Followed by natural pressure release for 8 minutes. Release remaining pressure by turning the venting know to "venting" position.
    Notes on size of squash:
    If your acorn squashes are particularly on the small size, you may have leftover stuffing mixture. You can add that on a bed of romaine lettuce for an easy salad.
     

    Nutrition

    Calories: 614kcal | Carbohydrates: 88g | Protein: 18g | Fat: 23g | Saturated Fat: 7g | Cholesterol: 27mg | Sodium: 512mg | Potassium: 1411mg | Fiber: 11g | Sugar: 5g | Vitamin A: 1942IU | Vitamin C: 65mg | Calcium: 302mg | Iron: 4mg


    If you liked this Mexican Stuffed Acorn Squash, please consider rating the recipe and leaving a comment below ⇓.

    More Healthy Dinner Options:

    Chicken Potato Bake Recipe
    Instant Pot Crispy Carnitas
    Sheet Pan Nachos - 30-minute Meal
    Instant Pot Ribs Recipe
    Sheet Pan Garlic Butter Salmon, Asparagus and Potatoes

    >>>Pin This<<<

    Mexican Stuffed Acorn Squash that is vegan, vegetarian and meatless

    This post was originally published in October 2016 but has since been updated to include helpful information.

    Homemade Eggnog Recipe

    eggnog poured into a glass from a glass bottle.

    Learn how to make eggnog in just 30 minutes that's creamy, velvety, and delicious! This easy, traditional eggnog recipe uses milk, eggs, and a healthy sweetener, with just the right hing to seasonal spices for a festive holiday drink.

    Two glasses of creamy eggnog sit on a white cloth, each topped with a sprinkle of cinnamon.
    Looking for more holiday drinks? 
    Check out honey citrus mint tea, cranberry juice, and pumpkin spice latte.
    [feast_advanced_jump_to]

    💡Recipe Overview

    • Prep and Cook Time: 10 minutes to prep and 15-20 minutes to make
    • Cooking Method: Stove-top
    • Skill Level: Moderate

    What is an ancestral diet? Read my post on what nourishing foods are based on the traditional dietary principles of the Weston A. Price Foundation.

    Reasons to Love this Egg Nog Recipe

    I didn’t grow up with eggnog at the holidays - Russian households are more Team Kefir and Pickled Everything than creamy boozy milk drinks. So when I finally met eggnog, I was suspicious.

    But then I learned why everyone treats it like liquid gold: traditionally, it’s spiked with rum, brandy, or bourbon.

    Not just to make family parties extra chatty, but because alcohol actually works as a preservative and sanitizer. Research suggests even stubborn bacteria like salmonella don’t thrive when booze is involved.

    That said, eggnog can be just as delicious alcohol-free. If you’re using the freshest, organic, pasture-raised eggs you can find, raw yolks are generally safe and give the drink that rich, velvety texture.

    Still wary? Go the cooked route. All you need is patience and the art of tempering - slowly whisking hot liquid into beaten yolks so they don’t scramble. (And I show how it's done below) It’s the same technique behind silky custards, puddings, and that fancy Hollandaise sauce you pretend you don’t eat by the spoonful.

    That's what we'll get into this recipe. It's one I make at least a few times per season and everyone loves it.

    image of Prepare and Nourish owner

    Ingredients for Homemade Egg Nog Recipe

    A glass measuring cup filled with milk sits in the foreground, with small bubbles on the surface. Behind it, a clear bowl holds several brown eggs.
    • Whole milk – Use your favorite brand of milk - whether it's raw milk or A2 gently pasteurized milk. Whatever your choice is - it's all good. I would avoid skim milk though.
    • Spices – Nutmeg, cinnamon, and cloves to give that classic eggnog flavor and a pinch of salt to balance it all out.
    • Egg yolks – You'll just be needing the yolks here so save your egg whites for another recipe. The yolks are whisked with the sugar to make the drink rich and smooth.
    • Sweetener - I usually use turbinado sugar, but maple or coconut sugar works too. I would avoid honey as it's overpowering but if you like that or on GAPS diet, go for it.
    • Toppings (optional)– Whipped cream and a little extra cinnamon or nutmeg on top.
    • Alcohol (optional) – Dark rum, brandy, or Cognac if you want a spiked version.

    Variation: Eggnog with Alcohol

    Alcoholic eggnog has been traditionally the drink of choice as a way to preserve milk and eggs. Since there is no need for that with modern refrigeration, my family personally prefers eggnog free of alcohol.

    However, that doesn't mean you can't turn this homemade eggnog into a spiked adult beverage. What type or how much alcohol to add is a matter of personal preference. But any dark spirit like brandy, rum, or Cognac goes well.

    So how much alcohol to add to eggnog?

    Well, that depends on who’s drinking it - we all know Aunt Linda doesn’t do subtle. (Just kidding - I don't even have an aunt Linda!) But a good starting point is a 5:1 ratio: five parts eggnog to one part booze. In plain English: one 1.5‑oz shot per cup of eggnog. Adjust accordingly if Aunt Linda is in the room, and you want to survive the holiday chaos.

    When to add alcohol to eggnog?

    Another great question. You can add alcohol directly to the bottle after eggnog has been fully chilled. Or you may spike individual drinks using the 5:1 ratio so there's always a virgin variety in the fridge for everyone else.

    graphic of fork and spoon connected in a plant.

    Make it Ancestral

    Use farm-fresh eggs and raw milk for the best flavor and nutrition. Sweeten lightly with natural sweeteners like turbinado or maple sugar. Eggnog can be a superfood when made with the right ingredients.

    Two glasses of creamy eggnog sit on a white cloth, each topped with a sprinkle of cinnamon.

    How to Make Eggnog

    The complete printable recipe is below in the recipe card for your convenience. Follow these simple step-by-step instructions for the best results.

    A close-up of a pot containing milk with a generous layer of cinnamon powder on top, ready to be stirred and heated.

    Step 1. Heat

    In a large saucepan, warm milk with nutmeg, cinnamon, cloves, and a pinch of salt. Stir regularly to avoid scorching.

    A close-up of a glass mixing bowl containing four raw egg yolks, with brown sugar being poured from a gold measuring spoon into the center of the yolks.

    Step 2. Whisk

    Beat egg yolks with sugar until pale and creamy.

    Close-up of a mixing bowl with a yellow batter being whisked. A measuring cup is pouring a stream of creamy liquid into the bowl, and several metal whisks are partially submerged in the mixture.

    Step 3. Temper

    Slowly add hot milk to the yolks in small increments, whisking constantly.

    A close-up view of a creamy, light-colored mixture simmering in a pot. Small bubbles dot the surface, and a wooden spoon rests across the top, coated with the mixture.

    Step 4. Cook

    Return mixture to the saucepan and heat gently until slightly thickened, without boiling.

    Helpful Tips

    1. Low and slow - Milk overheats quickly; keep it medium-low heat and stir often, especially once the egg yolks go in. Never boil (the eggs will scramble). 
    2. Sweetener options - I like turbinado for more caramel flavor and thicker body but maple sugar pairs excellently with nutmeg. Avoid honey here as it can overpower. 
    3. Straining is key - Even if you think it looks smooth, strain it. It gives a silky, velvety finish. 
    4. Spiced eggnog - To spice eggnog with alcohol: use 5:1 ratio of 5 parts eggnog to 1 part dark spirit such as rum, brandy or Cognac. That is approximately 1 (1.5oz) shot of alcohol to 1 cup of eggnog.

    Serving Suggestions

    Eggnog is great on its own as a creamy, seasonal drink, but you can also serve it alongside simple holiday treats like almond orange cookies, coconut flour banana muffins, or hazelnut butter cookies.

    For a little extra flair, sprinkle cinnamon, nutmeg, or pumpkin pie spice on top before serving. You can also add a splash of rum, bourbon, or brandy for an adult version. Serve it up in those holiday reindeer mugs - Cousin Eddie would approve.

    A thick, creamy drink is being poured from a clear bottle into a glass. The drink is pale and frothy.

    Frequently Asked Questions

    How do I store and reheat eggnog?

    Store leftover eggnog in an airtight glass container like mason jars or weck juice jar in the fridge for up to 3–4 days. Shake or stir well before serving, as some separation may occur.

    What alcohol goes well with eggnog?

    Any dark spirit pairs well with the flavor and texture of eggnog. Think a combination of  brandy, dark rum and Cognac. Because these spirits would be used as mixers, it's not necessary to purchase the most priciest and prime variety. Go for the middle shelf instead of the top shelf in the alcohol aisle.

    How to temper eggs in eggnog?

    Tempering eggs is essentially the process of slowly warming the eggs before introducing them to drastic increase in temperature. The slow addition of the hot liquid dilutes the uncooked egg proteins, making it impossible for them to clump up when heated. Here's the simple process:
    1. Bring the milk and sugar to a gentle boil.
    2. Whisk the egg yolks and sugar in a medium bowl. Save the egg whites for another use.
    3. Slowly add the hot milk to the eggs, 1-2 tablespoons at a time and whisk constantly.
    4. Stir constantly to avoid eggs from curdling.

    Looking for more tasty drinks? Here are some ideas:
    • cranberry juice in a stemless wine glass with lemon slice and mint sprig.
      How to Make Homemade Cranberry Juice Recipe - 2 Ingredients!
    • starbucks pink drink in plastic cups with fresh strawberries on the side.
      Starbucks Pink Drink Recipe (Healthy!)
    • protein coffee in large glasses with ice and a slight foam on top.
      Easy Protein Coffee Recipe (No Blender!)
    • homemade lemonade in pitcher and mason jar
      Easy Homemade Honey Lemonade Recipe (3 ingredients!)
    Did you make this eggnog? Please leave a ⭐⭐⭐⭐⭐ recipe rating in the recipe card below and leave a review in the comments. Thank you!💚

    Printable Recipe

    eggnog poured into a glass from a glass bottle.
    Print Recipe
    5 from 1 vote

    Homemade Eggnog Recipe

    Eggnog made with milk, egg yolks, and natural sweetener for a creamy, lightly spiced drink you can make at home.
    Prep Time5 minutes mins
    Cook Time25 minutes mins
    Chilling Time1 hour hr
    Total Time1 hour hr 30 minutes mins
    Course: Drinks
    Cuisine: American
    Keyword: egg nog recipe, eggnog, homemade egg nog recipe, how to make eggnog, traditional eggnog recipe
    Servings: 4 servings
    Calories: 298kcal
    Author: Anya @ Prepare & Nourish

    Ingredients

    • 3 cups whole milk
    • ½ teaspoon ground nutmeg
    • ¼ teaspoon ground cinnamon
    • ¼ teaspoon ground cloves
    • pinch of sea salt
    • 6 egg yolks
    • ½ cup turbinado sugar or maple sugar, coconut sugar

    Instructions

    • In a large saucepan over medium heat, combine 3 cups whole milk, ½ teaspoon ground nutmeg, ¼ teaspoon ground cinnamon, ¼ teaspoon ground cloves, and a pinch of sea salt and heat to approximately 120°F. Stir regularly to avoid scorching.
    • In a medium size bowl, whisk the 6 egg yolks with ½ cup turbinado sugar. Whisk briskly until mixture turns pale yellow and slightly creamy.
    • Incrementally, add the hot milk mixture to the whipped yolks, ½ cup at a time, whisking the entire time. Constantly stir to temper the yolks with the hot milk.
    • When mixture has been thoroughly combined, pour everything back into the saucepan and warm over medium heat. Stir for another 4 minutes until mixture is thickened but be careful not to bring it to boil.
    • Strain the eggnog over a sieve to catch any egg clumps or large chunks of spices.
    • Allow to fully cool, then move to the refrigerator to chill thoroughly. Add whipped cream and dust cinnamon or nutmeg.

    Notes

    Recipe makes approximately 1 quart.
    Storage: Prepared eggnog will keep in the refrigerator for up to a week, but no later than the expiration date on the milk used for the recipe.
    Helpful Tips:
    1. Low and slow - Milk overheats quickly; keep it medium-low heat and stir often, especially once the egg yolks go in. Never boil (the eggs will scramble). 
    2. Sweetener options - I like turbinado for more caramel flavor and thicker body but maple sugar pairs excellently with nutmeg. Avoid honey here as it can overpower. 
    3. Straining is key - Even if you think it looks smooth, strain it. It gives a silky, velvety finish. 
    4. Spiced eggnog - To spice eggnog with alcohol: use 5:1 ratio of 5 parts eggnog to 1 part dark spirit such as rum, brandy or Cognac. That is approximately 1 (1.5oz) shot of alcohol to 1 cup of eggnog.

    Nutrition

    Calories: 298kcal | Carbohydrates: 35g | Protein: 10g | Fat: 13g | Saturated Fat: 6g | Polyunsaturated Fat: 1g | Monounsaturated Fat: 4g | Cholesterol: 314mg | Sodium: 84mg | Potassium: 314mg | Fiber: 0.2g | Sugar: 34g | Vitamin A: 687IU | Vitamin C: 0.01mg | Calcium: 265mg | Iron: 1mg
    • « Go to Previous Page
    • Page 1
    • Interim pages omitted …
    • Page 16
    • Page 17
    • Page 18
    • Page 19
    • Page 20
    • Interim pages omitted …
    • Page 33
    • Go to Next Page »

    Primary Sidebar

    Anya at a farm

    Hello and welcome

    I'm Anya and it is my joy to share wholesome recipes using seasonal ingredients and simplified methods. My hope is you'll feel right at home in this online kitchen, where you'll find real food recipes for real families.

    More about me →

    Family Meal Planning NOW Available!

    cover page for Dinner Decoded Guide and Cookbook

    Spring into Flavor

    • hibiscus tea in glasses with raspberries and lemon wedges.
      How to Make Hibiscus Tea Recipe
    • Romaine salad in a white bowl with a fork in it.
      Lemon Parmesan Romaine Salad
    • oven roasted chicken in a cast iron skillet with serving utensils.
      Juicy Oven Roasted Whole Chicken
    • roasted carrots on white platter.
      Roasted Carrots with Garlic
    • starbucks pink drink in plastic cups with fresh strawberries on the side.
      Starbucks Pink Drink Recipe (Healthy!)
    • spinach artichoke and chicken in a black baking dish with a wooden spoon.
      Healthy Spinach Chicken Artichoke Casserole Recipe

    Trending Now

    • mushrooms and chicken gravy with fresh thyme sprigs garnished on top.
      Easy Creamy Chicken Liver Recipe
    • grinder sandwich on a focaccia bread with lettuce and red onions.
      Italian Grinder Sandwich Recipe
    • roasted cabbage with parsley garnish sprinkled on top.
      Simple Oven Roasted Buttered Cabbage Recipe
    • Caesar salad dressing in a weck jar
      Healthy Caesar Salad Dressing Recipe
    • dumpling lasagna in a chistera saute pan.
      Easy Viral Dumpling Lasagna
    • Chia seed puddings in clear cups, served on a white plate with a strawberry and spoon on the side.
      Protein Chia Seed Pudding

    Footer

    ↑ back to top

    Never miss a new post!

    ... Subscribe

    About

    About Me

    Privacy Policy

    Contact

    Shop

    Recipes

    Recipe Index

    Dinner Recipes

    Fermentation Recipes

    Healthy Basics

    Connect

    Instagram

    Facebook

    Pinterest

    Youtube

    Copyright © 2026 Prepare + Nourish

    Rate This Recipe

    Your vote:


    Let us know what you thought of this recipe:

    This worked exactly as written, thanks!
    My family loved this!
    Thank you for sharing this recipe.
    This recipe is a winner! Will make again.

    Or share in your own words:

    A rating is required
    A name is required
    An email is required